Enable IPv6 End-to-End
This guide gets you an Instance with an IPv6 address in about 10 minutes. You'll do two steps on the Console Portal: create a dual-stack Subnet and create an Instance — after FPT Cloud has configured a dual-stack VPC for you.
Before you start
- FPT Cloud has configured a General-type VPC with dual-stack for your account
- You have Tenant permissions on the Console Portal
- See Requirements and Preparation if you haven't checked the conditions
Step 1 — Confirm you have a Dual-Stack VPC
Before creating a Subnet, verify the VPC is configured correctly:
- Log in to the Console Portal and go to VPCs (or Networks).
- Find the VPC you want to use — a dual-stack VPC shows a Dual-stack badge or detail.
- If you don't have a dual-stack VPC yet, contact FPT Cloud to request one before continuing.
Step 2 — Create a Dual-Stack Subnet
Make sure the dual-stack VPC is selected in the VPC switcher at the top of the Console Portal, then:
- Go to Network → Subnets.
- Click Create subnet.
- Fill in the IPv4 CIDR (for example,
10.42.10.0/24) and IPv4 gateway. - Expand the Advanced section and tick Enable IPv6 (dual-stack).
- The hint reads: "Allocate a /64 prefix from this VPC's IPv6 parent pool. Addresses are assigned via DHCPv6 Stateful."
- Click Create subnet.
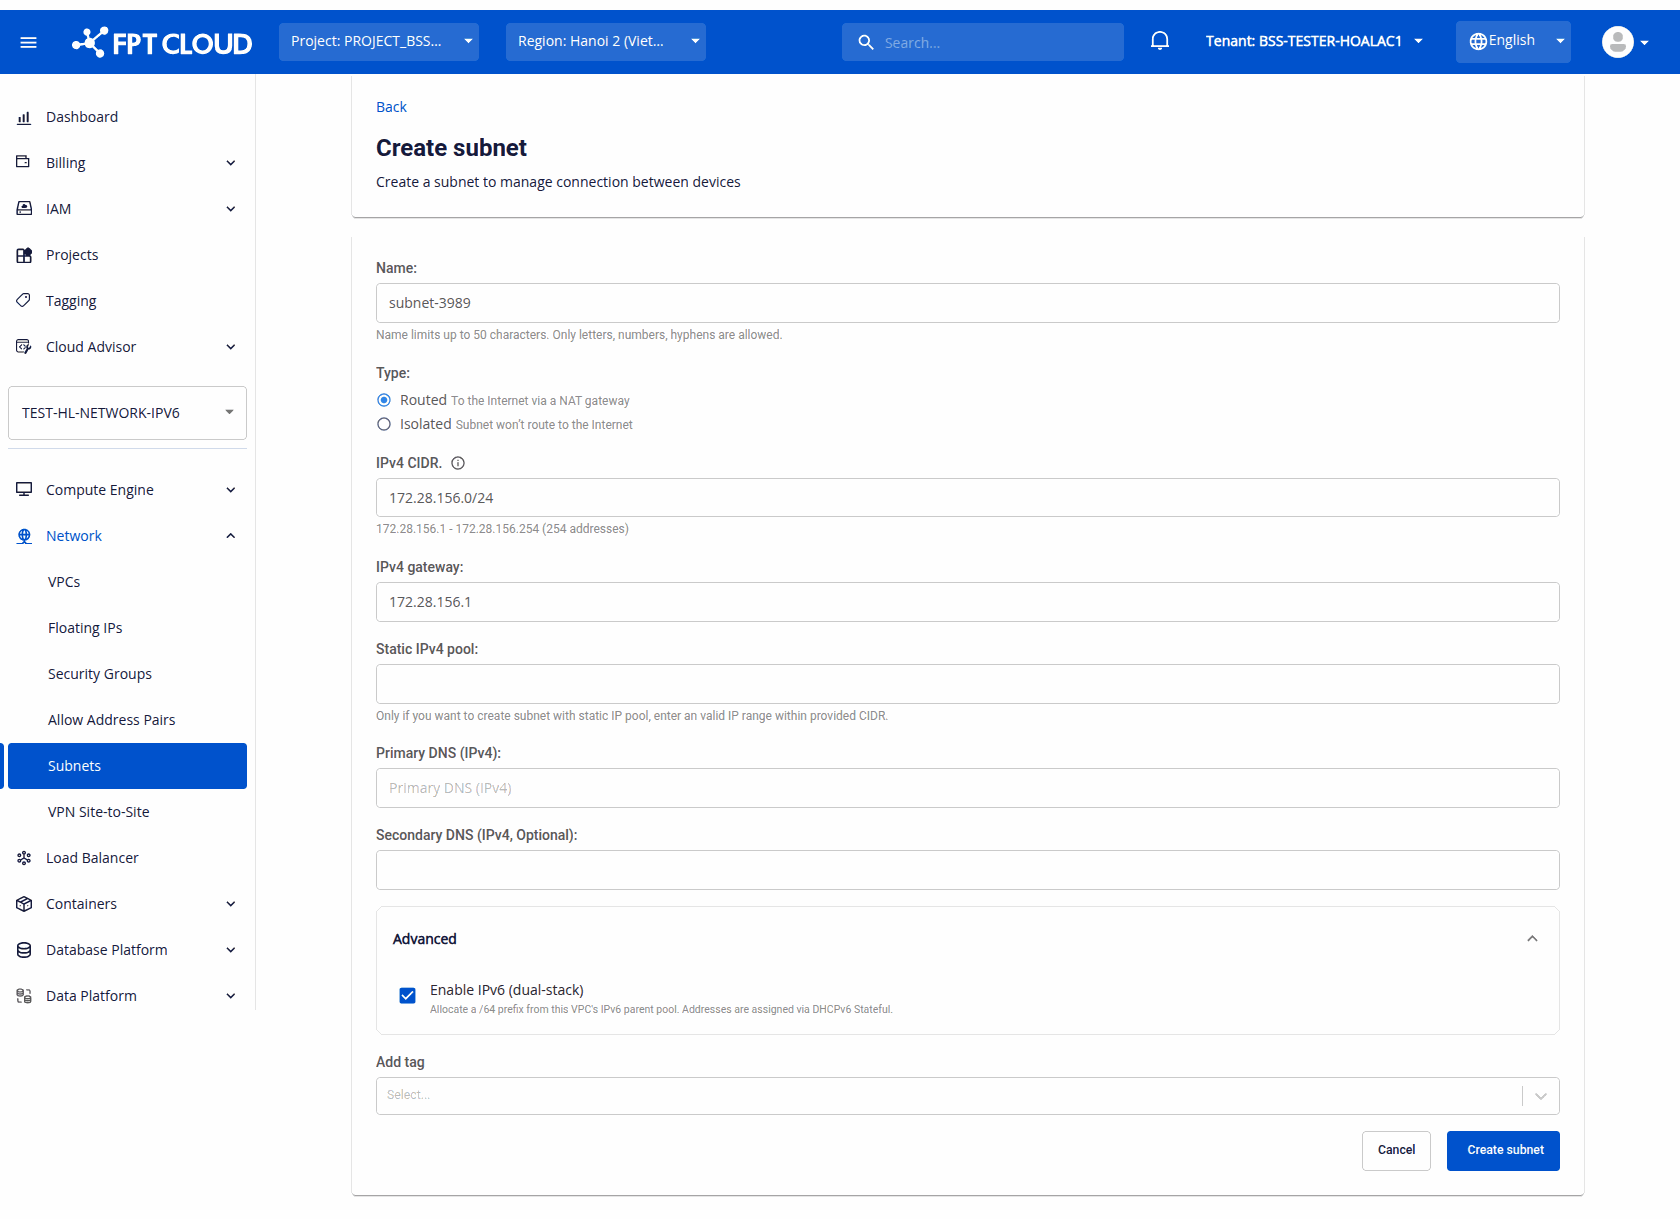
Result: The Subnet appears in the list with an IPv6 CIDR and IPv6 gateway, showing the automatically allocated /64 prefix.
If the Enable IPv6 (dual-stack) checkbox is missing or has no effect, the selected VPC is not dual-stack or has no free /64 — contact FPT Cloud.
Step 3 — Create an Instance
- Go to Compute Engine → Instances.
- Click Create instance.
- Under Subnet, select the dual-stack subnet you just created.
- Fill in the rest (OS, instance size, name, authentication) and click Create instance.
The Instance automatically receives an IPv6 address via DHCPv6 from the dual-stack subnet — there is no separate IPv6 field to fill in.

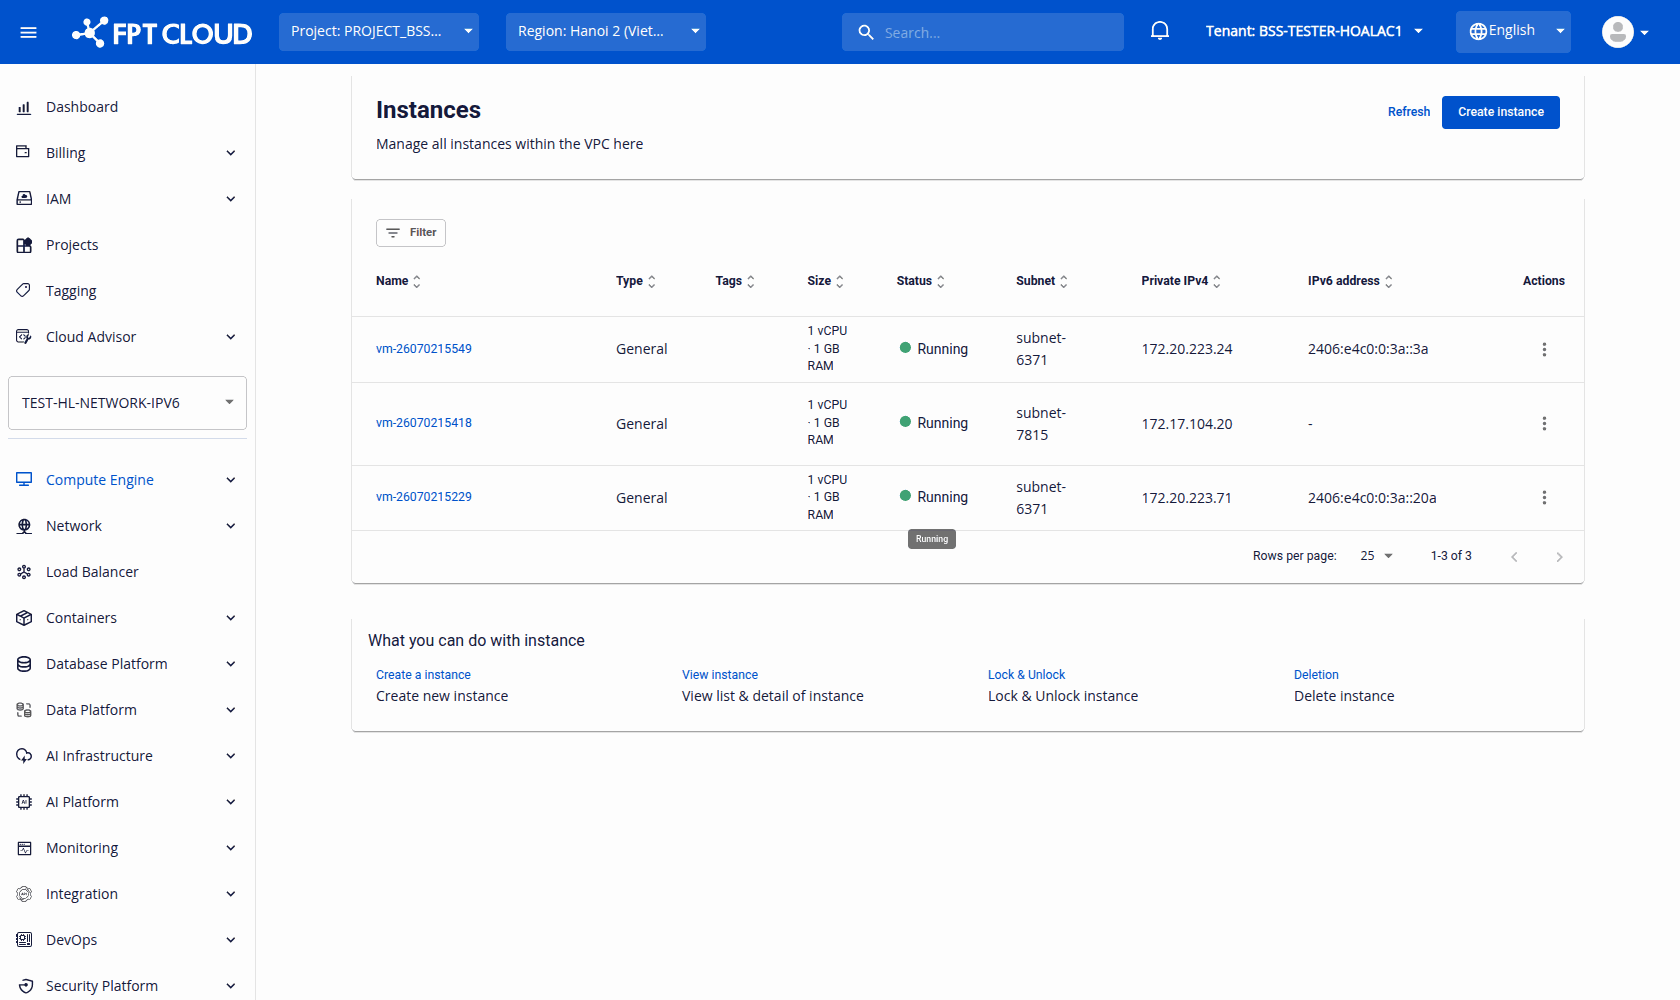
Result: The Instance is created with both IPv4 and IPv6. The IPv6 address column in the Instances List shows the VM's IPv6 address.
Verify the result
After completing the steps above, check:
| Where to check | Sign of success |
|---|---|
| Subnets List | IPv6 CIDR and IPv6 gateway are filled for the new subnet |
| Subnet Detail | Dual-stack badge; IPv6 CIDR and IPv6 gateway are shown |
| Instances List | IPv6 address column has the Instance's IPv6 address |
| Instance Detail | Header shows the IPv6 address; the Network interface tab has an IPv6 address column |