Add an IPv6 NIC to a Running Instance
This guide helps you attach an additional Network Interface Card (NIC) with an IPv6 address to a running Instance.
Before you start
- Logged in to the Console Portal with the
instance:Updatepermission - The Instance is in the Running state
- You have a dual-stack subnet (
ipv6Enabled = true) withipv6Remaining > 0
Steps
- Go to Compute Engine → Instances → click the name of the Instance you want to add a NIC to.
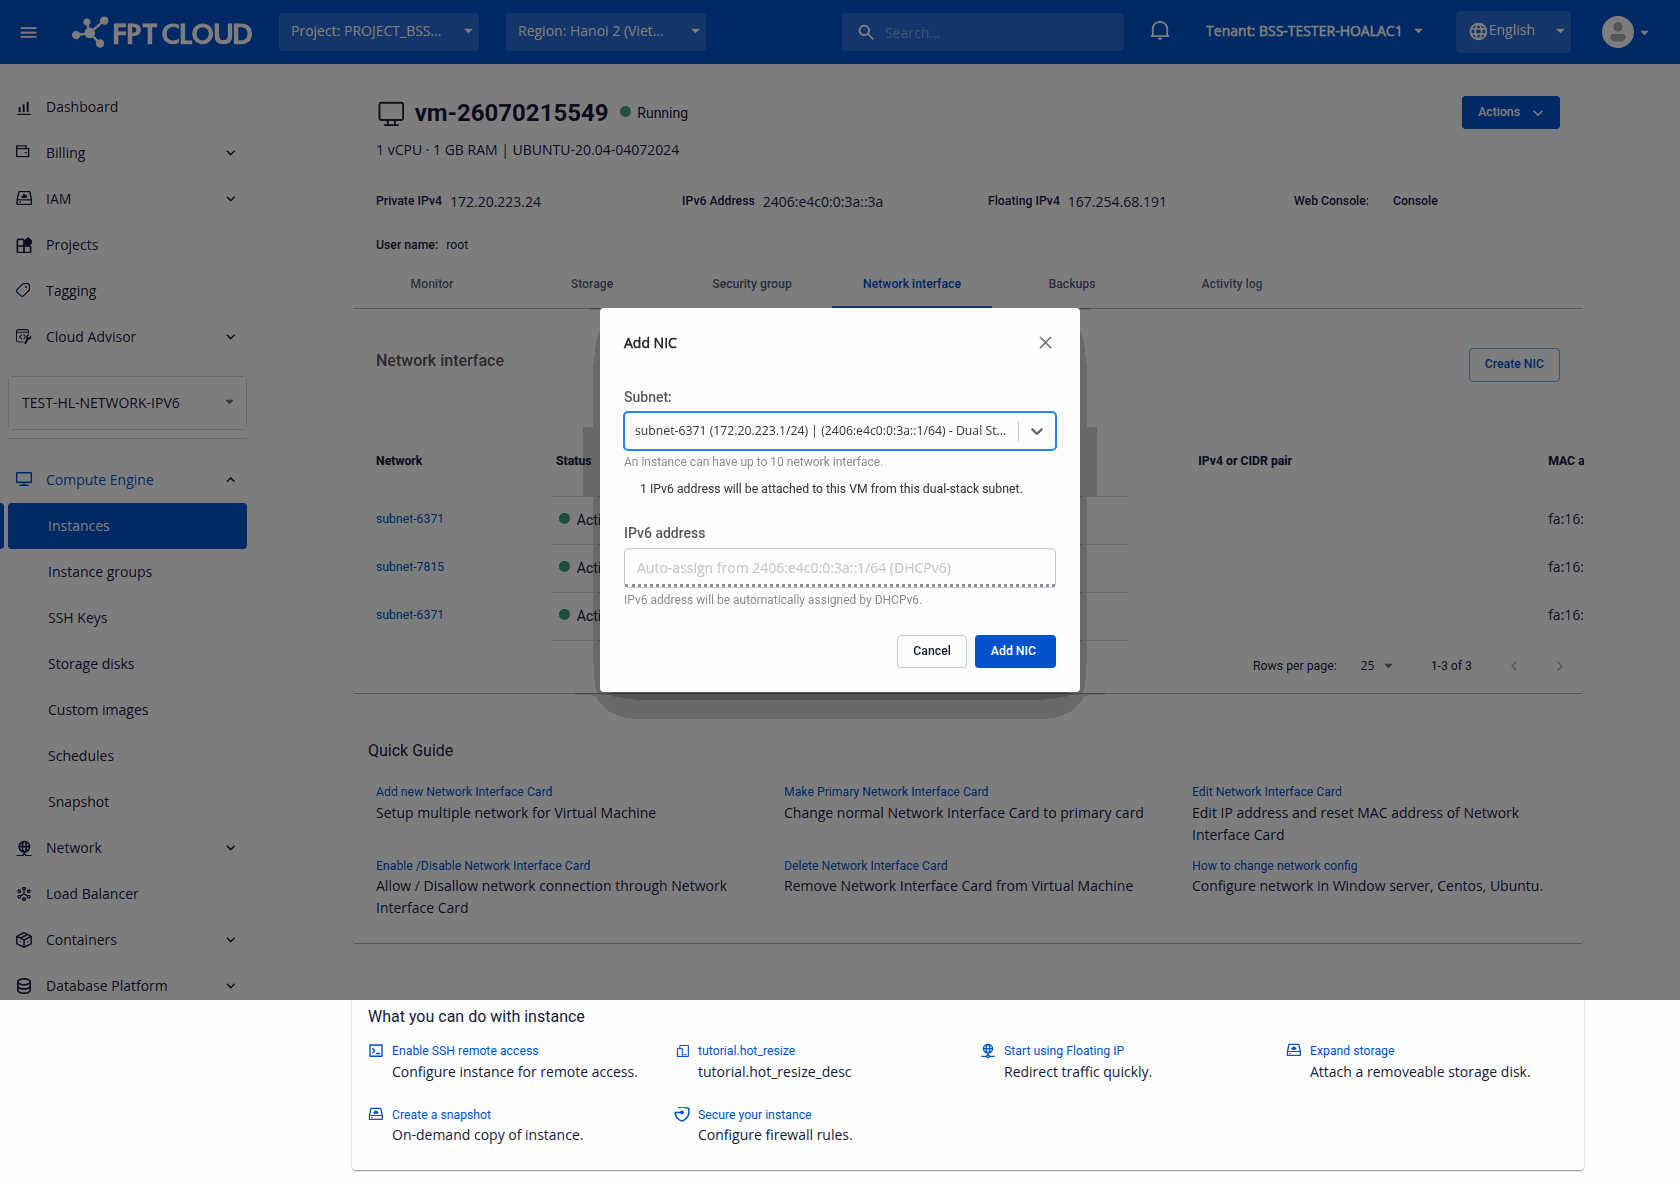
- Open the Network interface tab and click Create NIC.
- In the Add NIC dialog, select the dual-stack subnet from the Subnet dropdown — dual-stack subnets are labelled
name (ipv4) | (ipv6) - Dual Stack.- A green hint appears: "1 IPv6 address will be attached to this VM from this dual-stack subnet."
- The read-only IPv6 address field shows
Auto-assign from <ipv6-cidr> (DHCPv6). The address is assigned automatically by DHCPv6.
- Click Add NIC.
Result
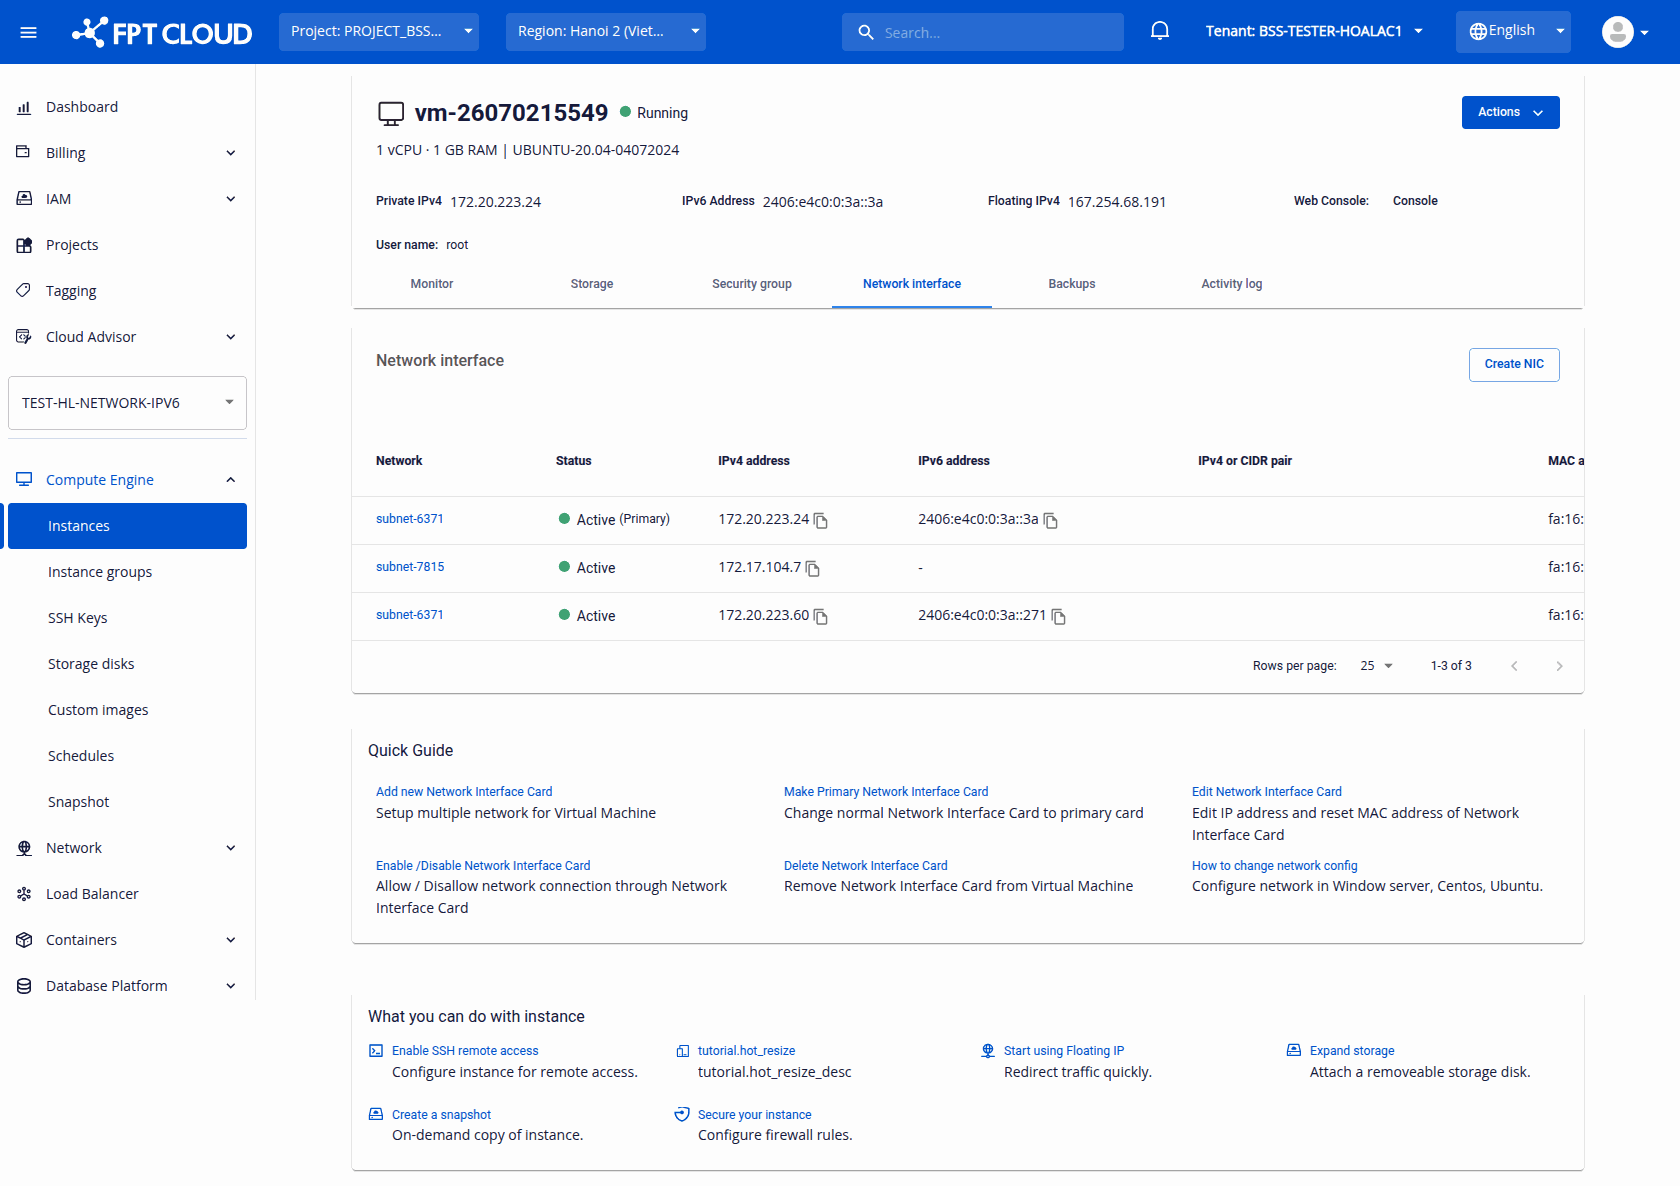
- The new NIC is attached to the Instance with both an IPv4 and an IPv6 address.
- The Network interface table on the Instance Detail page shows the new NIC with its IPv6 address.
note
If you select an IPv4-only subnet, no IPv6 address is attached and the NIC has IPv4 only.