Connect CheckPoint R8120
Step 1: Configure VPN Site-to-Site on FPT Cloud Portal
Create a Customer Gateway and a VPN Connection for the CheckPoint device on the FPT Cloud Portal. For detailed steps, see Create VPN connection.
Step 2: Configure CheckPoint
- Sign in to the VNC console of the CheckPoint VM using the account created above and run the command: "Cpstart".
- Sign in to the web interface at https://{
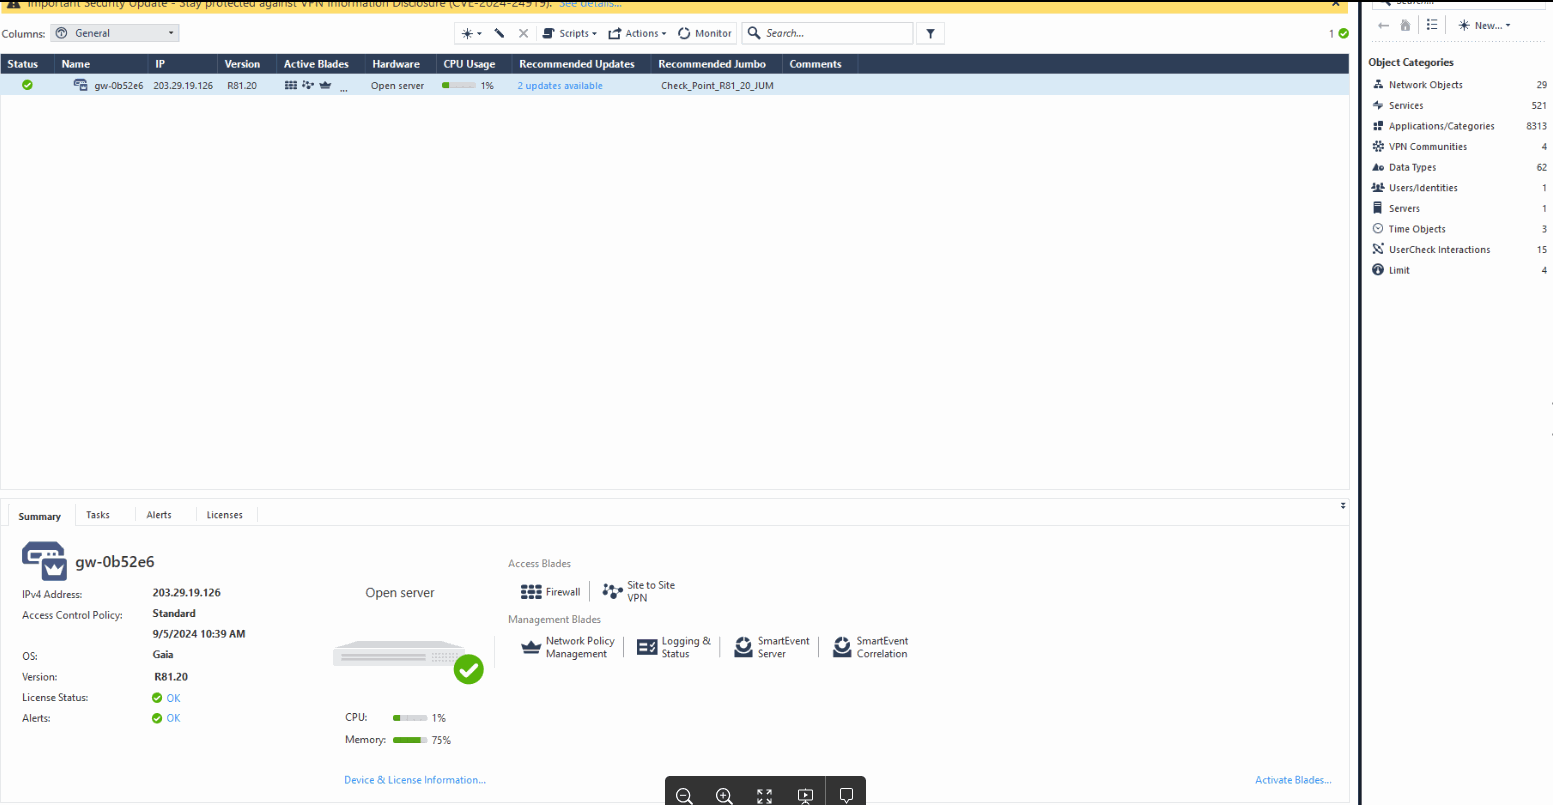
IP} and download SmartConsole using the link and version recommended by the page. - Install and sign in to the SmartConsole app using the provided credentials. Note: an activated license is required to access SmartConsole. A successful login looks like the image below:
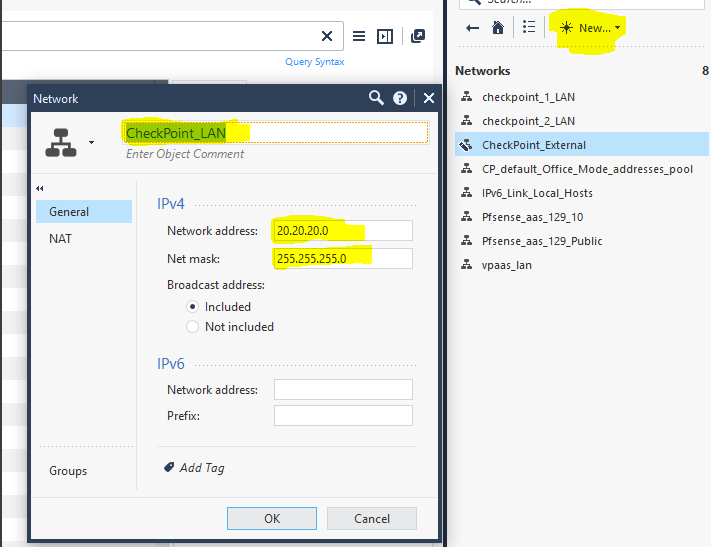
— Create a LAN network.
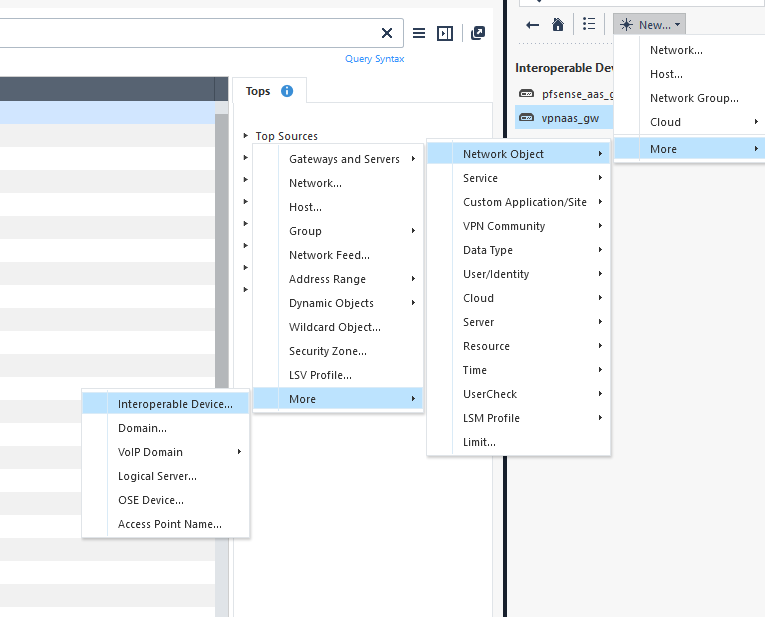
— Create an Interoperable Device with the public IP of the VPN Site-to-Site as follows: Go to New → More → Network Object → More → Interoperable Device.
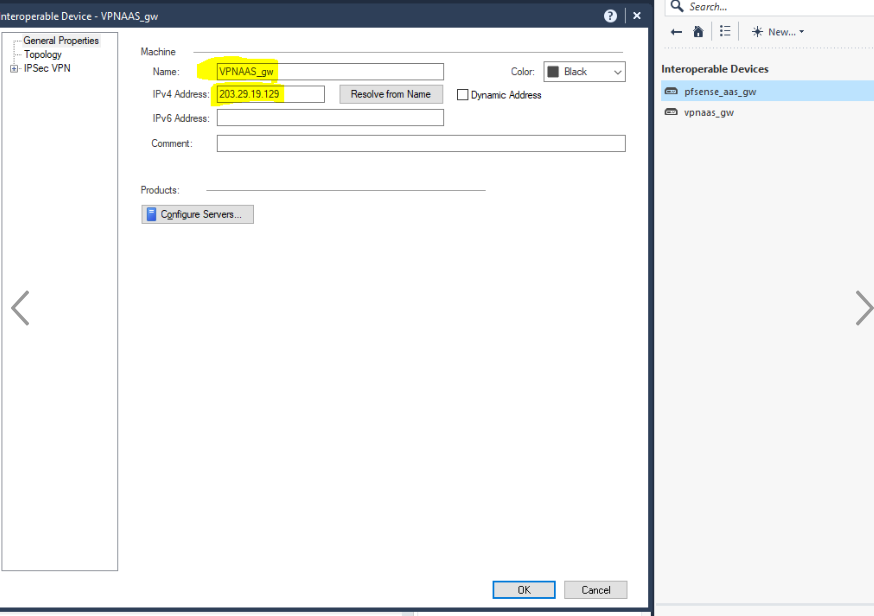
Fill in the Name, IPv4 Address, and select OK.
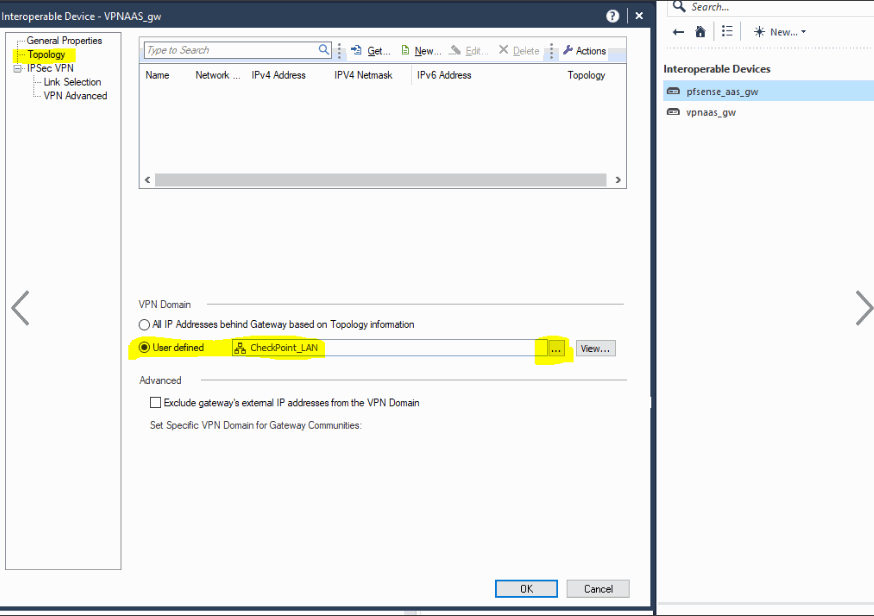
— Create a VPN Star Community as follows: Go to New → More → VPN Community → Star Community.
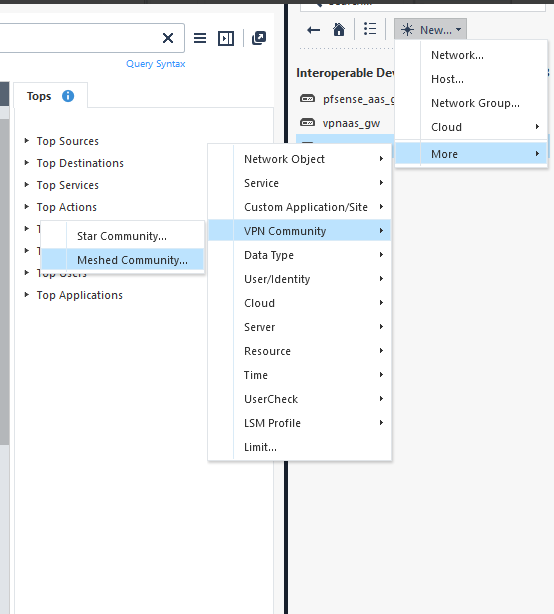
— Configure with the following settings:
- Select Center Gateway named: CheckPoint (created above).
- Select Satellite Gateway as the Interoperable Device.
- Select VPN Domain with the corresponding LAN/local and Remote/peer network ranges.
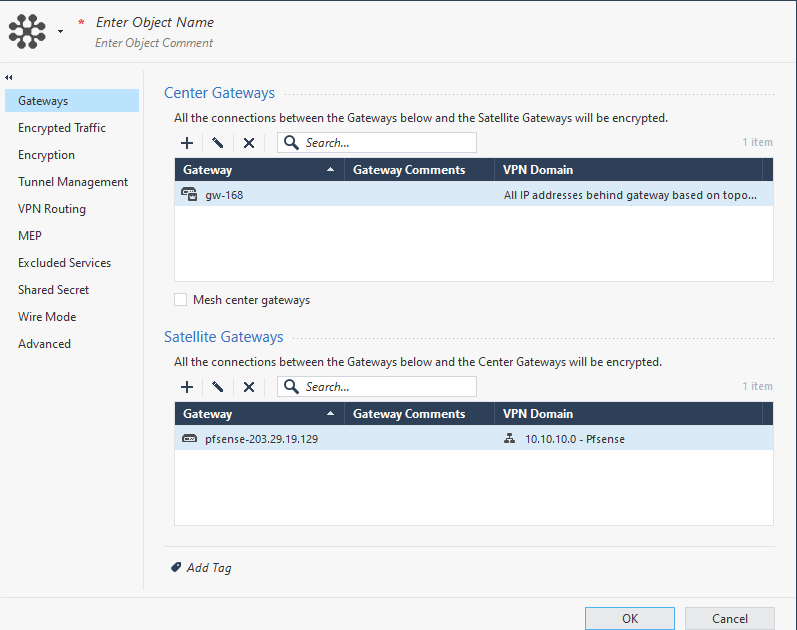
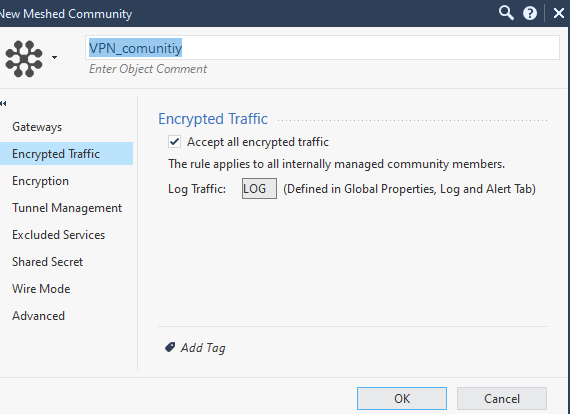
- Select the Encryption configuration matching what was chosen on the FPT Smart Cloud portal, for example:
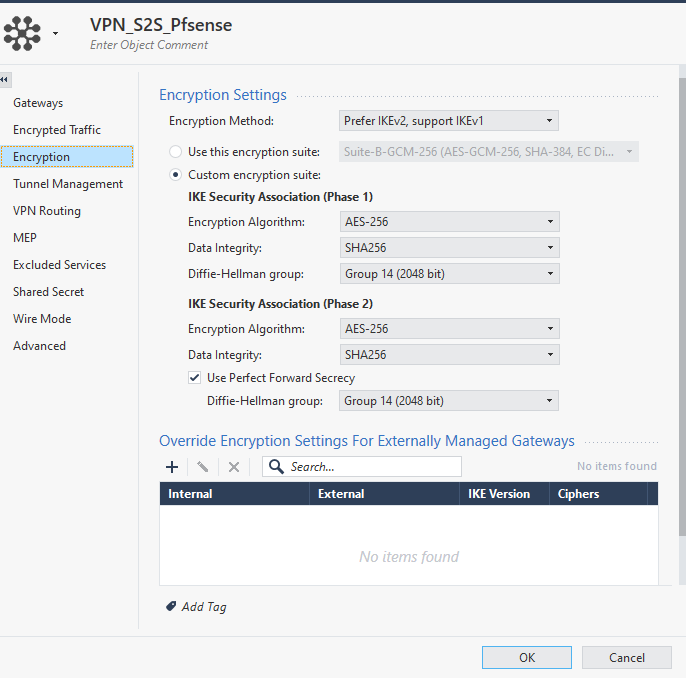
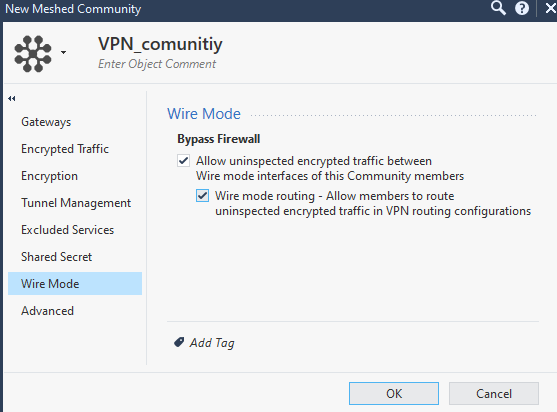
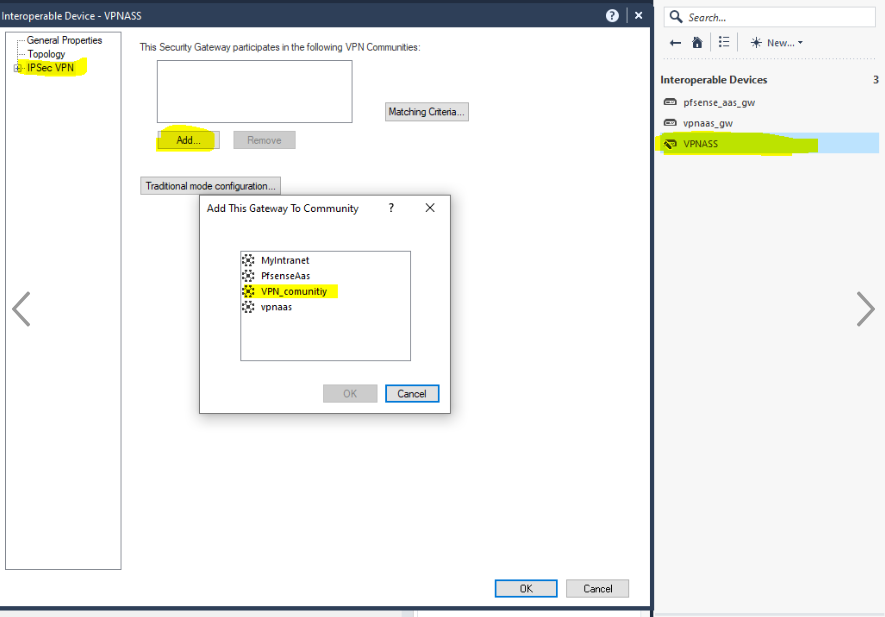
— After creating the VPN Community, go back to Interoperable Devices to update it.
— Return to VPN Communication Meshed and use the Pre-Shared Key created on the VPN Site-to-Site portal.
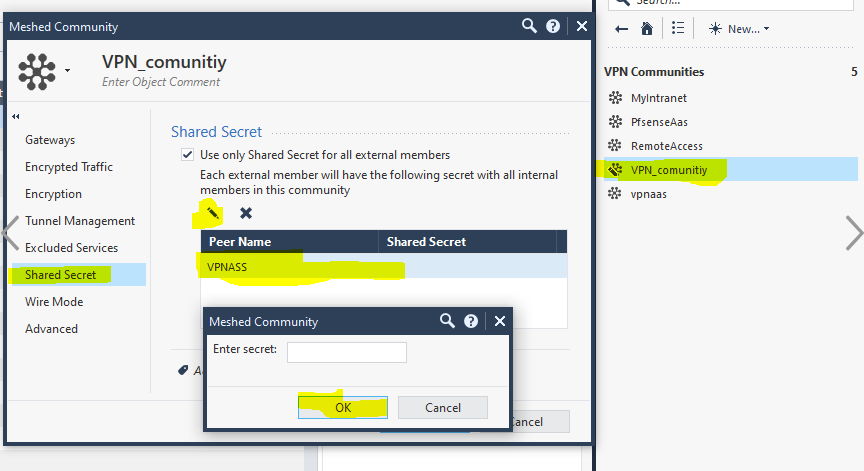
- Then select "Publish" to create the VPN Community on CheckPoint.
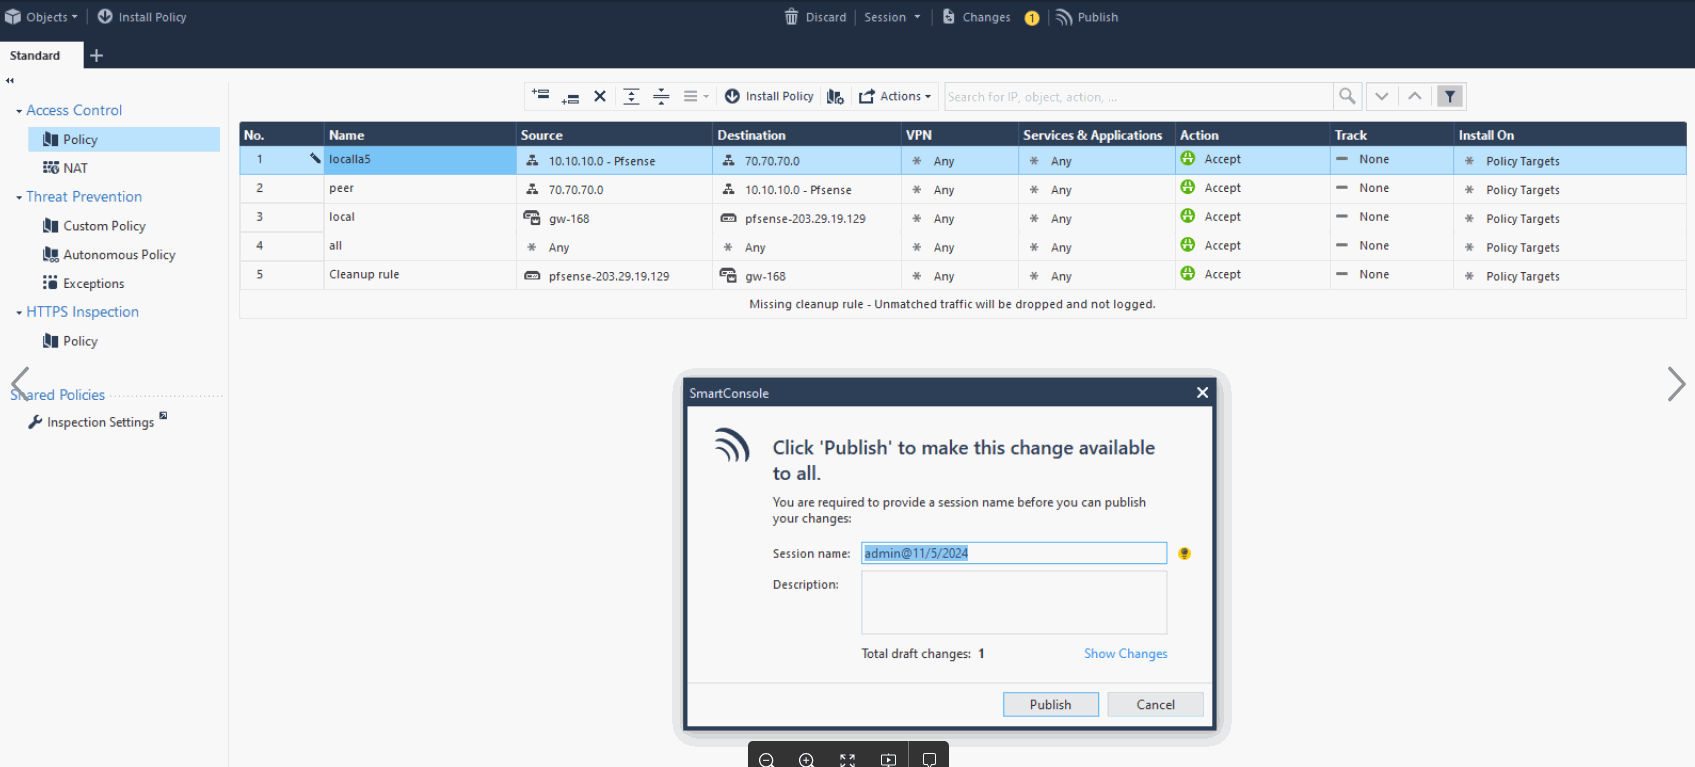
— Set up the firewall to allow bidirectional traffic between the two subnets and bidirectional traffic between the two gateway IPs as shown below, then select "Publish".
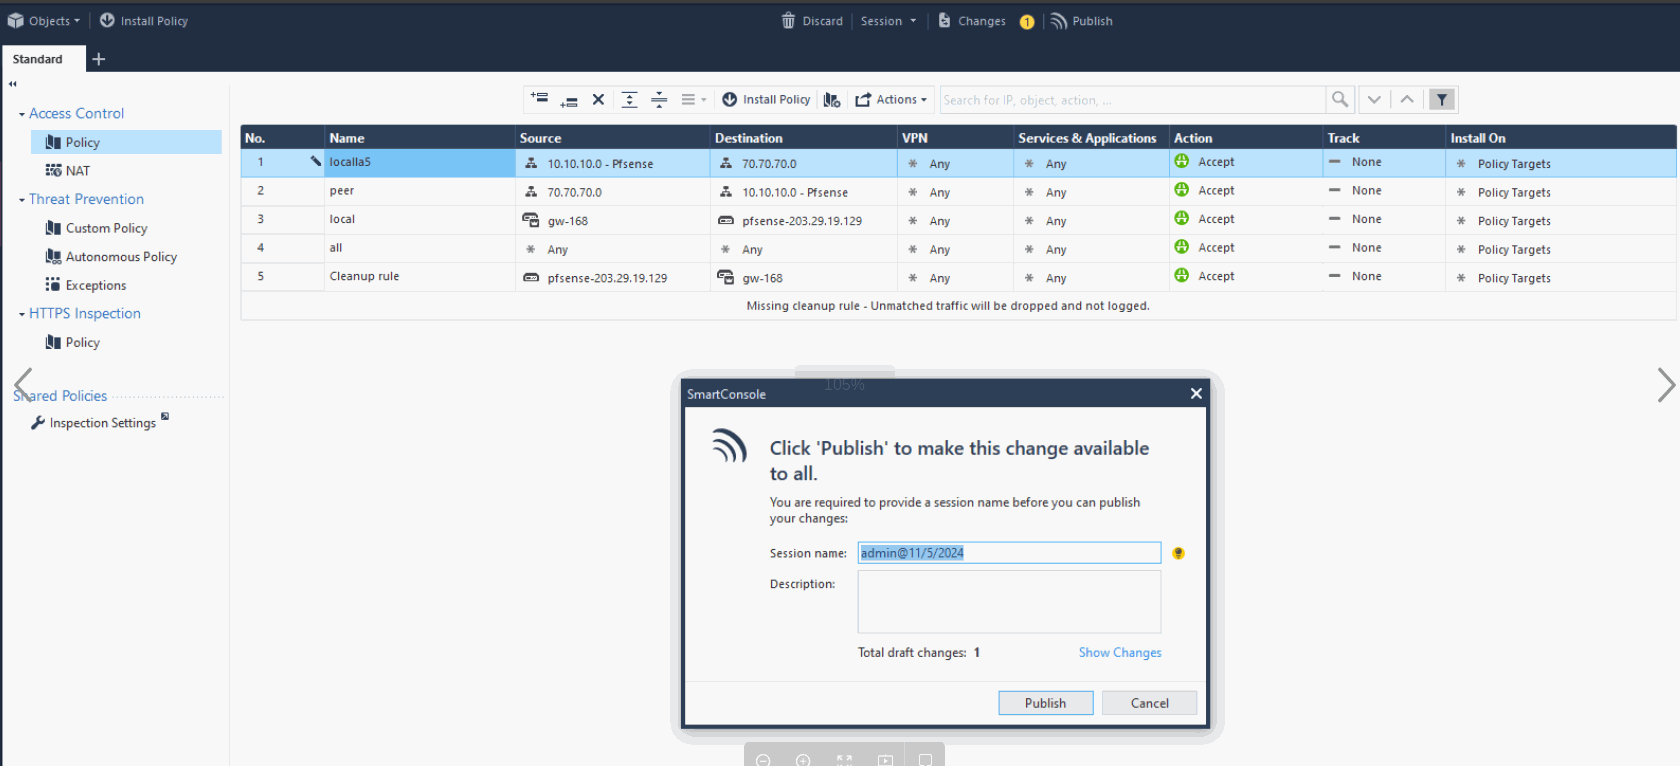
- Finally, set the route for the internal network inside CheckPoint (the VPN Site-to-Site side is already pre-configured).
On CheckPoint Gaia OS, use the set static-route command to add a route. Syntax and example:
Openstack command
set static-route <destination-network> nexthop gateway address <gateway-ip> on
Example: To route traffic to the network 192.168.1.0/24 through gateway 10.0.0.1:
Openstack command
set static-route 192.168.1.0/24 nexthop gateway address 10.0.0.1 on
After adding the route, run the following command to save the configuration:
Openstack command
save config
Step 3: Debug — Tracert
- From a machine inside the network, ping each side. If connectivity is established, the configuration is complete.