Connect PfSense
This guide explains how to build a PfSense device to connect VPN S2S with the FPT Smart Cloud VPN Site-to-Site service.
- Step 1: Configure VPN Site-to-Site
- Step 2: Configure PfSense Ensure the following prerequisites are met:
- VPNaaS on the Portal
- PfSense downloaded and booted from the image named: Pfsense
- A public IP — for simplicity, assign it directly to the VM rather than using a Floating IP
- The corresponding network range
- Two PfSense VMs for debugging (2C4G)
Step 1: Configure VPN Site-to-Site on FPT Cloud Portal
Create a Customer Gateway and a VPN Connection for the PfSense device on the FPT Cloud Portal. For detailed steps, see Create VPN connection.
Step 2: Configure PfSense
-
Sign in to the VNC console of the PfSense VM using the account created above.
-
Sign in to the web interface at https://{
IP}. You may see an SSL warning like the following: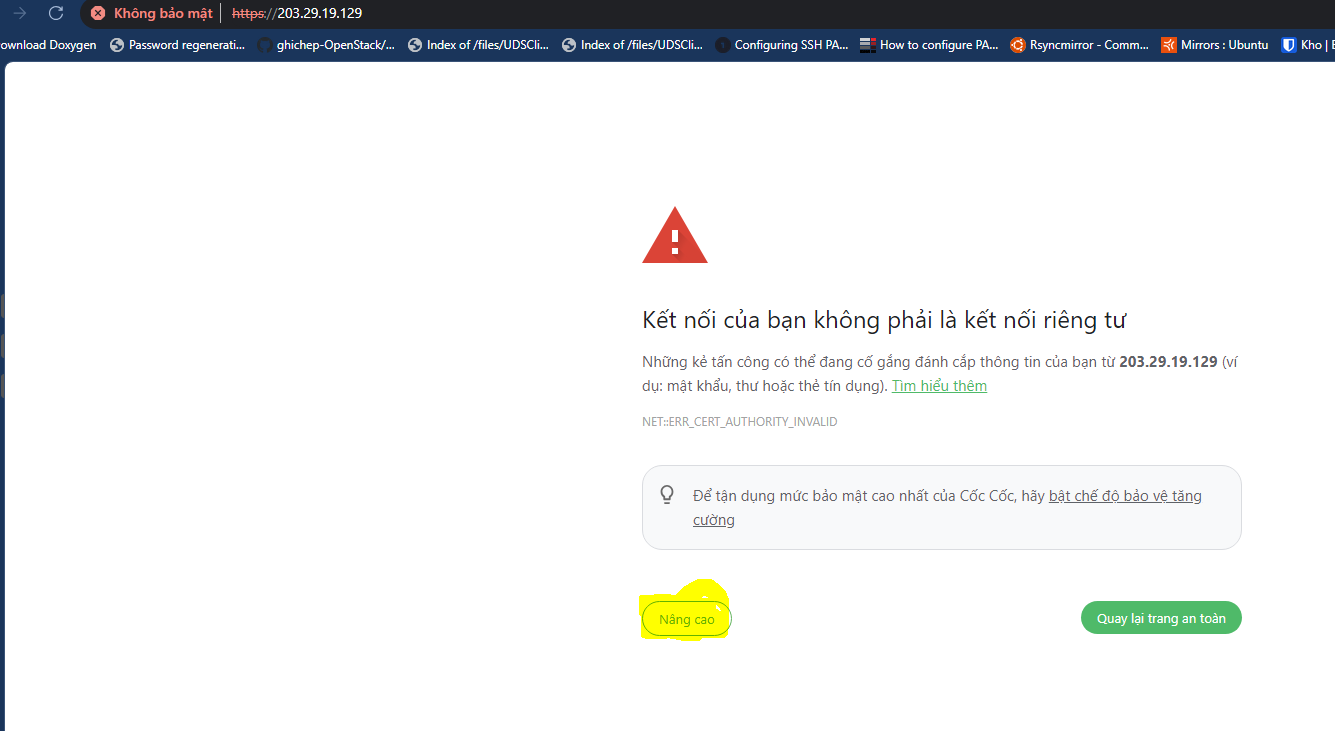
- Default login credentials:

User: Admin Password: Pfsense (You can change the password on first web login.)
- If you do not have a LAN configured yet, go to Interfaces → select LAN to add one:

-
Configure the Tunnel for PfSense:
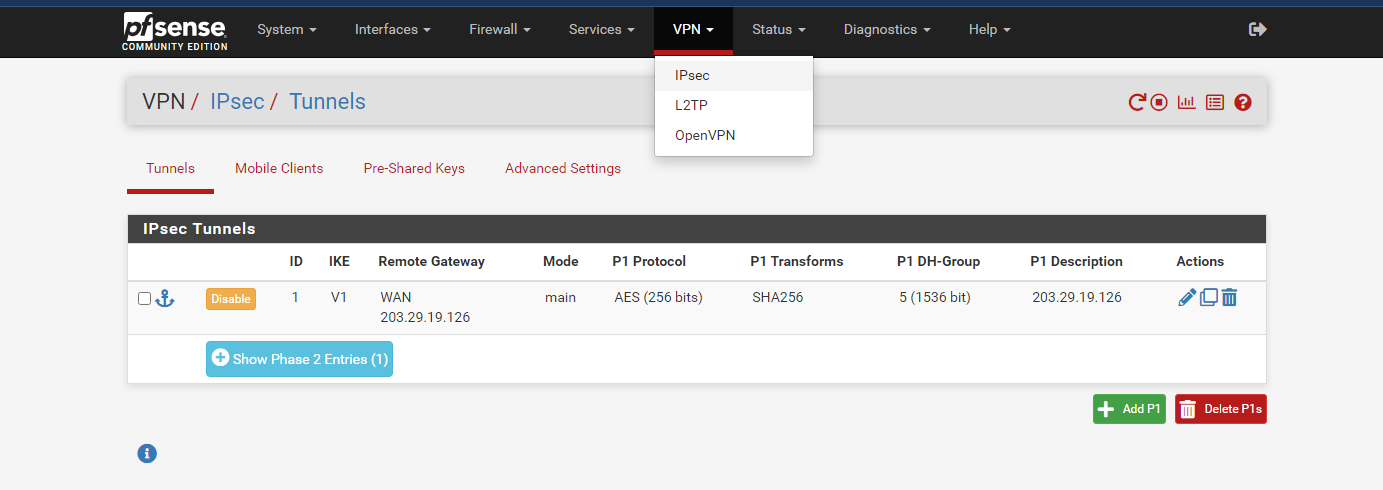

On the VPN tab, select IPsec → Tunnels and select Add P1.
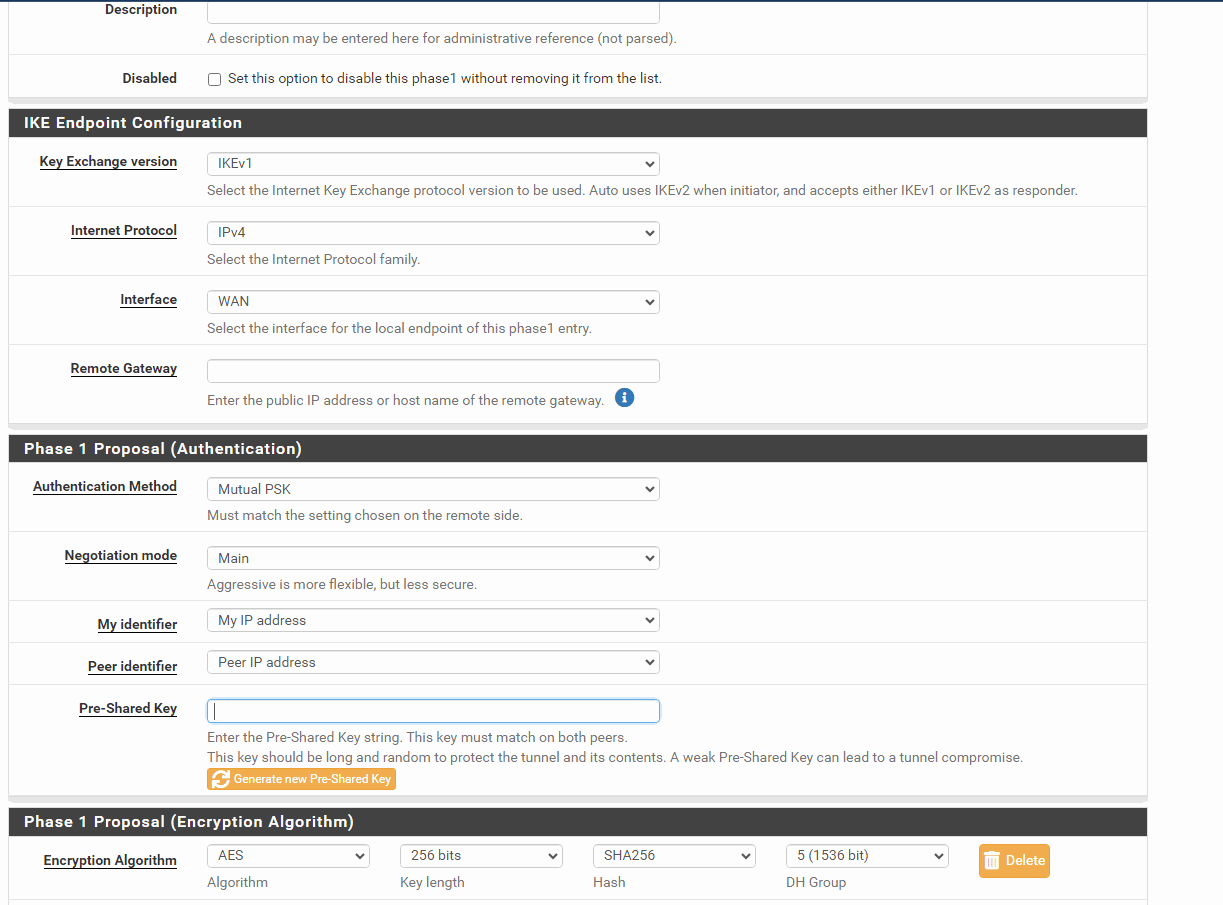
- Set up Phase 1 as shown below:
Note:
-
Pre-Shared Key: enter the key from the VPNaaS created on the portal earlier.
-
Remote Gateway: enter the public IP of the VPNaaS created on the portal earlier.
-
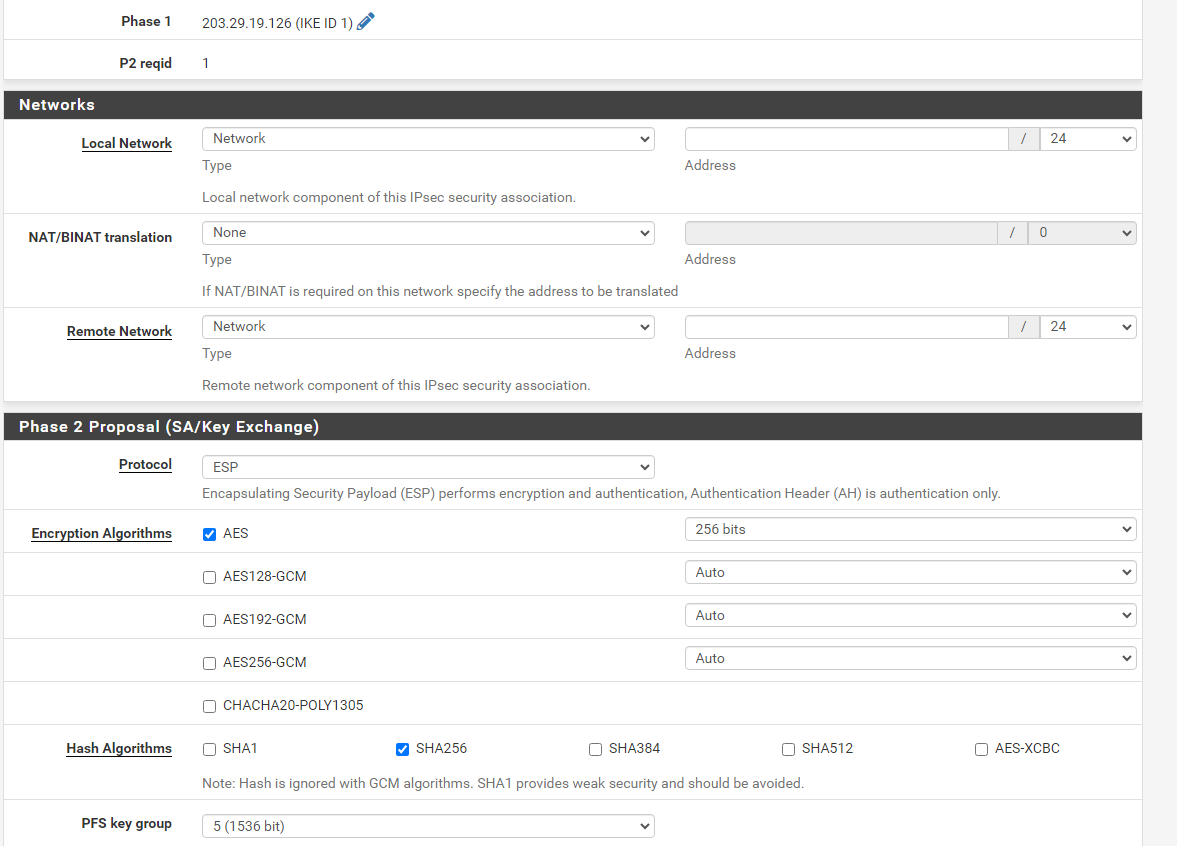
Set up Phase 2 as follows:
-


You can now open a Terminal or command line to test network connectivity with ping.