VPN Site-to-Site configuration with Fortigate
Prerequisites
Ensure the following conditions are met before starting:
- VPN Site-to-Site has been created on FPT Cloud Portal.
- Fortigate is installed, enabled, and licensed on the customer side.
- Fortigate has been configured with LAN and WAN IP addresses.
Step 1: Configure VPN Site-to-Site on FPT Cloud Portal
Create a Customer Gateway and a VPN Connection for the Fortigate device on the FPT Cloud Portal. For detailed steps, see Create VPN connection.
Step 2: Configure IPsec on Fortigate
- Log in to the Fortigate web interface.
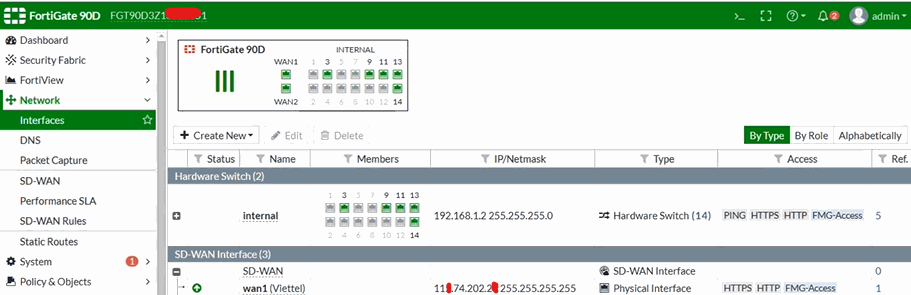
- Select IPsec Wizard.
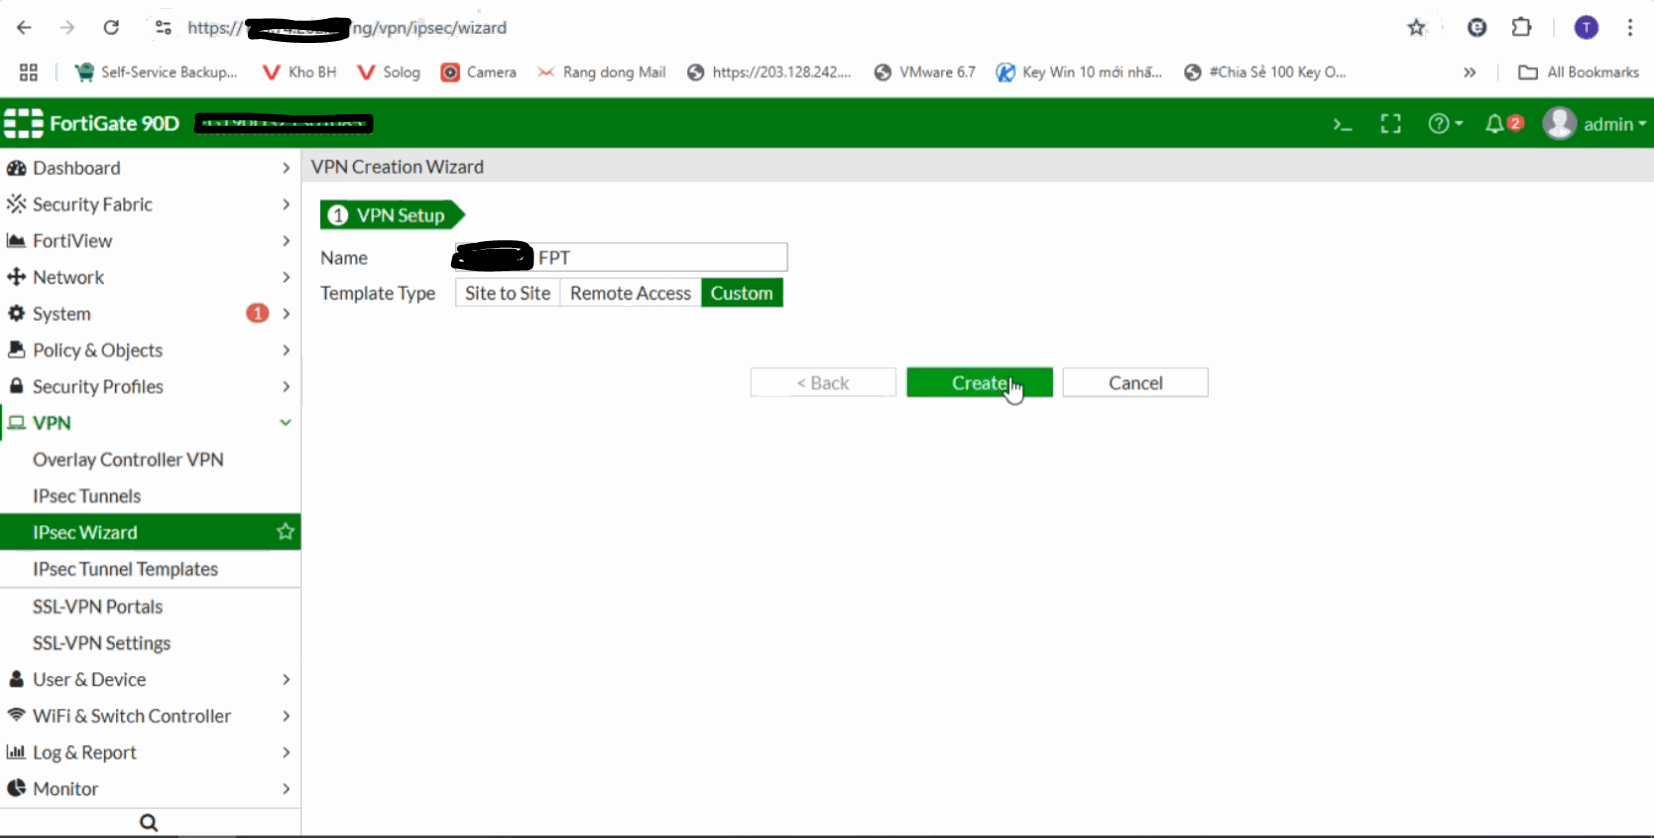
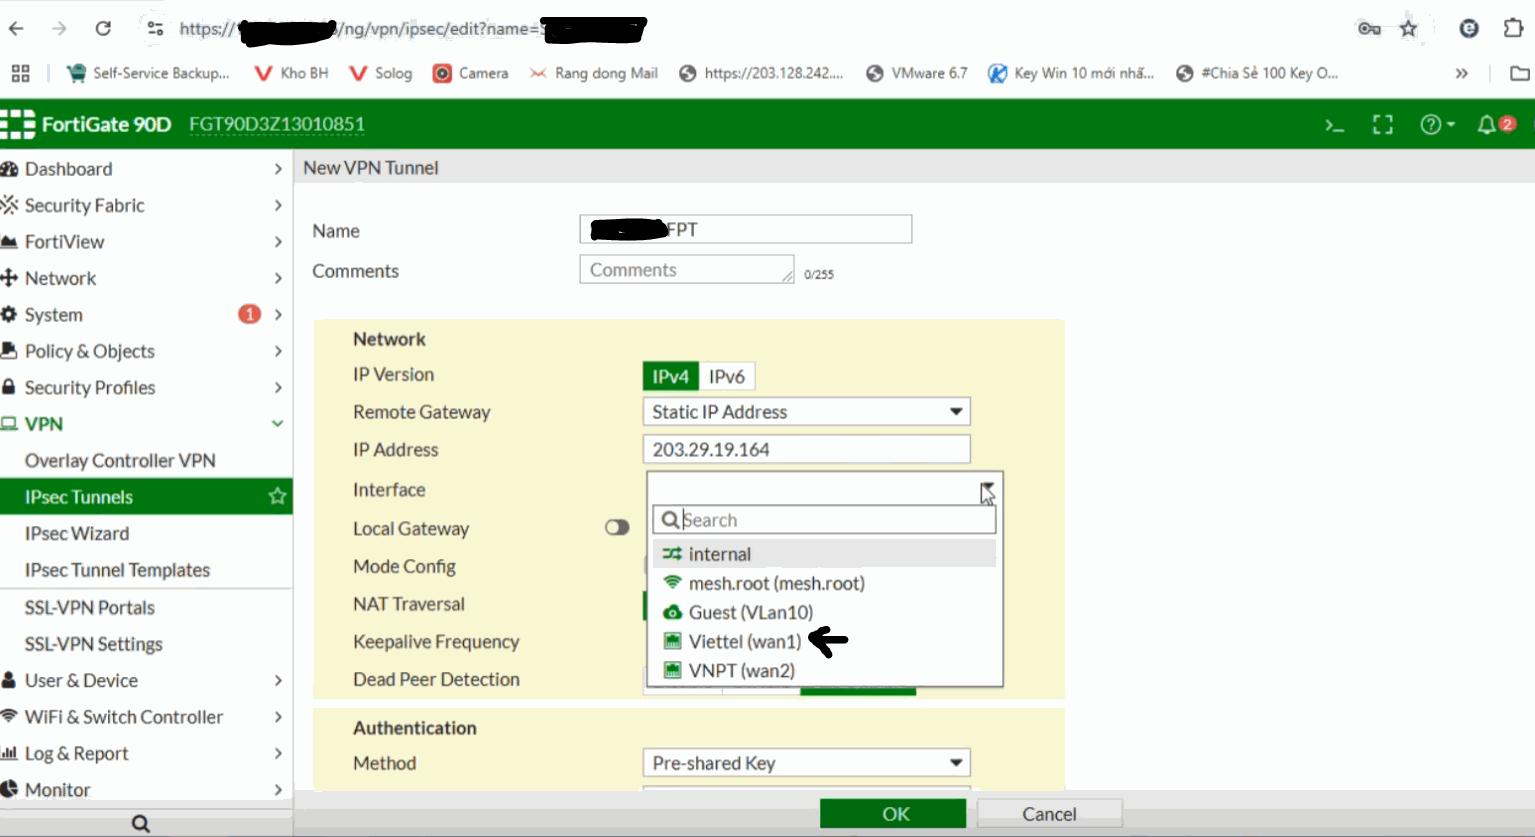
- Go to IPsec Tunnels:
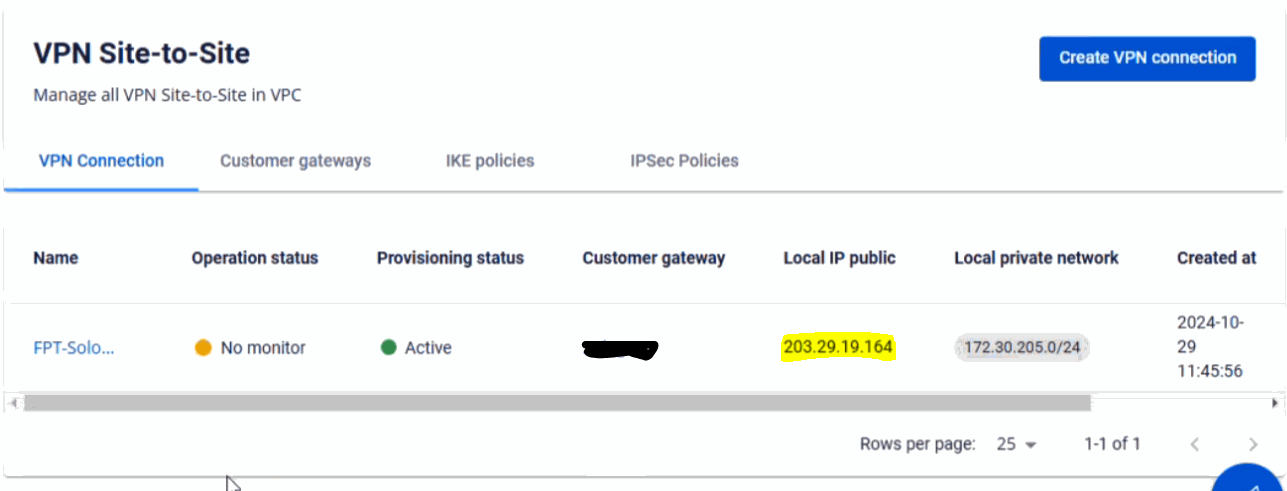
- Enter the FPT Cloud IP address from Step 1.
- Select the WAN interface (if multiple WAN interfaces exist, specify the one to use).
Check the connection status on FPT Smart Cloud Portal.
- Enable Local Gateway and select Primary IP.
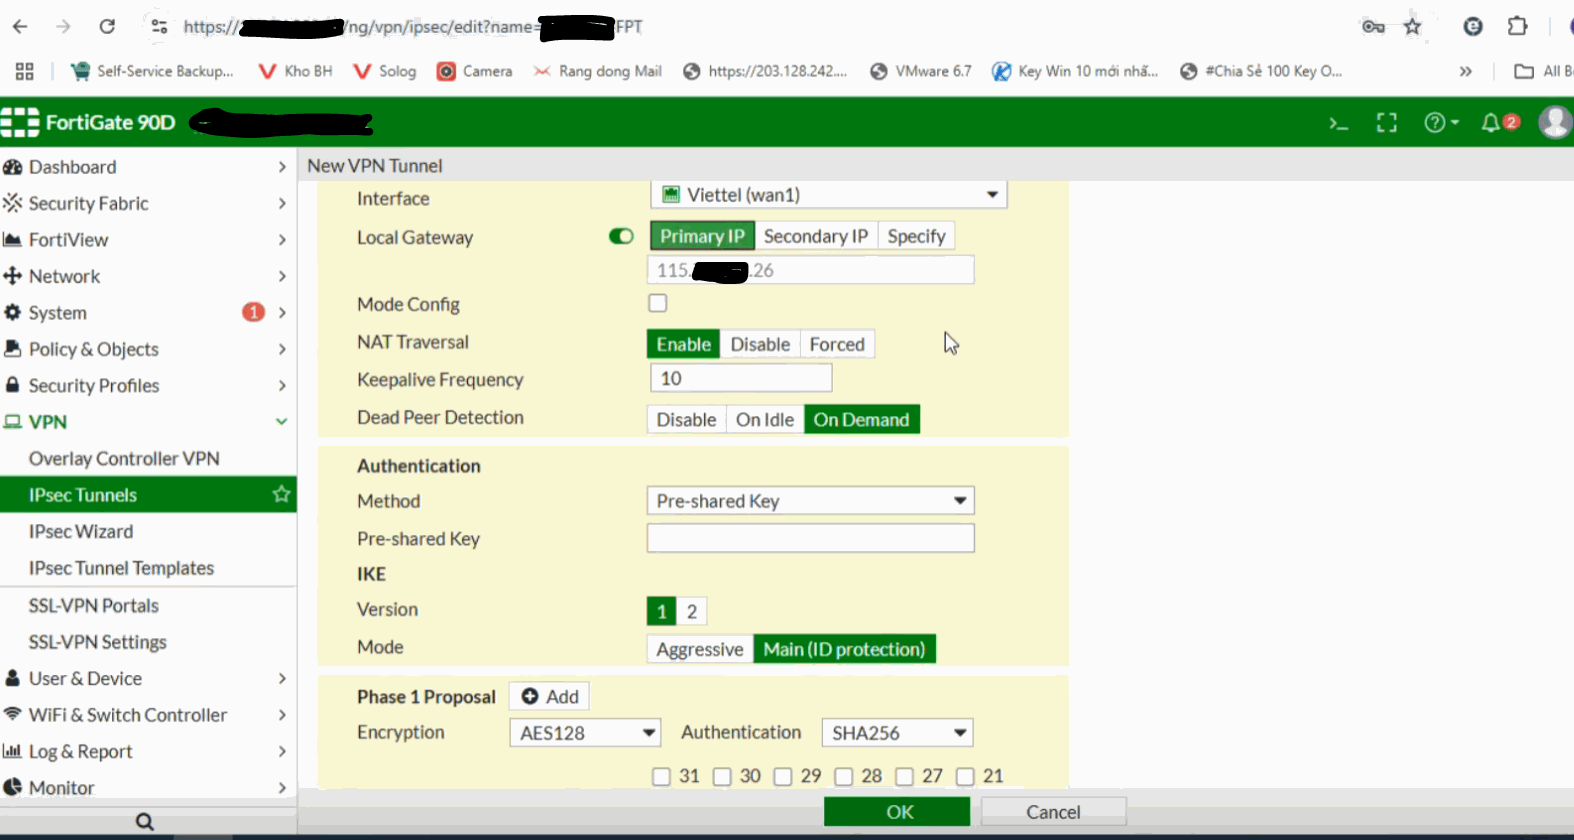
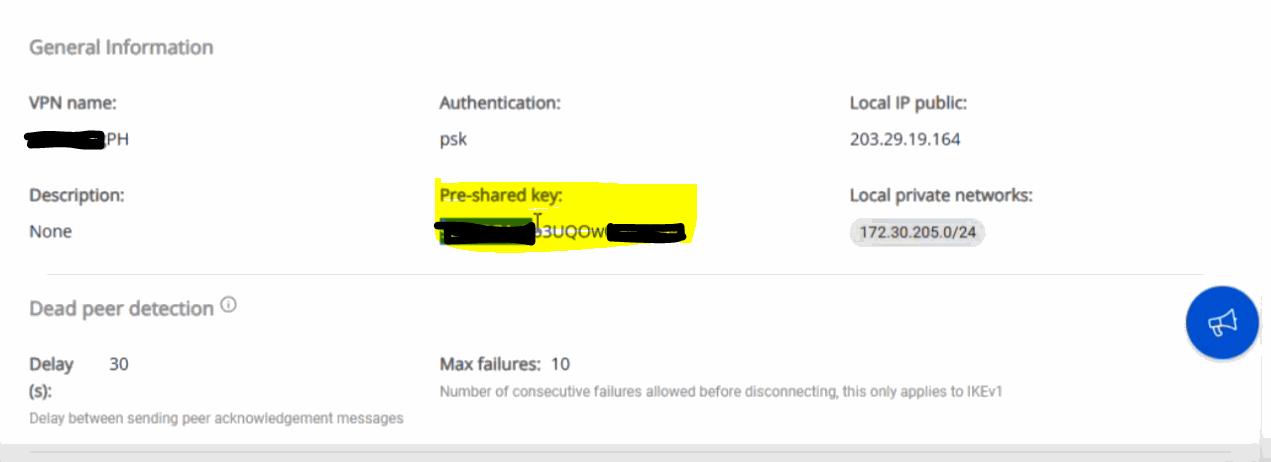
- Set the Method to Pre-shared Key and enter the same key as in Step 1.
If the customer setup is behind NAT, configure as shown below and contact L3-FPT Smart Cloud for support.
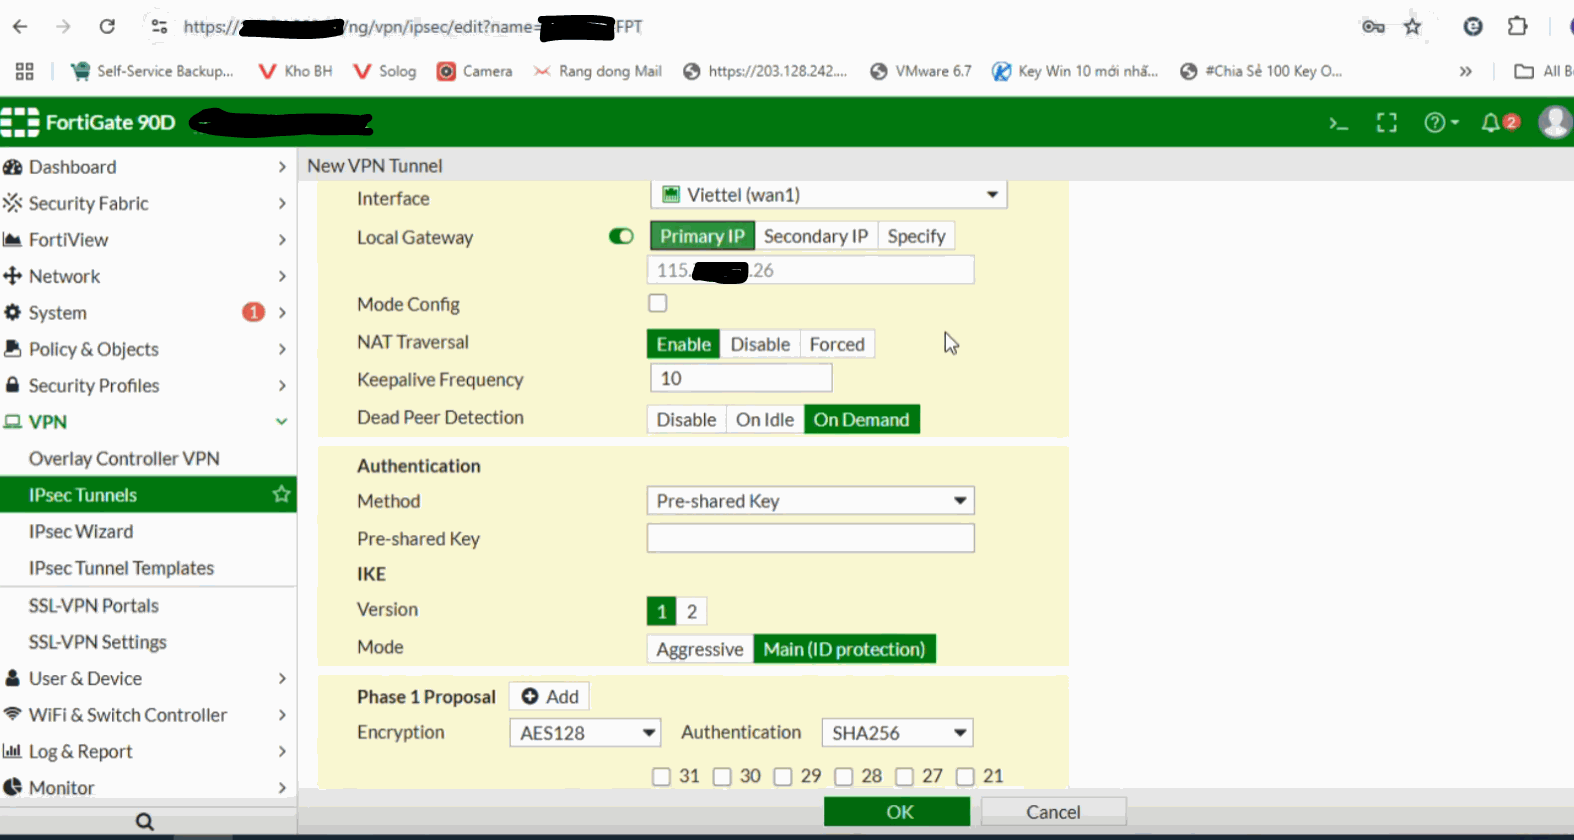
- Configure Phase 1.
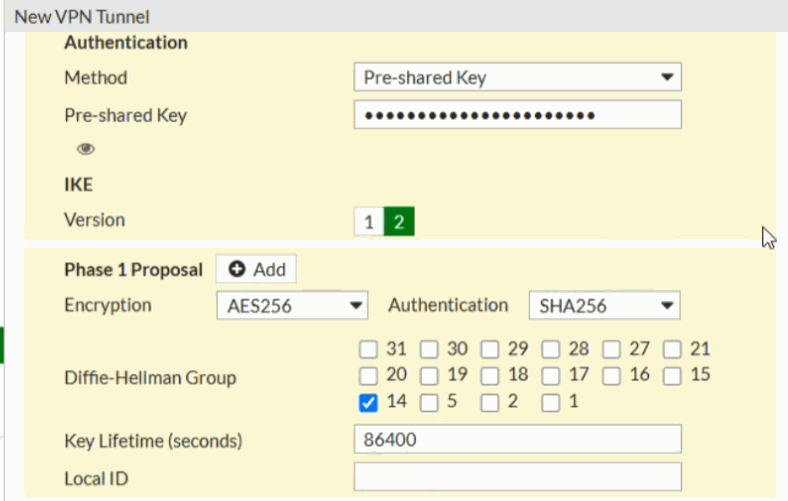
If NAT is not used, ensure that NAT mode is disabled.
- Configure Phase 2. Set the Local IP to the customer network range.
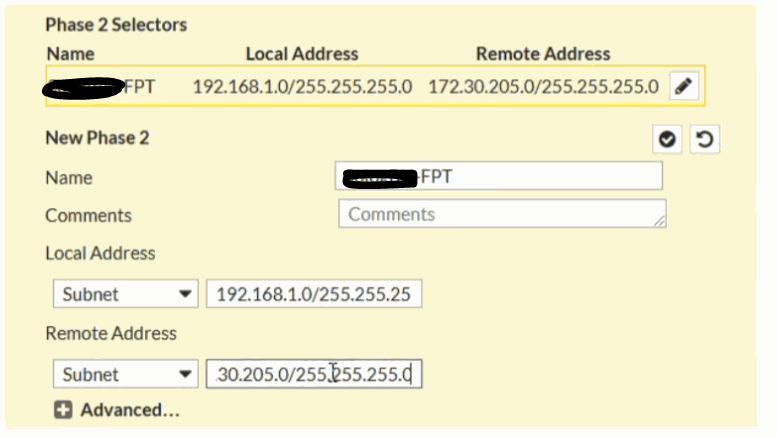
Step 3: Configure firewall and routing on Fortigate
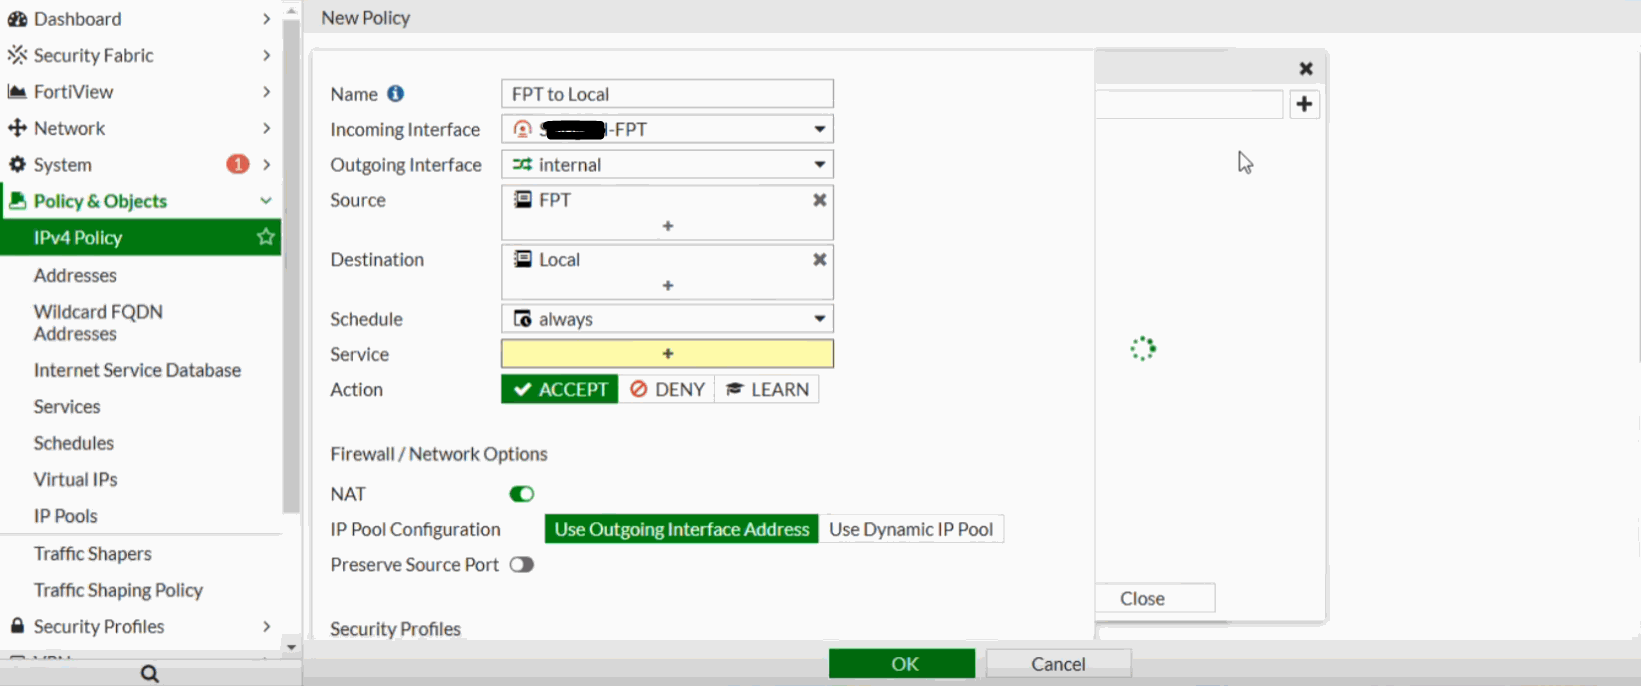
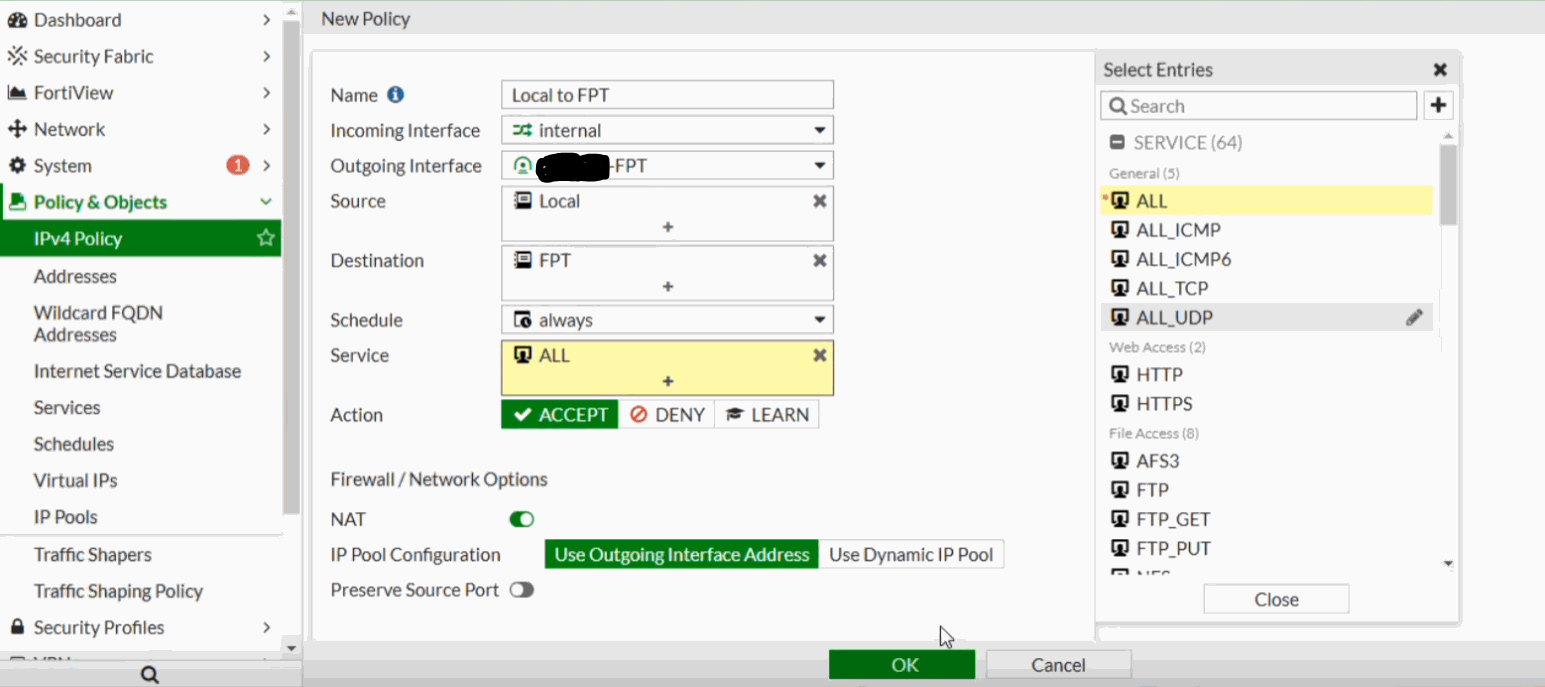
Set the firewall to Allow All for both incoming and outgoing traffic.
From FPT Cloud to Fortigate:
From Fortigate to FPT Cloud:
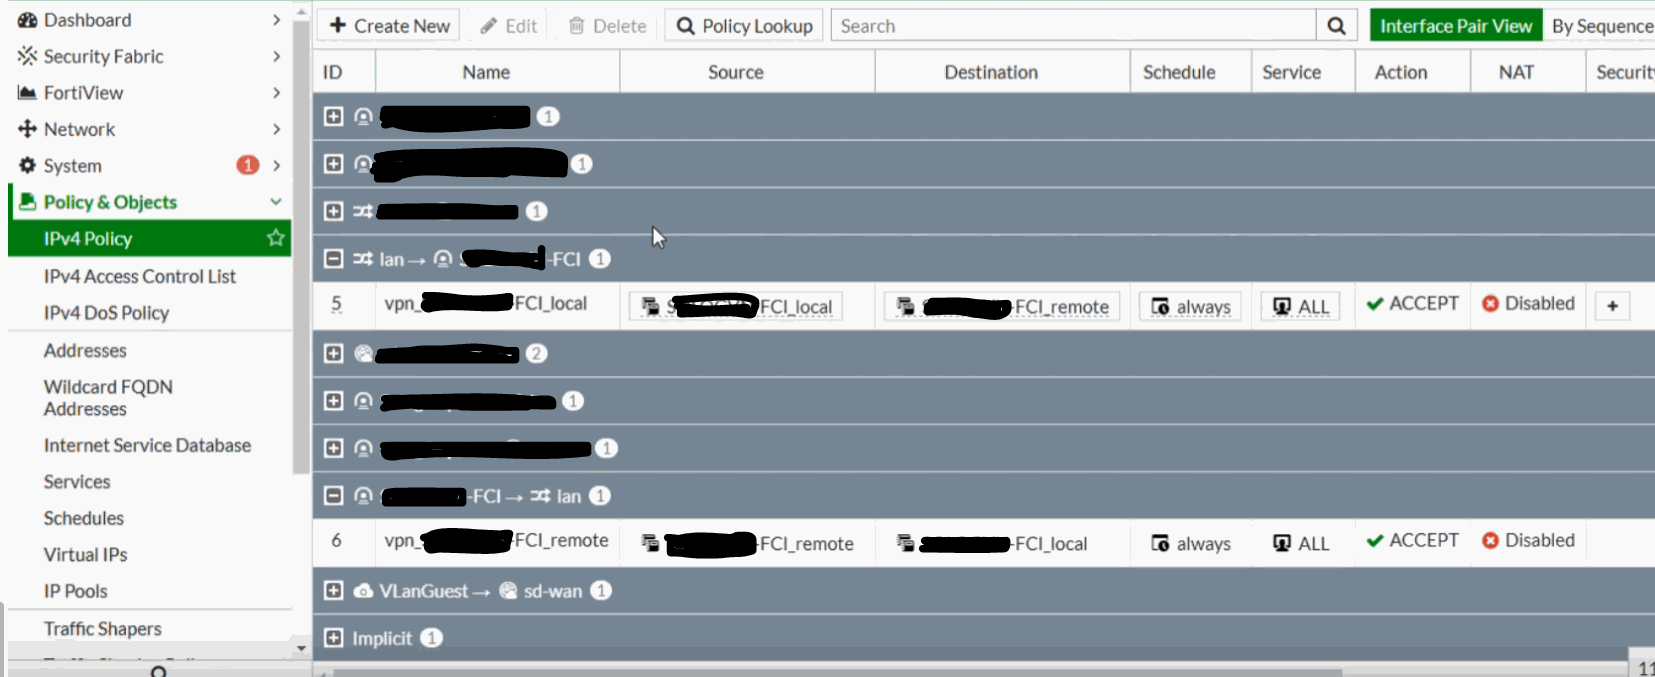
Connection successfully established:
Configure routing with the Destination set to the FPT Cloud network (e.g., 172.30.205.0/255.255.255.0) and Interface set to the IPsec tunnel created earlier.
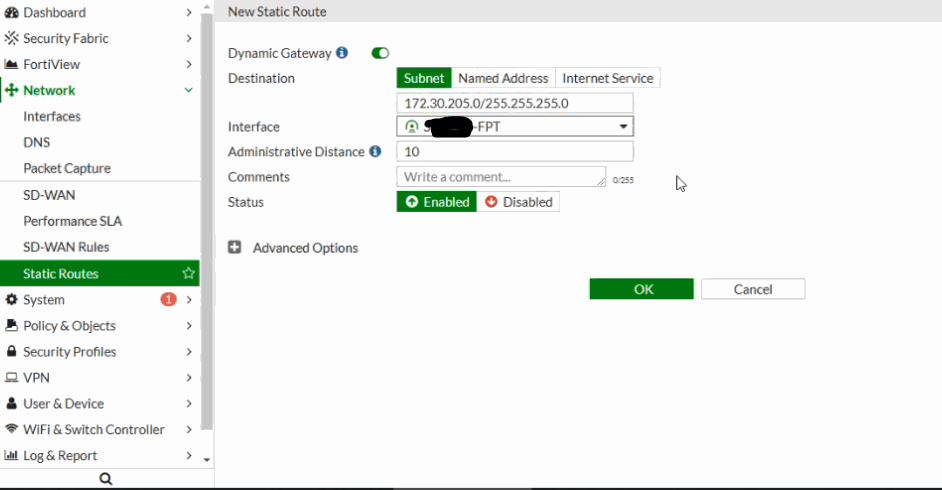
You can now open a terminal to test network connectivity using ping.