DAST API integration
The DAST API Integration feature lets users manage DAST integration and security scanning for the organization/team's APIs. Users can:
- View the Authentication Profile list
- Create and edit Authentication Profiles
- Verify domain ownership
- Manage API Sources (Add / Enable / Disable / Delete)
- Retrieve the CI/CD Scan Script for pipeline integration
View the DAST API Integration list
From the menu, choose Integration to open the Integration Management screen. Then select the API card (DAST Control group) for the Organization/team.
The system displays the DAST API Integration List screen.
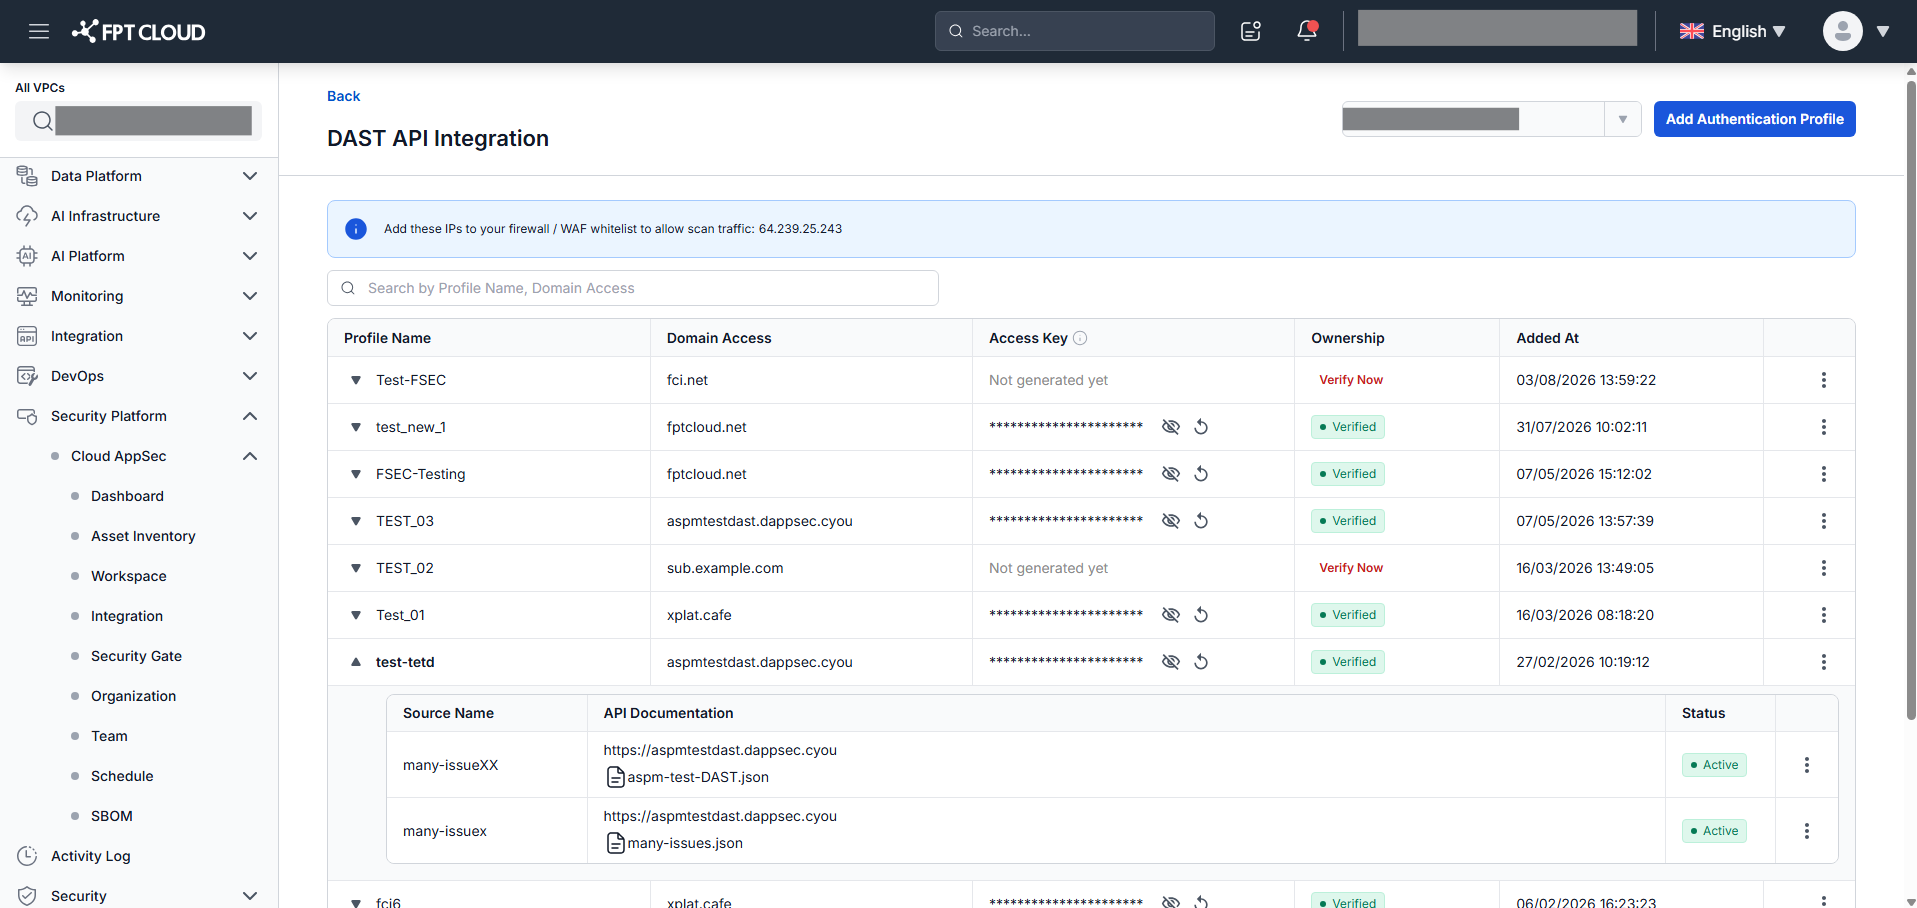
Authentication Profile fields:
| Field | Description |
|---|---|
| Profile Name | Name of the Authentication Profile |
| Domain Access | The configured domain |
| Access Key | Key used for CI/CD (can be hidden/shown or reset) |
| Ownership | Domain verification status |
| Added At | When the profile was created |
| Action | Available actions: Edit and Add API Source |
The system supports search by Profile Name and Domain Access (case-insensitive).
Create an Authentication Profile
The Authentication Profile holds credentials. An API Source is the system you want to scan. You must create a profile first so the system knows how to access that API.
- From the DAST API Integration list, click Add Authentication Profile.
- The Add Authentication Profile popup appears. Enter the profile information.
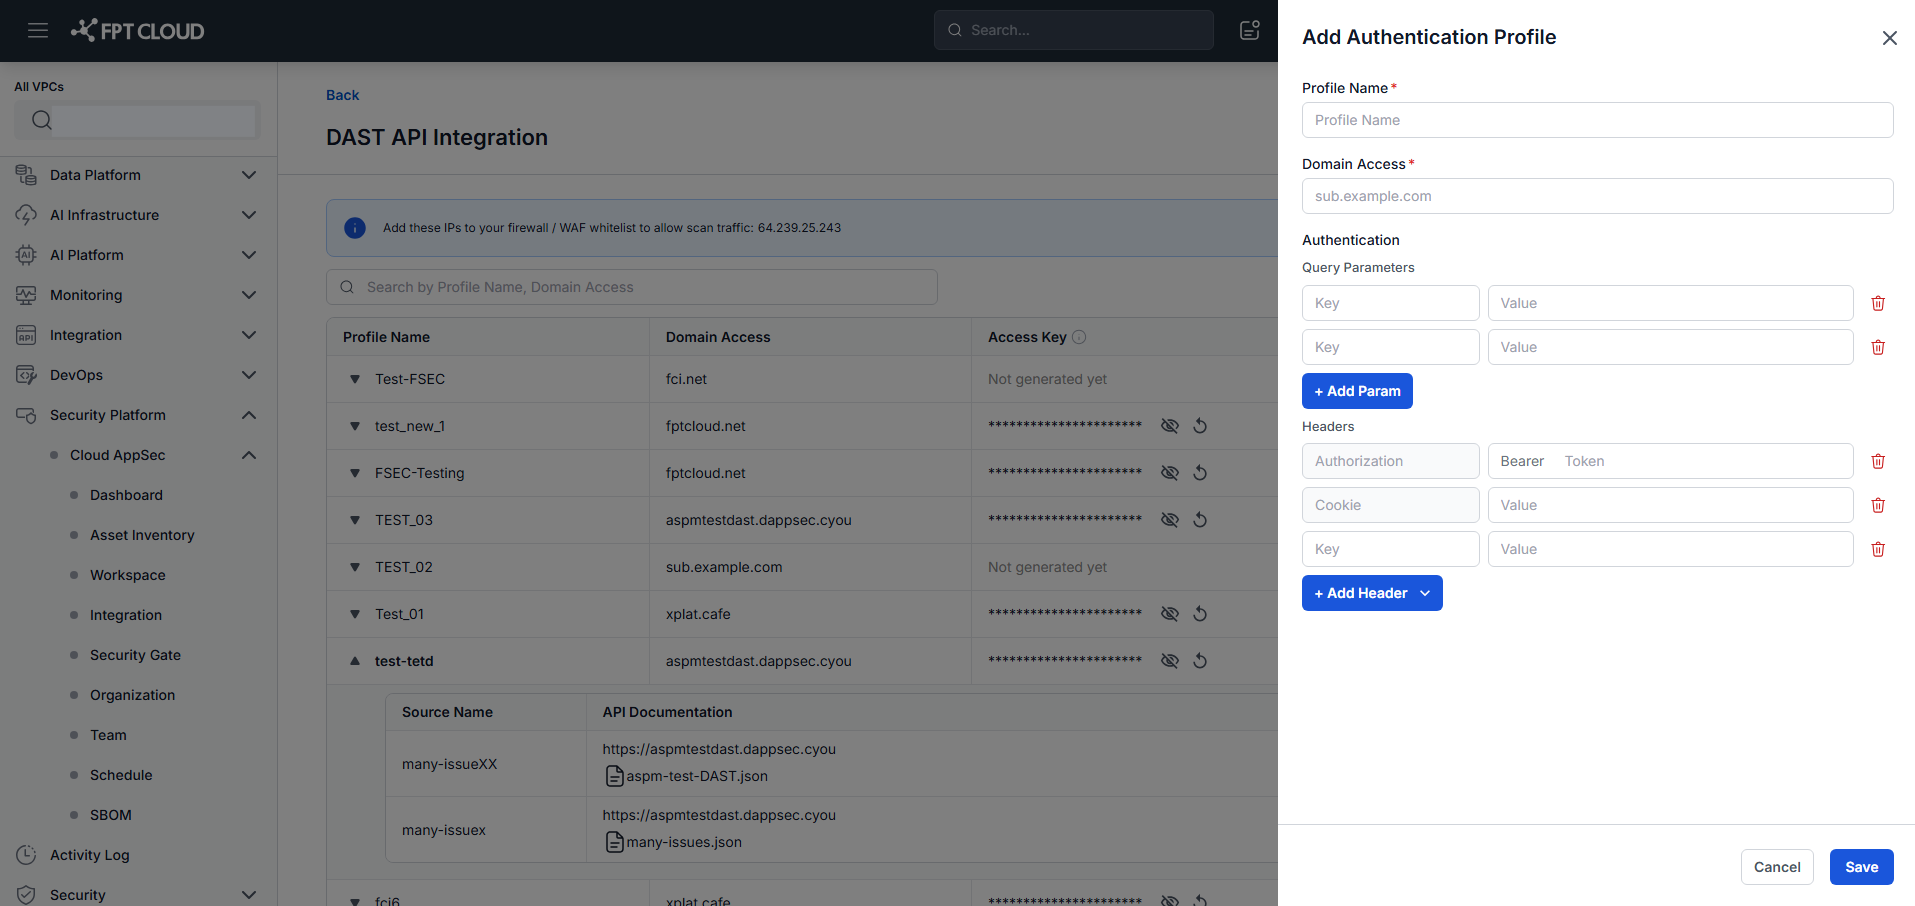
- Profile Name (required): enter a name for the Authentication Profile.
- Domain Access (required): enter the domain the system is allowed to send requests to.
- Authentication configuration: supports two main groups — Query Parameters and Headers.
Query Parameters (optional): pass authentication data through the URL. Up to 5 parameters; each has a unique Key and a Value.
Headers (optional): supports Bearer Token, Basic Auth, Cookie, and Custom Header.
| Type | Limit | Notes |
|---|---|---|
| Bearer Token | 1 | Fixed key: Authorization; value up to 2048 chars |
| Basic Auth | 1 | Fixed key: Authorization; enter Username + Password |
| Cookie | 1 | Default key: Cookie; enter Value |
| Custom Header | 5 | Each has a unique Key and Value |
When Bearer Token or Basic Auth has been added, the other is disabled. When the maximum count for a header type is reached, that option is disabled.
After saving:
- Domain not previously verified → profile shows a Verify Now button in the Ownership column.
- Domain already verified → profile shows Verified status.
Edit an Authentication Profile
- From the DAST API Integration list, click Edit on the profile you want to update.
- The Edit Authentication Profile popup appears. Update the profile information.
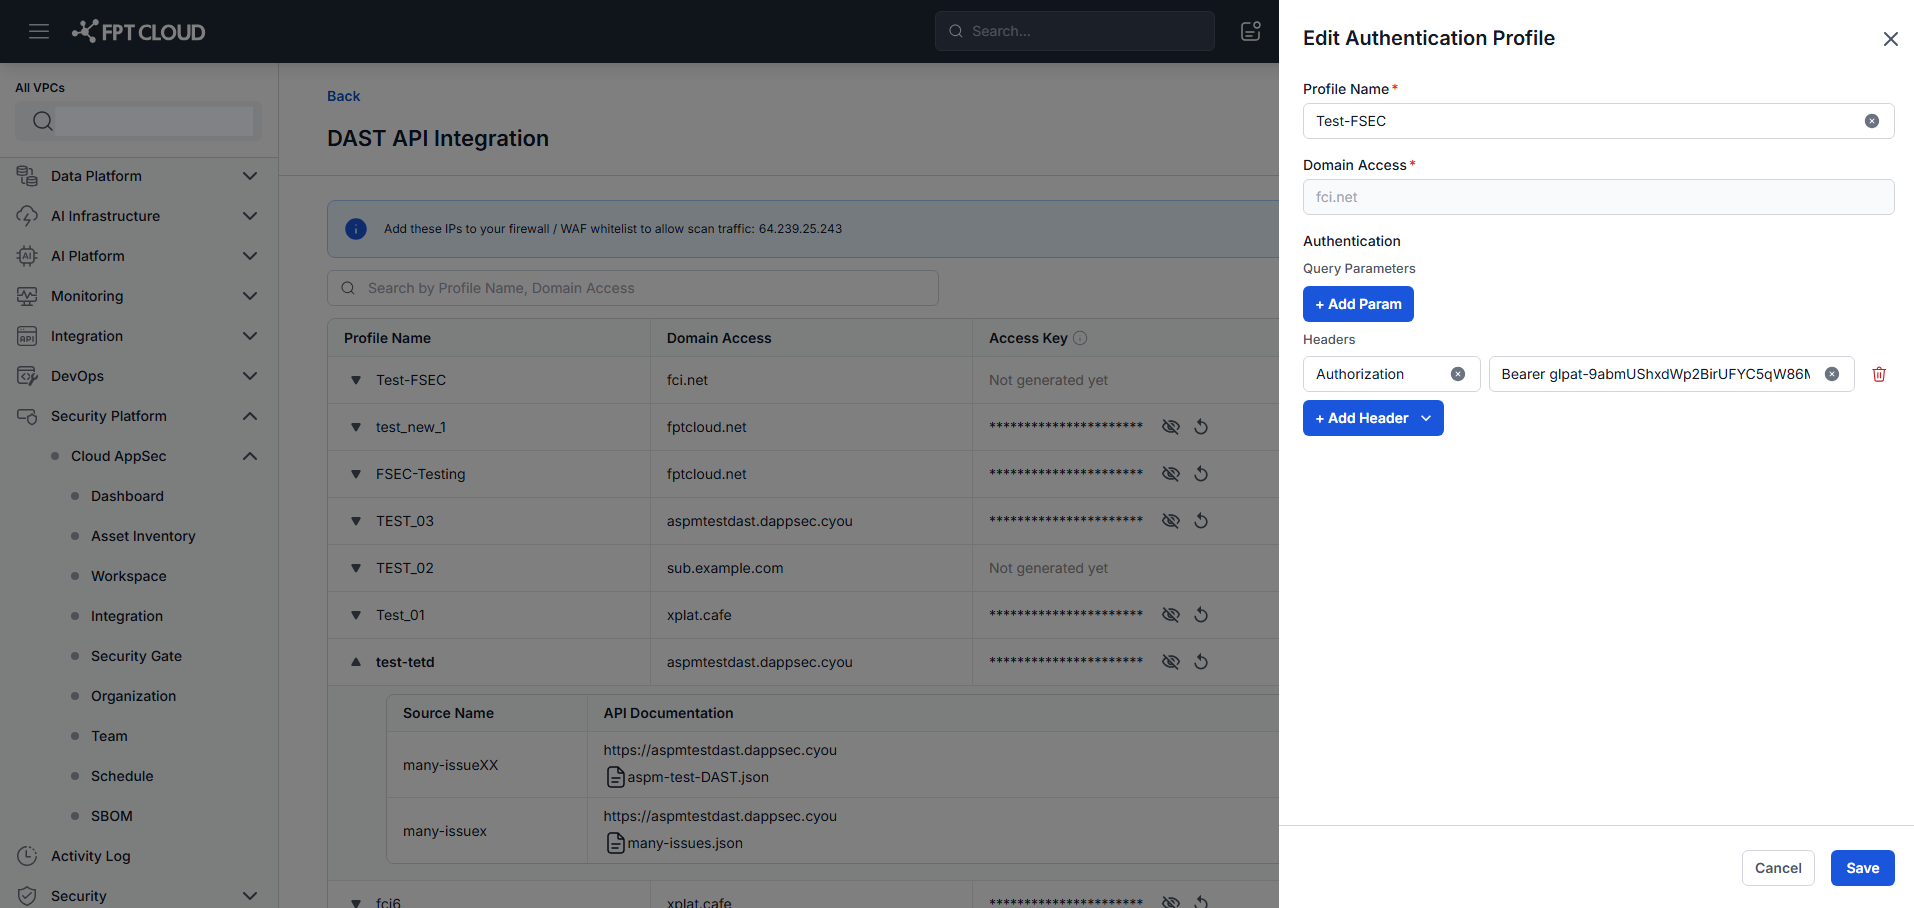
Same as creating a profile, except Domain Access cannot be modified.
Verify domain ownership
The Verify Domain Ownership feature verifies that the scanned domain is under the user's control and activates DAST API scan capabilities.
- Click Verify Now in the Ownership column of a profile whose domain has not been verified.
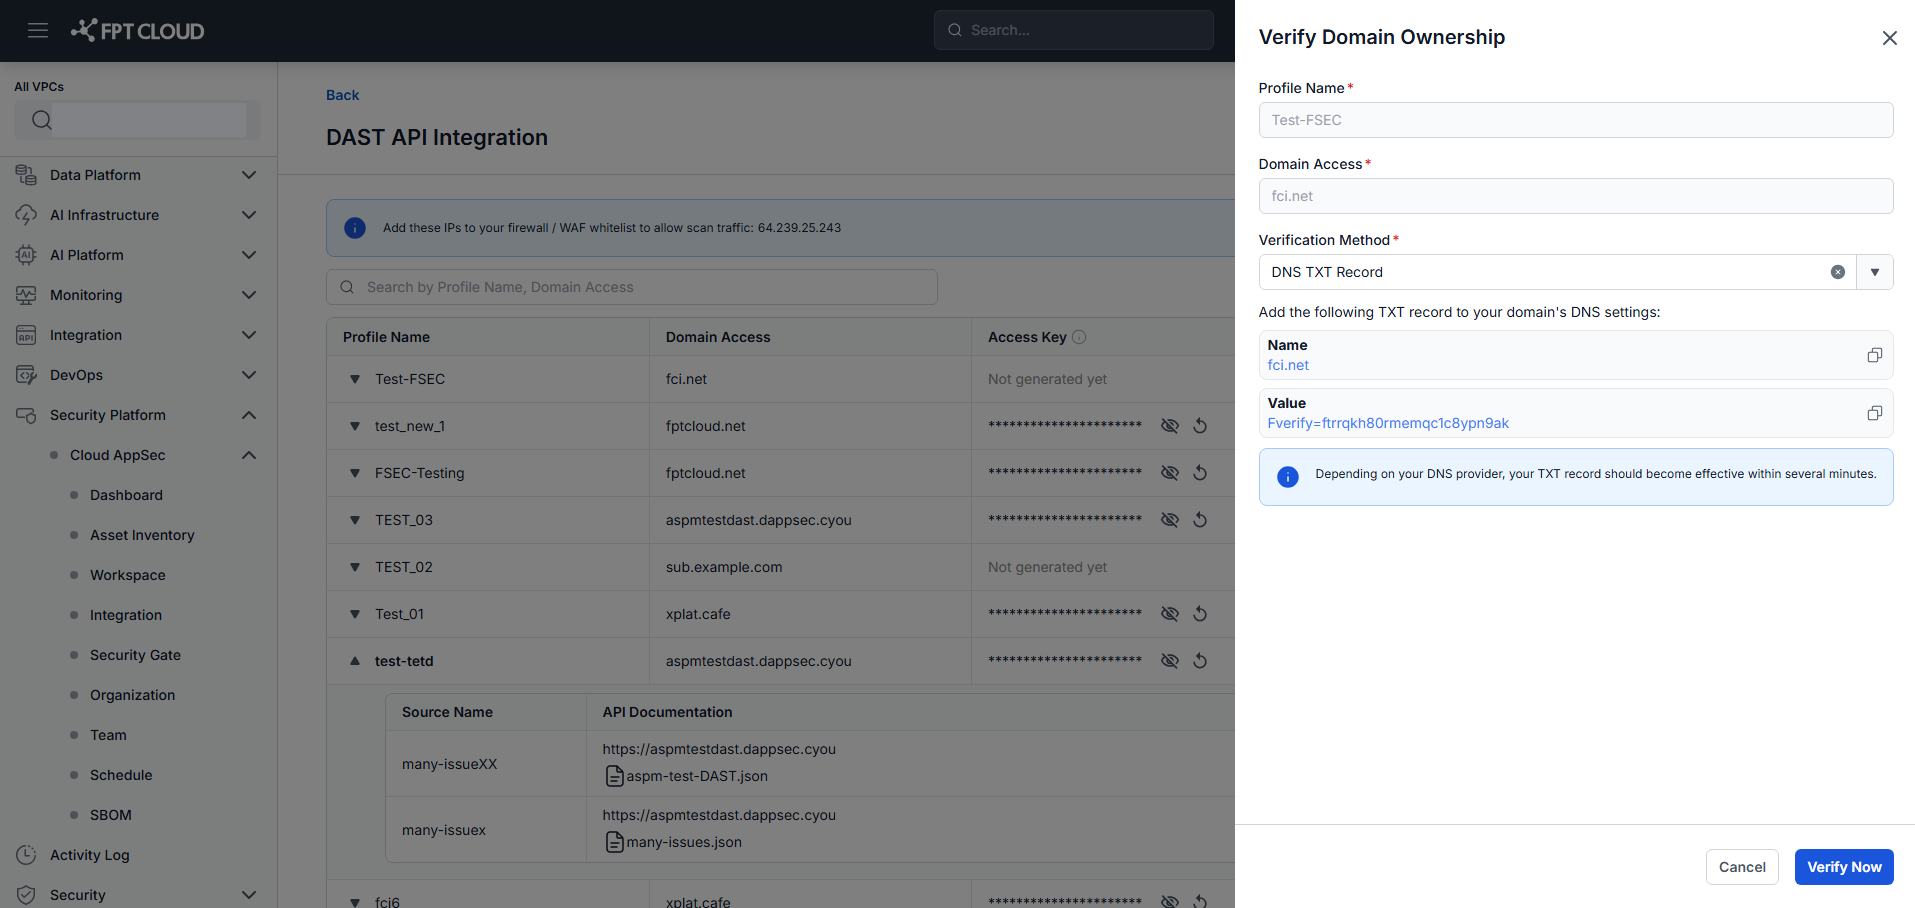
The Verify Domain popup appears.
-
Review the fields:
- Domain Access: the domain declared in the profile.
- Domain Verification: the root domain automatically derived from Domain Access.
-
Choose a verification method:
Method 1: DNS TXT Record (default)
- Copy the provided Name and Value.
- Open the DNS management system for the domain → create a TXT record with the supplied Name and Value → save and wait for DNS propagation.
Method 2: HTML File Upload
- Download the generated
.txtfile with the provided File Name and Content. - Upload this file to the web server's root directory at the specified Upload Location.
- Click Verify Now.
If verification succeeds: the Ownership status is set to Verified, an Access Key is generated, and all profiles sharing the same root domain are also updated to Verified.
If verification fails: a failure message is shown and the user stays on the popup to review and retry.
View and manage API Sources
From the DAST API Integration list, click the Expand icon on an Authentication Profile to view its API Sources.
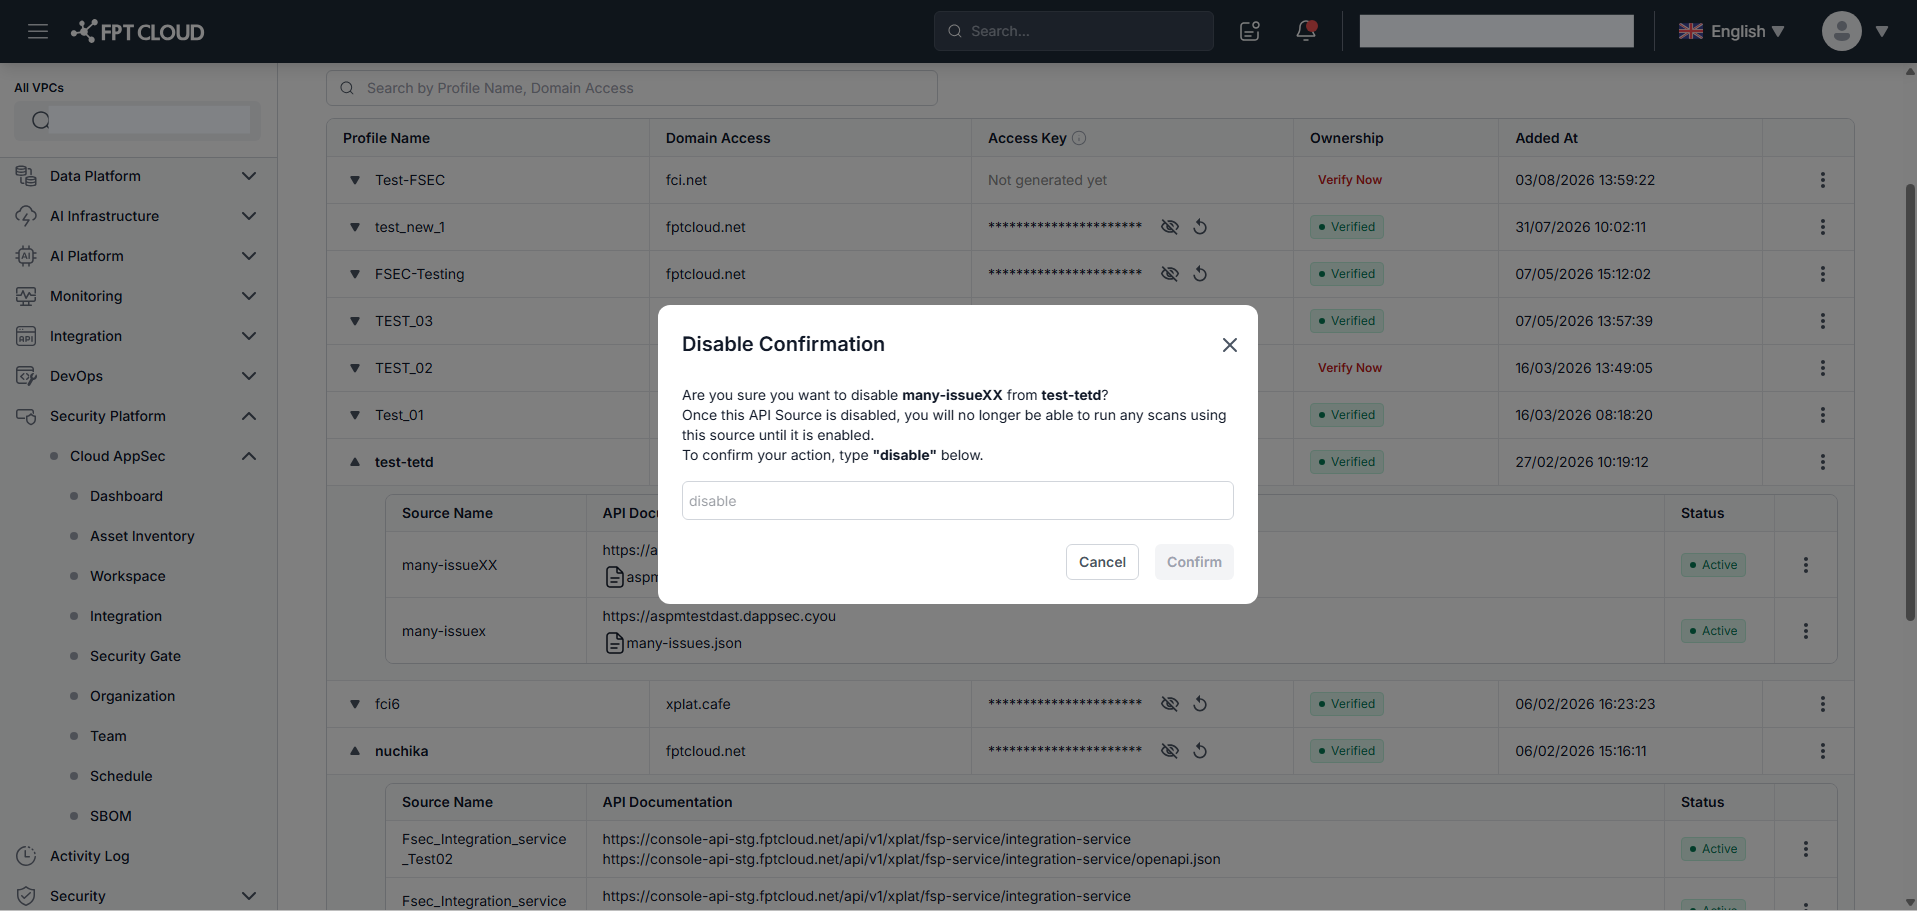
API Source fields:
| Field | Description |
|---|---|
| Source Name | Name of the API Source |
| API Document | Endpoint and Document URL or uploaded file |
| Status | Active or Inactive |
| Action | Disable, Enable, Delete, View CI/CD scan script |
Create an API Source
Only Authentication Profiles with verified domain ownership can create an API Source.
- On a row with a verified profile, click Add API Source.
- The Create API Source popup appears. Enter the information.
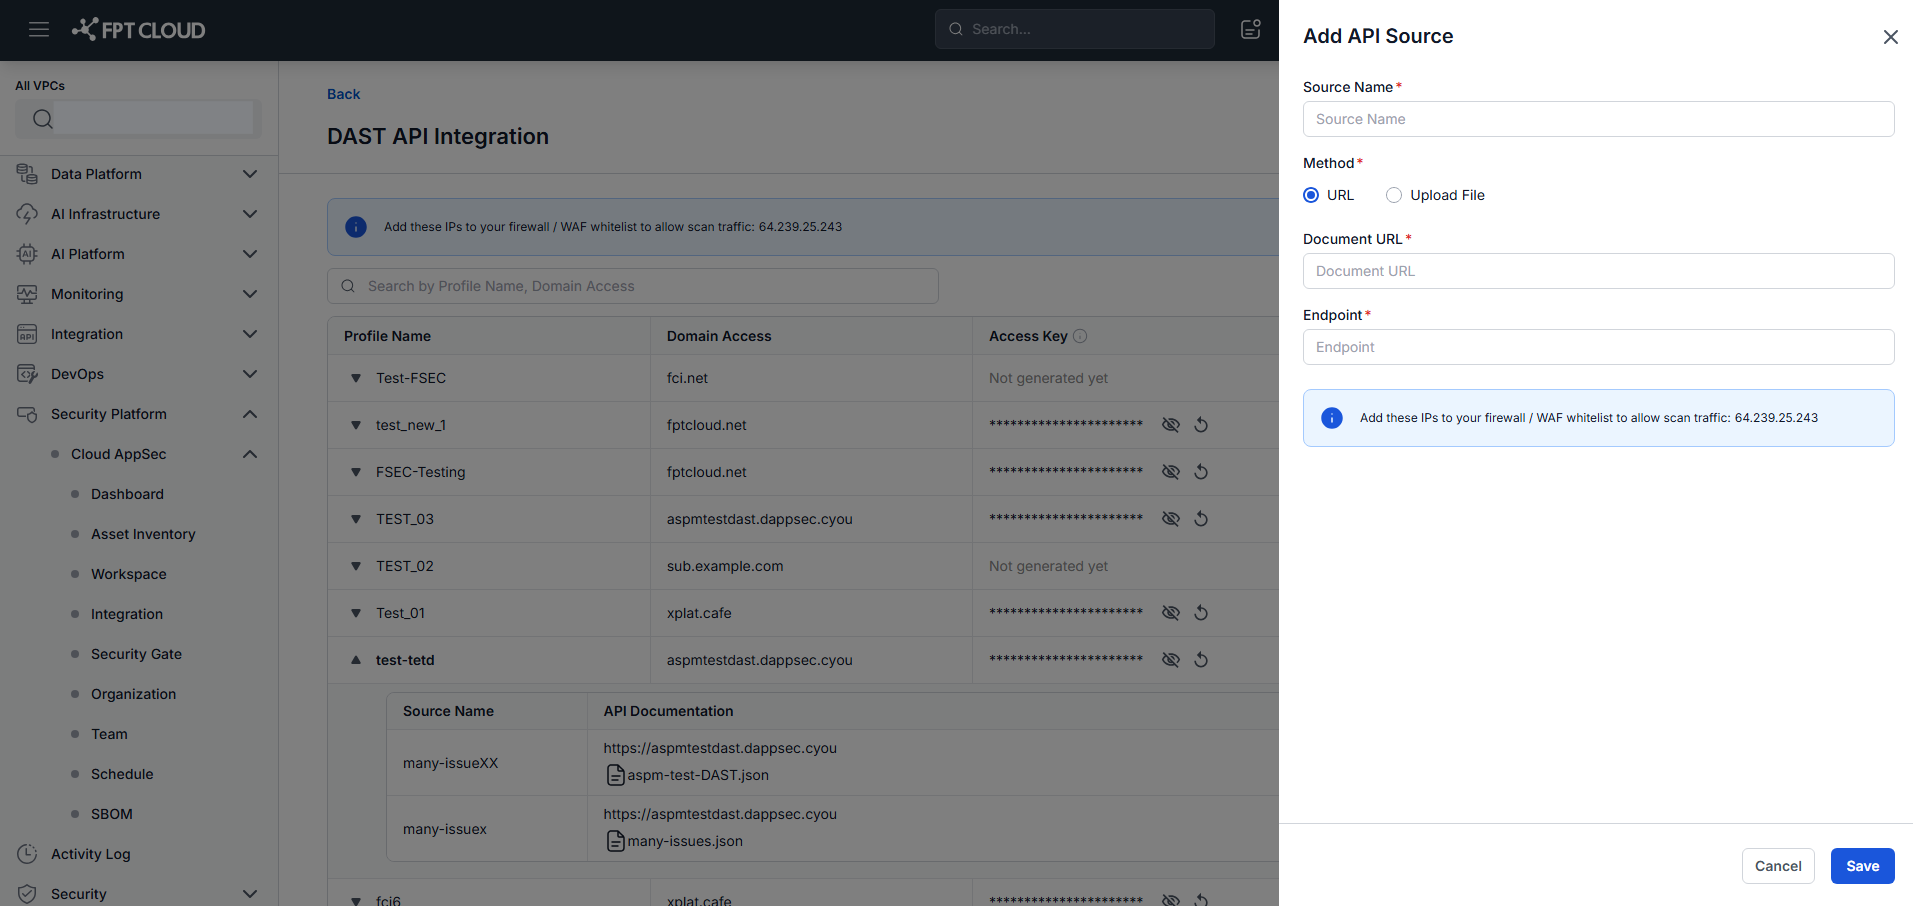
- Source Name: enter a name for the API Source.
- Method: URL (default) or Upload file.
- Document URL / Upload File: path to the Swagger file.
- Endpoint: the actual endpoint the client calls.
- Parameter: required parameters parsed from Swagger (Header, Path, Query).
- Whitelist IP: IPs that must be whitelisted to allow scan traffic.
- Click Save. On success, the new API Source appears in the list.
Disable / Enable an API Source
Click Disable or Enable in the Action column of an API Source to change its status.
Delete an API Source
Click Delete in the Action column of an API Source.
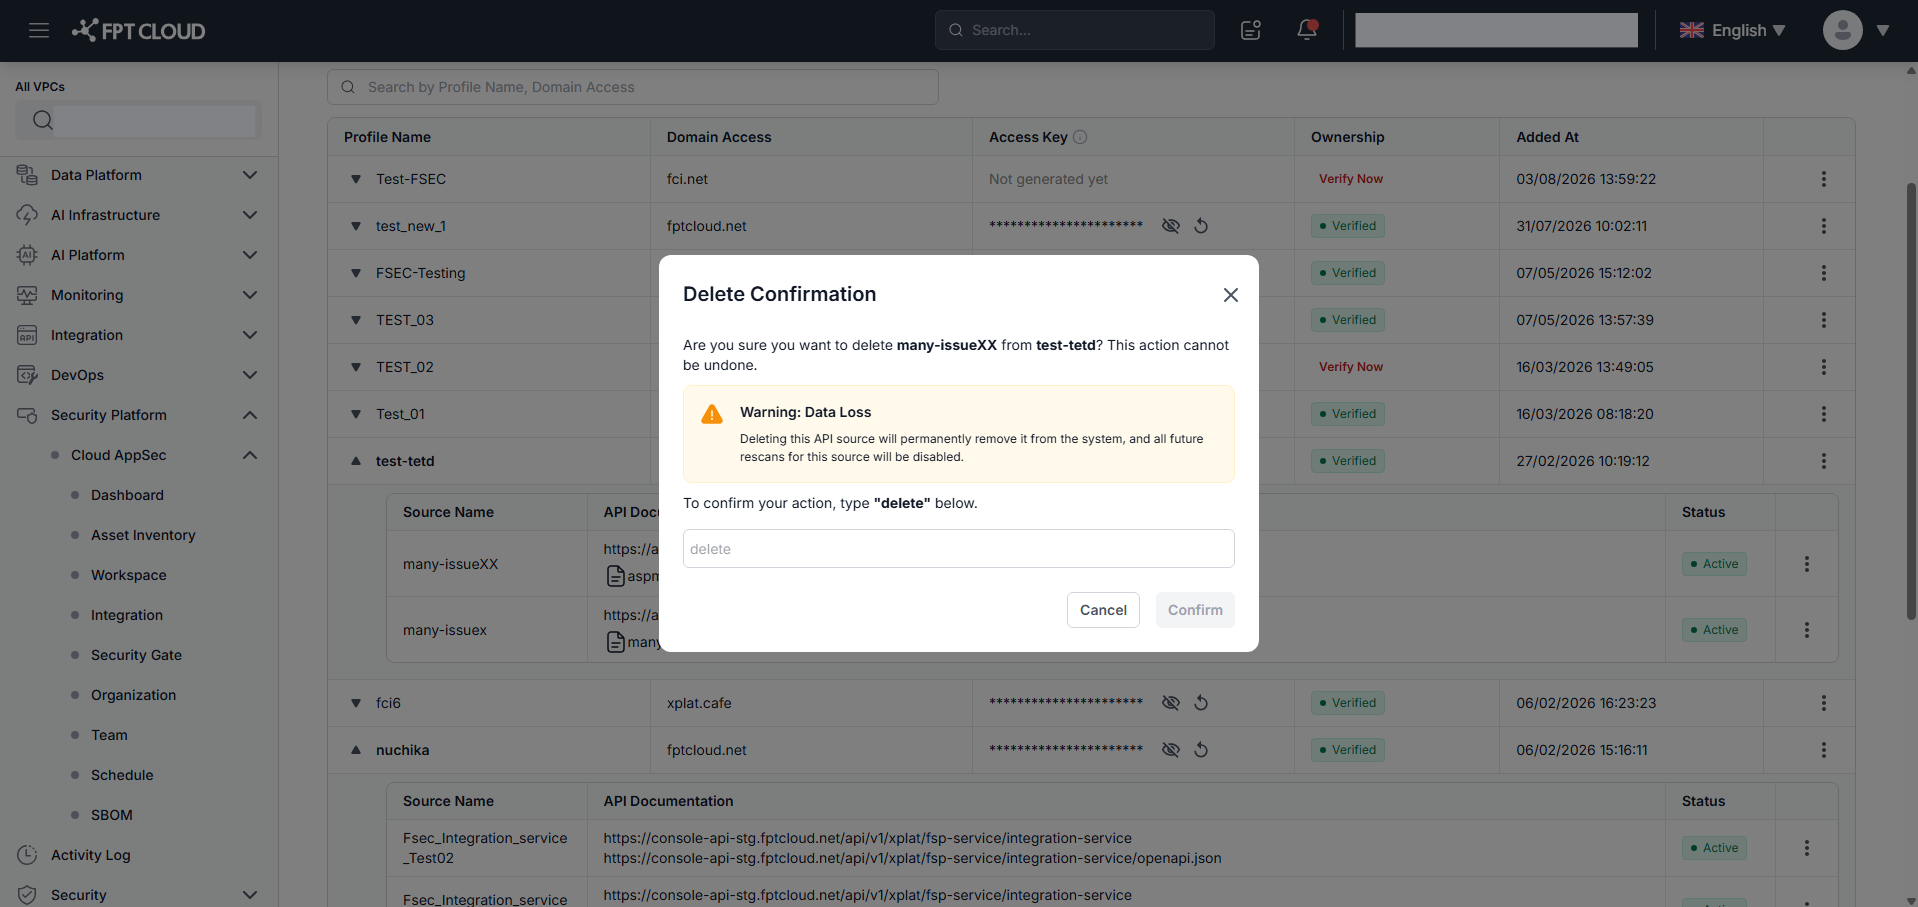
Confirm the deletion in the confirmation dialog.
View CI/CD scan script
Click View CI/CD Scan Script in the Action column of an API Source to view the script for pipeline integration.
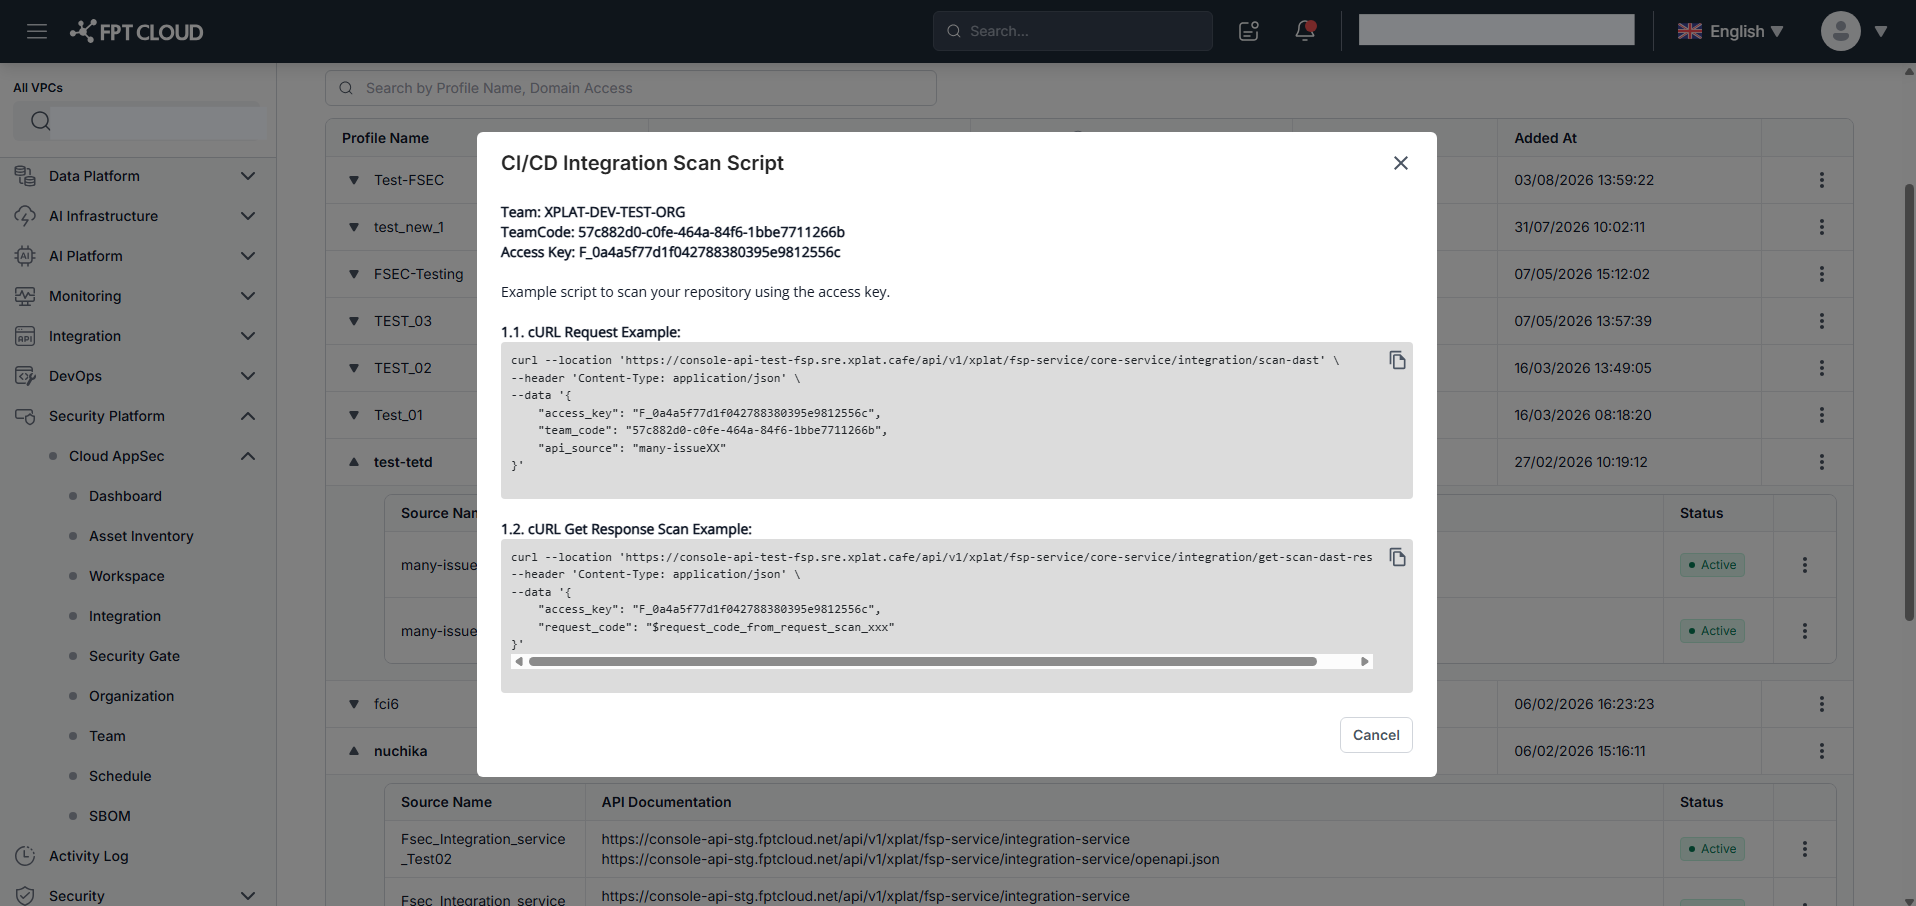
Copy the script and add it to your CI/CD pipeline configuration.