FPT Container Registry integration
Only Org Admin and Team Manager have permission to edit the FPT Container Registry (FCR) integration.
See permission details.
View FPT Container Registry integration
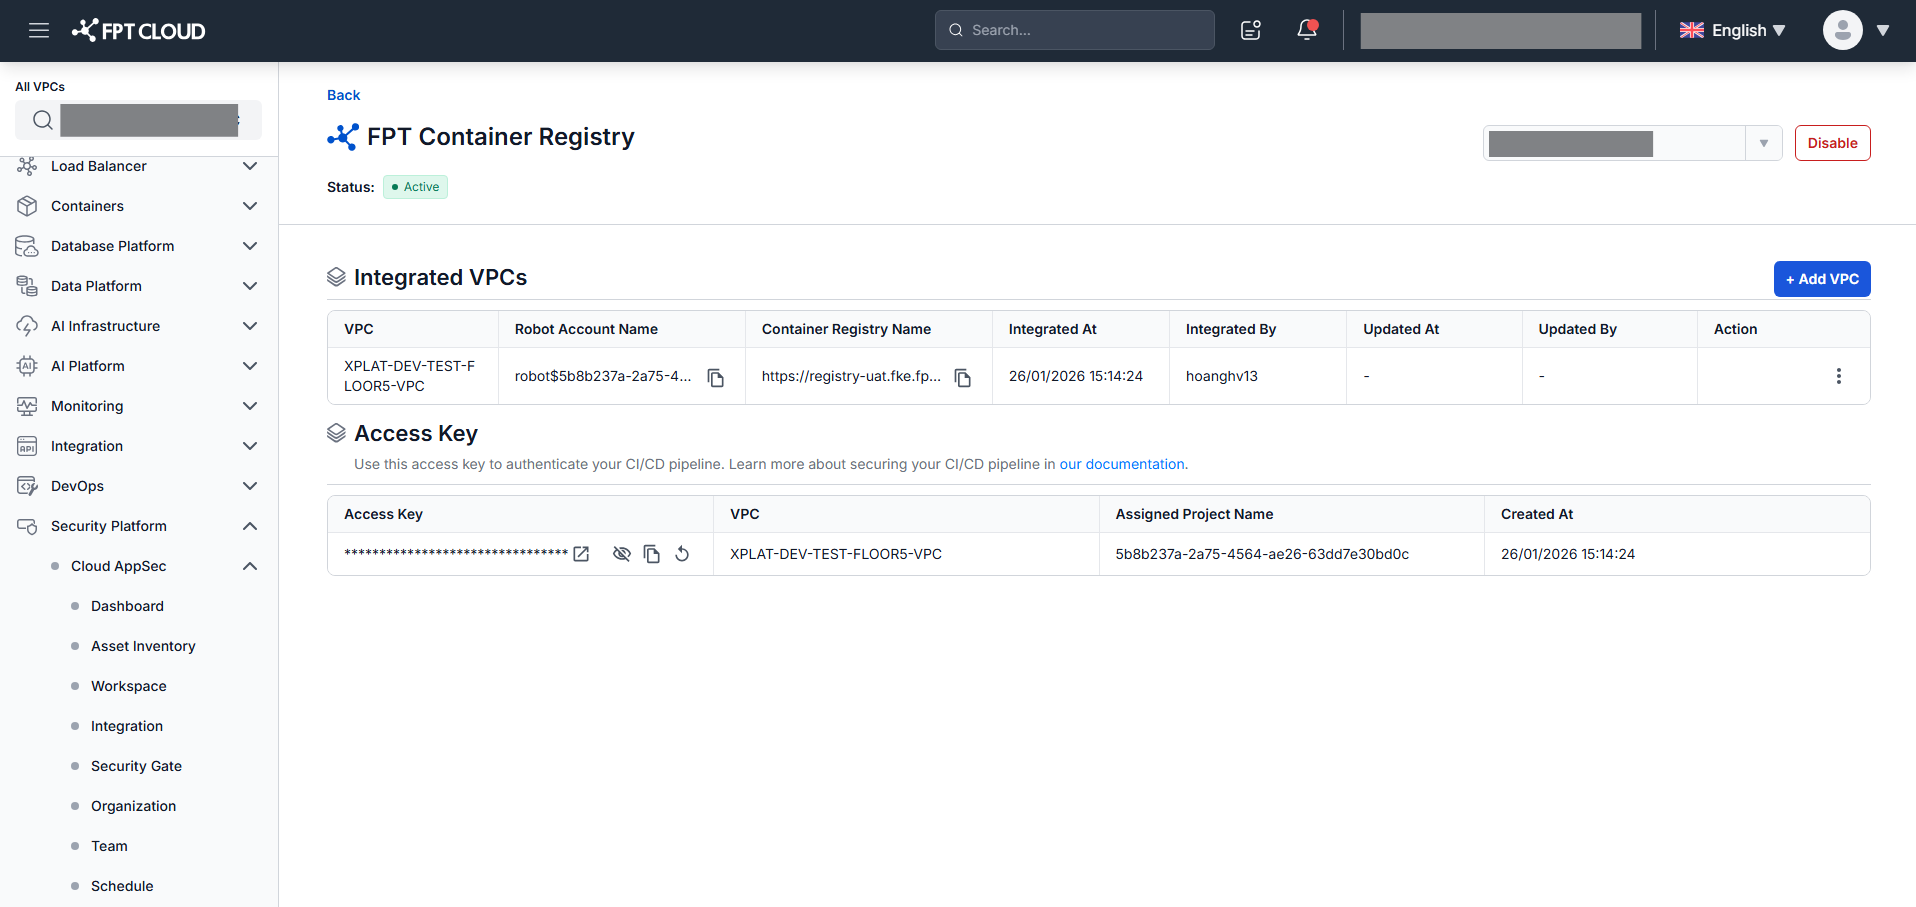
After selecting your org/team, click FPT Container Registry to open the integration screen.
The screen displays the integration status and the Integrated VPCs list, including VPC, Robot Account Name, Container Registry Name, and Access Key for CI/CD integration.
Add VPC
From the integration screen, click Add VPC to add a new VPC.
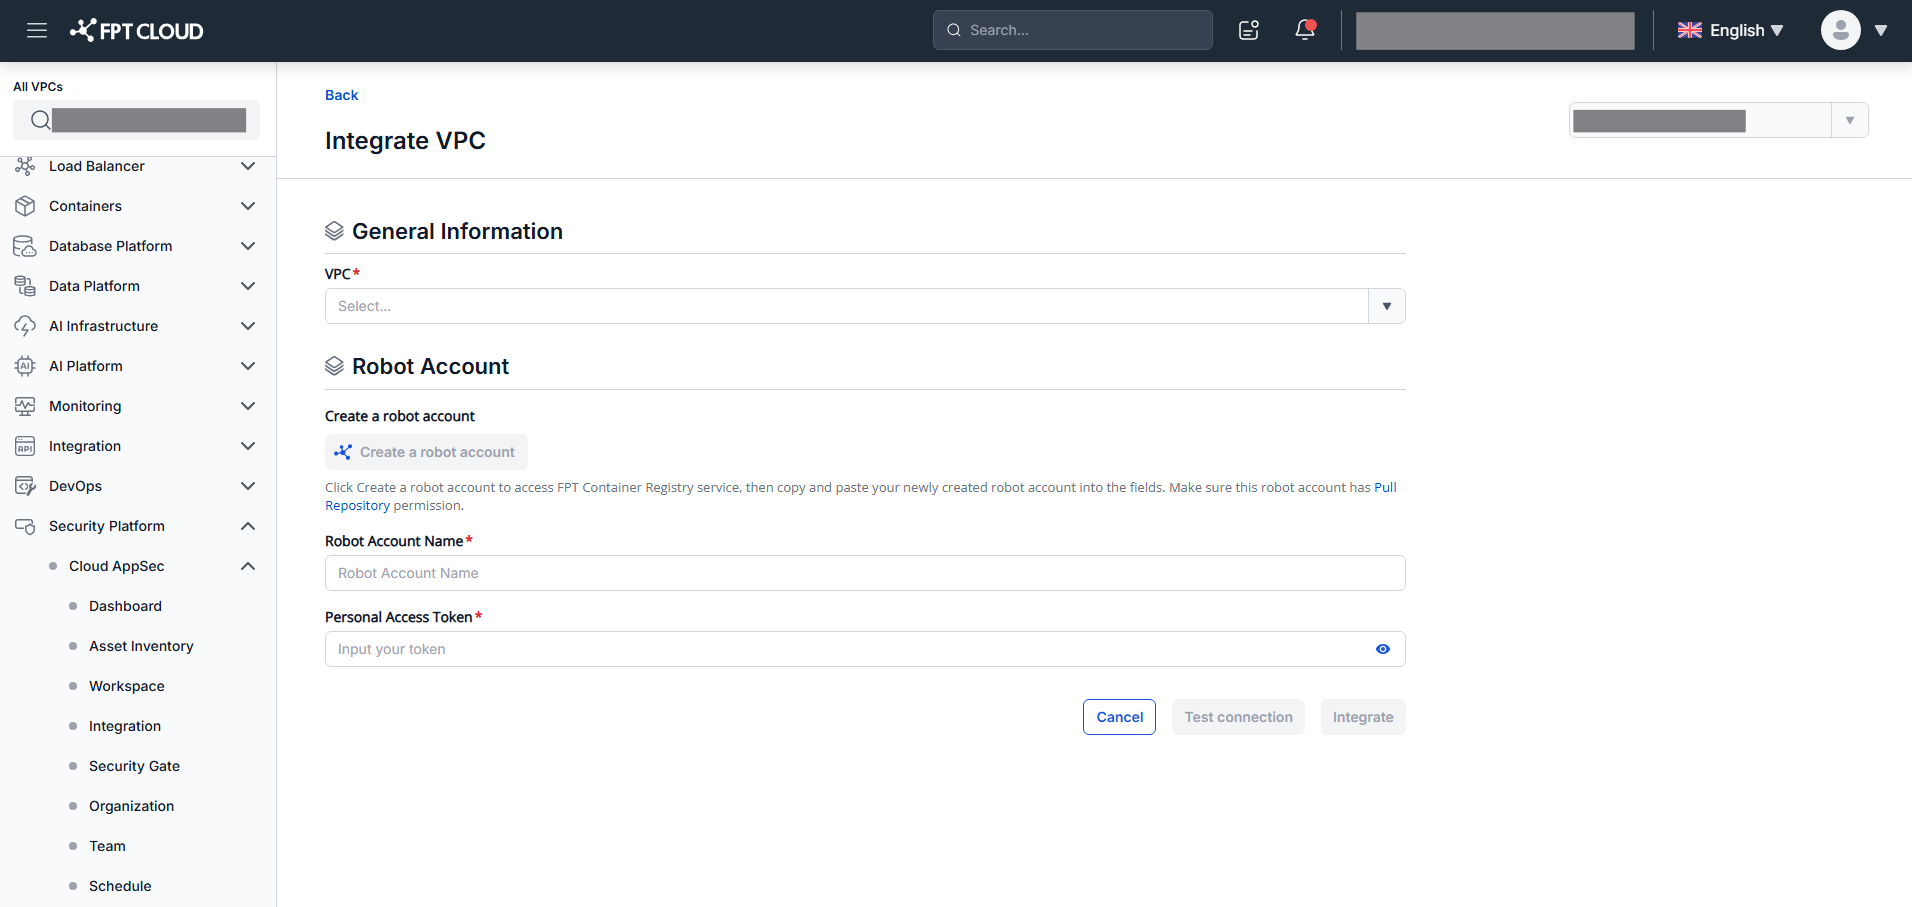
In the Add VPC form:
- Select the VPC to integrate.
- Enter the Robot Account Name and Robot Account Secret.
- Click Test Connection. If valid, the system shows Connected successfully and enables the Integrate button. If invalid, the system shows "Connected failed".
- Click Integrate.
The VPC is added to the Integrated VPCs list.
If you do not have a Robot Account yet, refer to the FPT Container Registry guide to create one before integrating.
Reconfigure a VPC
Click Reconfigure in the Action column of a VPC, then follow the same steps as Add VPC.
Delete a VPC
Click Delete in the Action column of a VPC.
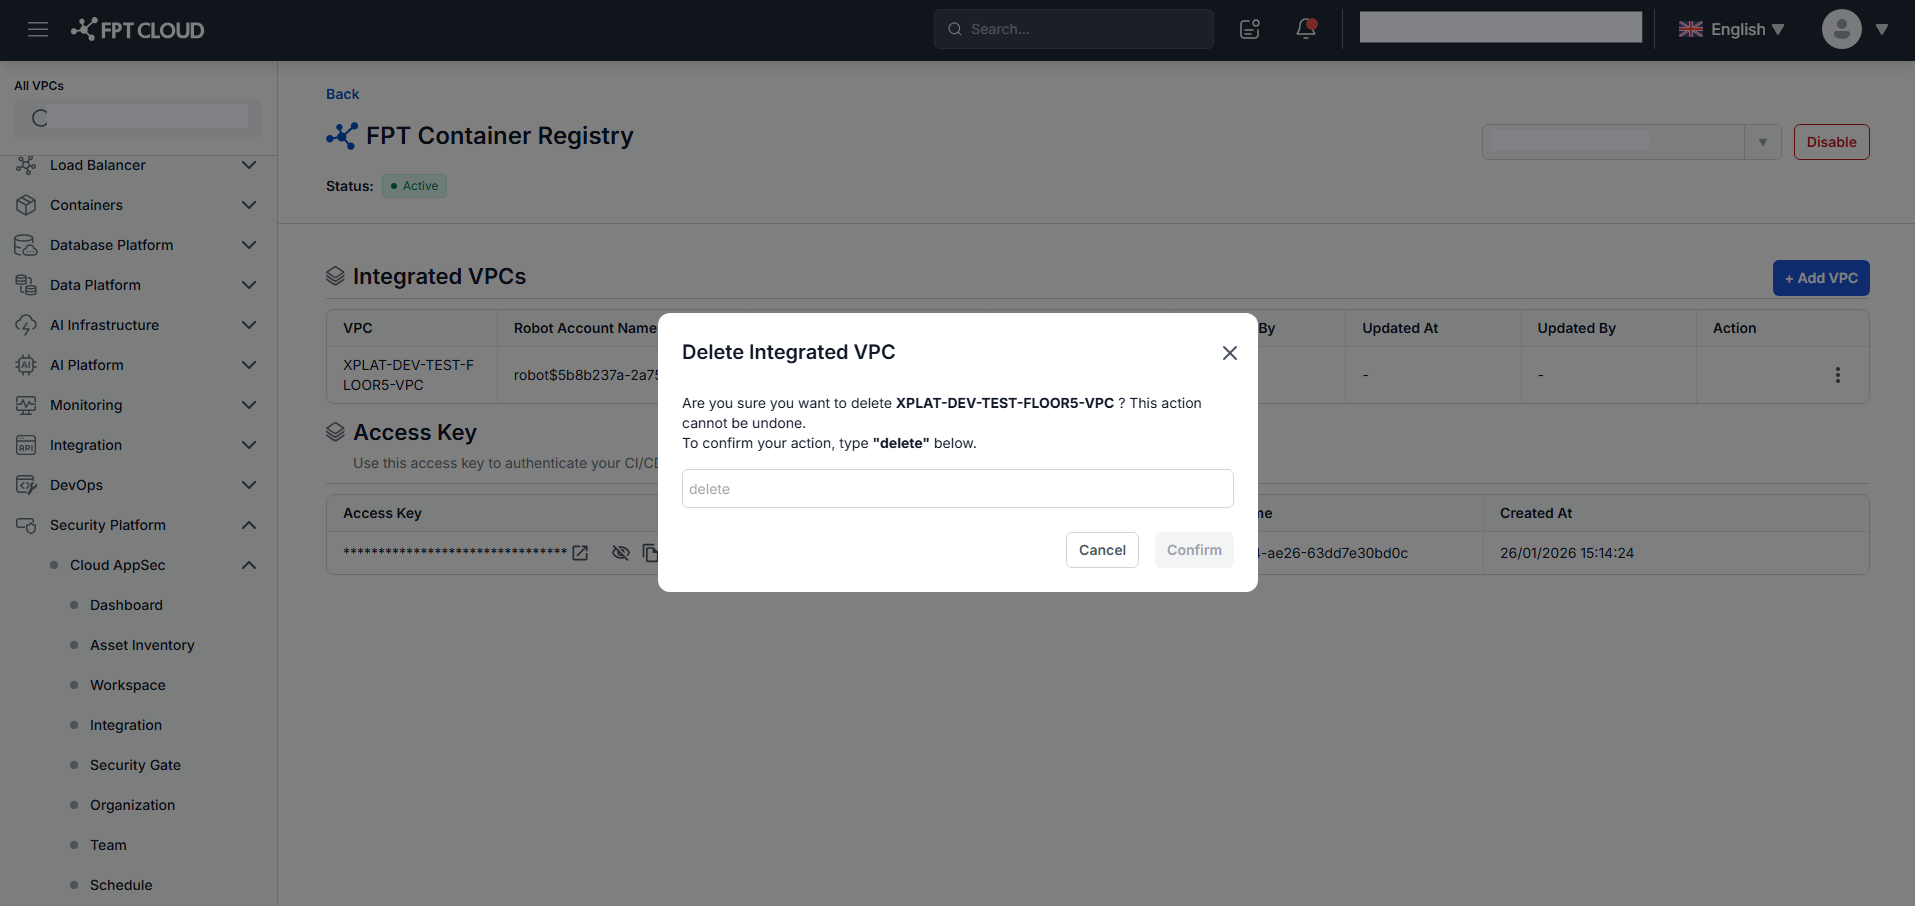
Type delete, then click Confirm.
Disable FPT Container Registry integration
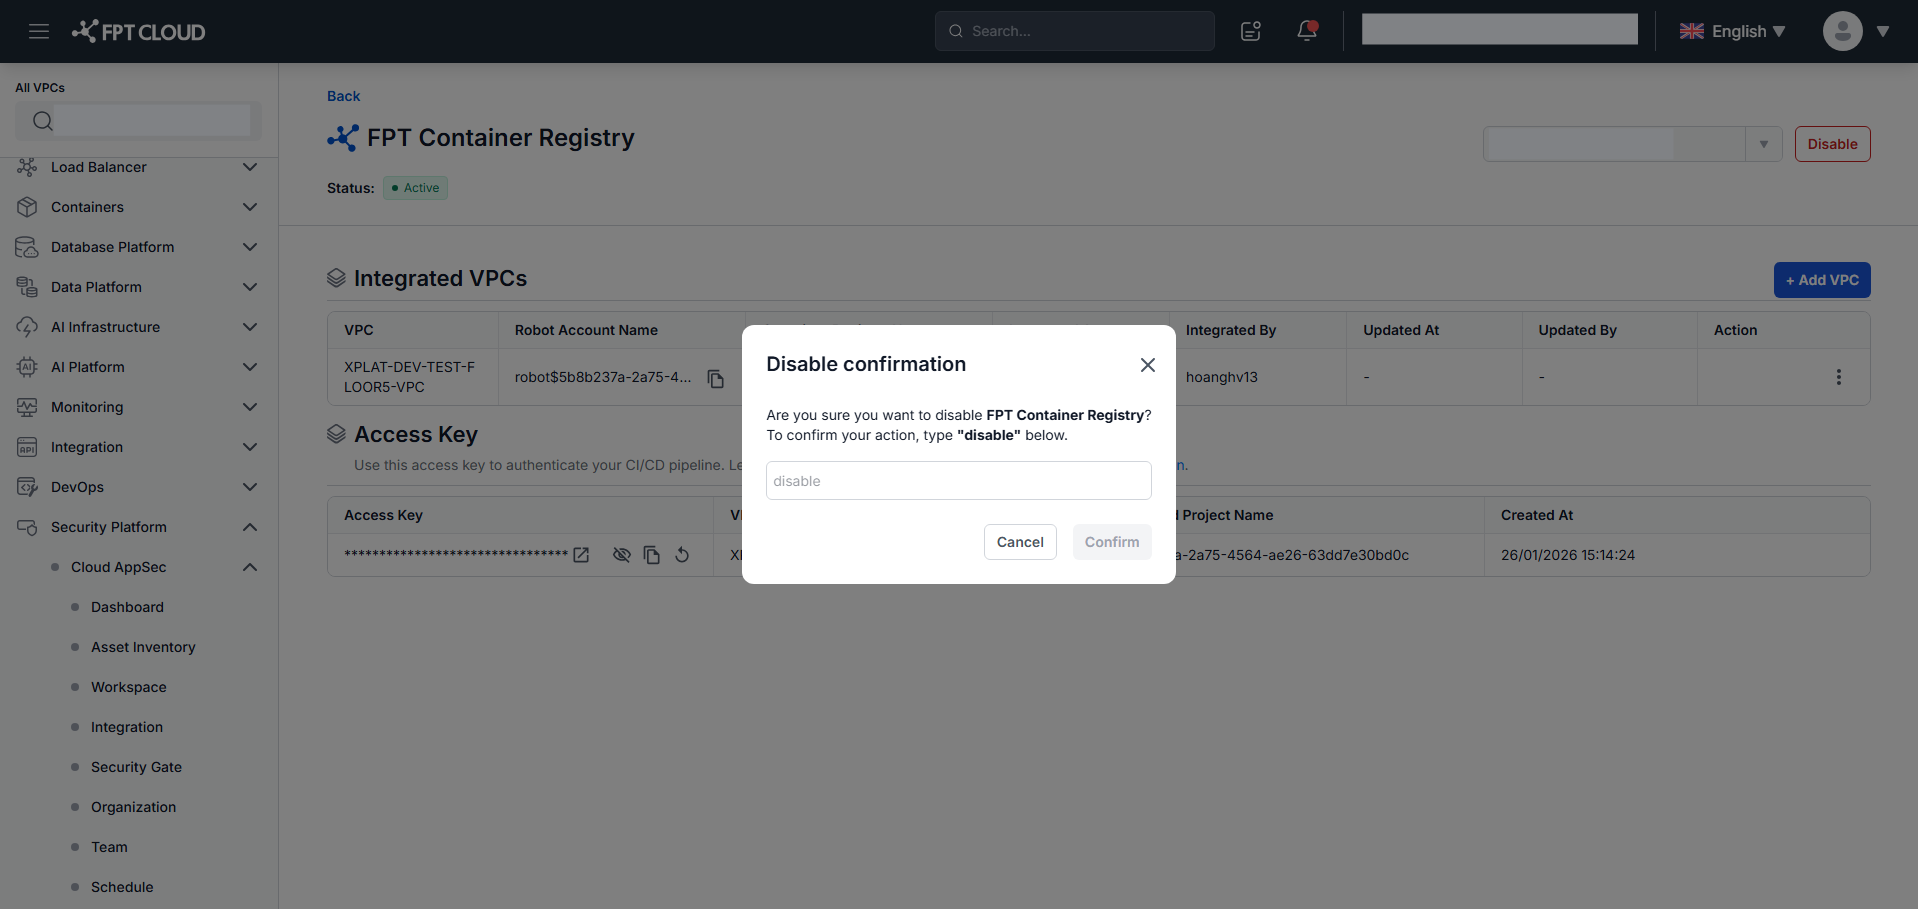
Step 1: Click Disable on the integration screen.
Step 2: Type disable and click Confirm.
Access key for CI/CD pipeline
In the integration screen, each VPC has an access key for CI/CD pipelines. You can copy or reset the access key.