GitLab Server integration
Only Org Admin and Team Manager have permission to edit the GitLab Server integration.
See permission details.
Configure GitLab Server
Step 1: After selecting an org/team, click GitLab Server to go to the integration screen.
Step 2: Enter the URL of your GitLab Enterprise instance. The Create a personal access token button is enabled after entering the URL.
Step 3: After configuring repository access, click Create a personal access token. You will be redirected to GitLab to create a token.
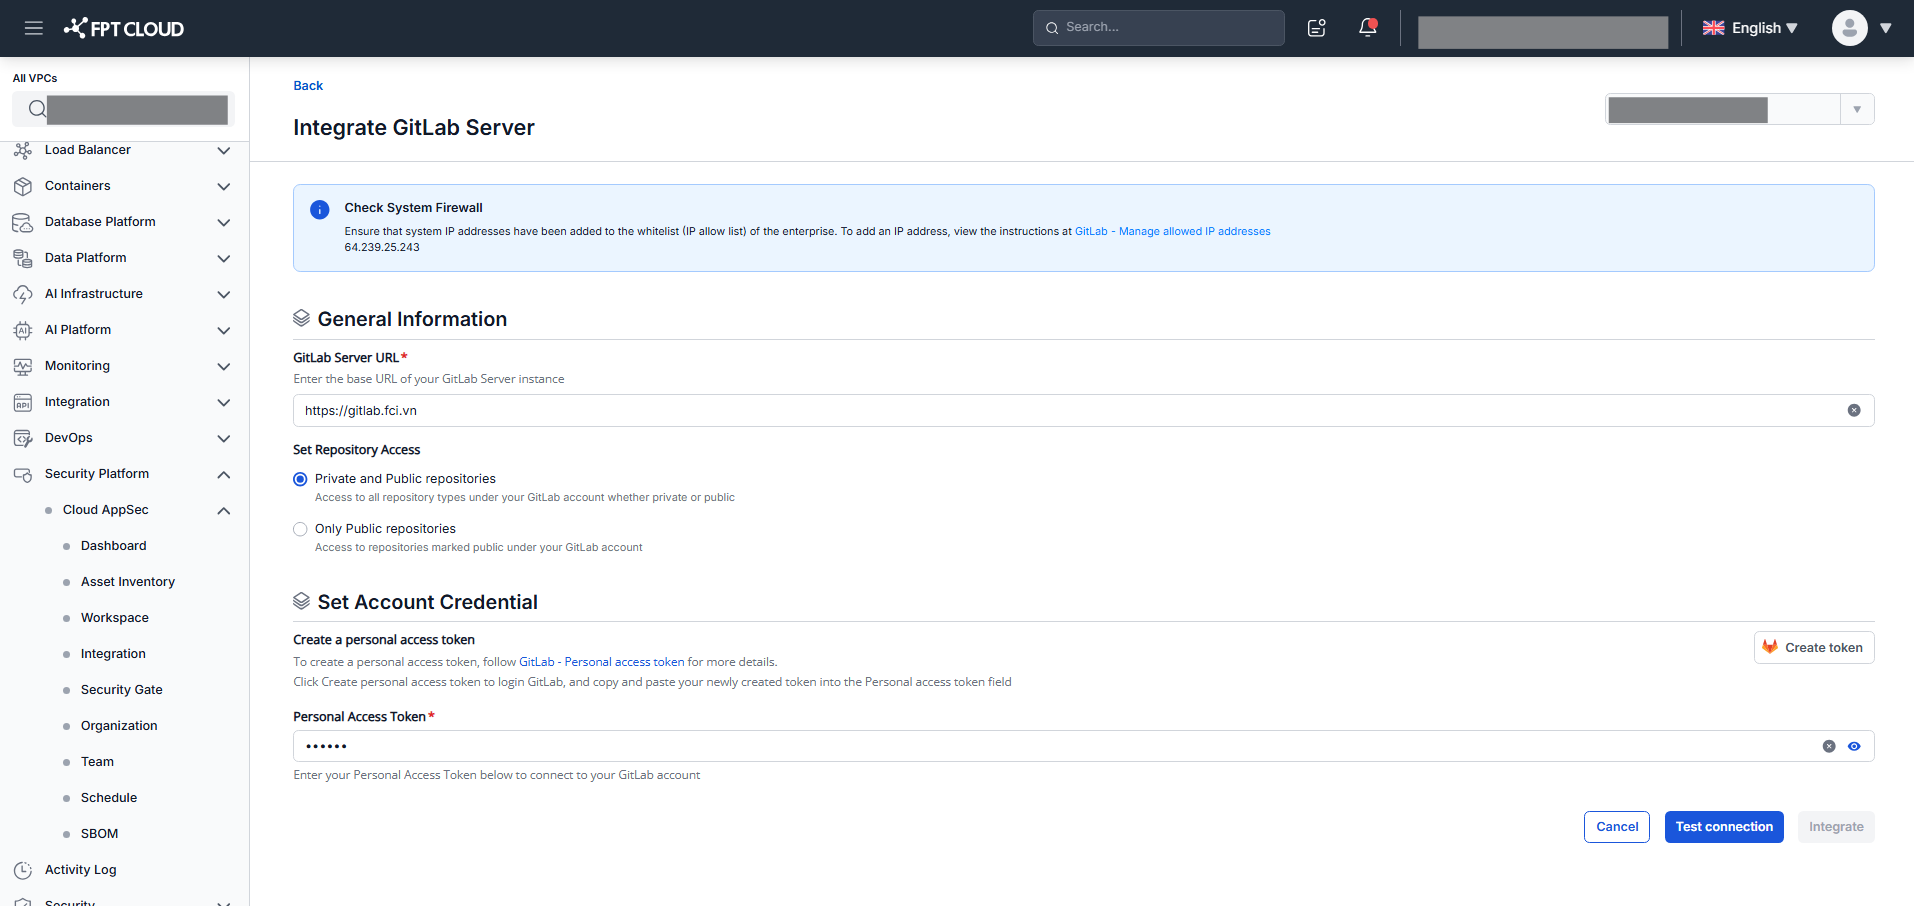
Step 4: On GitLab, fill in Token name and Token Description, then select read_api.


Step 5: Copy the personal access token.
Step 6: Return to FPT AppSec. Paste the Personal Access Token and click Test Connection.
The system validates required fields and the token. If successful, Test connect successfully is displayed. If it fails, Test connection Failed appears.
Step 7: Click Integrate.
View details
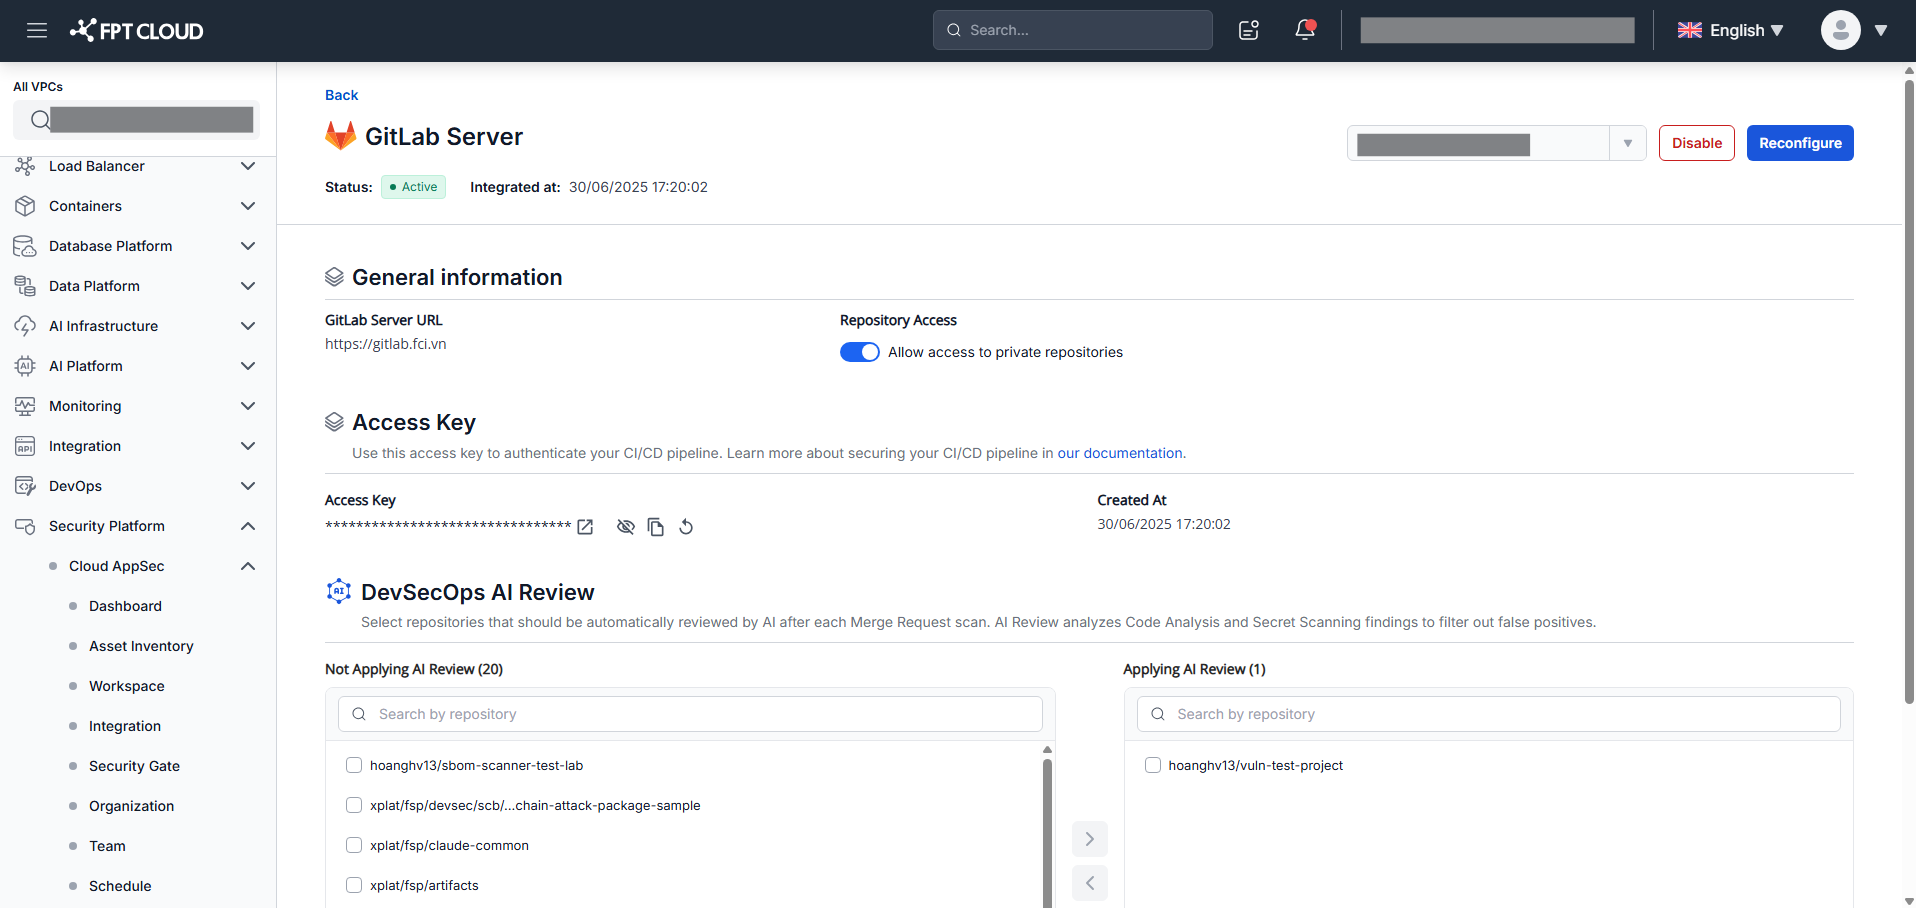
After selecting your org/team, click Configured GitLab Server to view the integration status, including Personal Access Token, Repository Access, Integrated at, and the Access Key for CI/CD integration.
You can also Reintegrate or Disable the integration from this screen.
Reconfigure GitLab Server
Click Reconfigure on the GitLab Server integration detail screen, then follow the same steps as the initial integration.
Disable GitLab Server integration
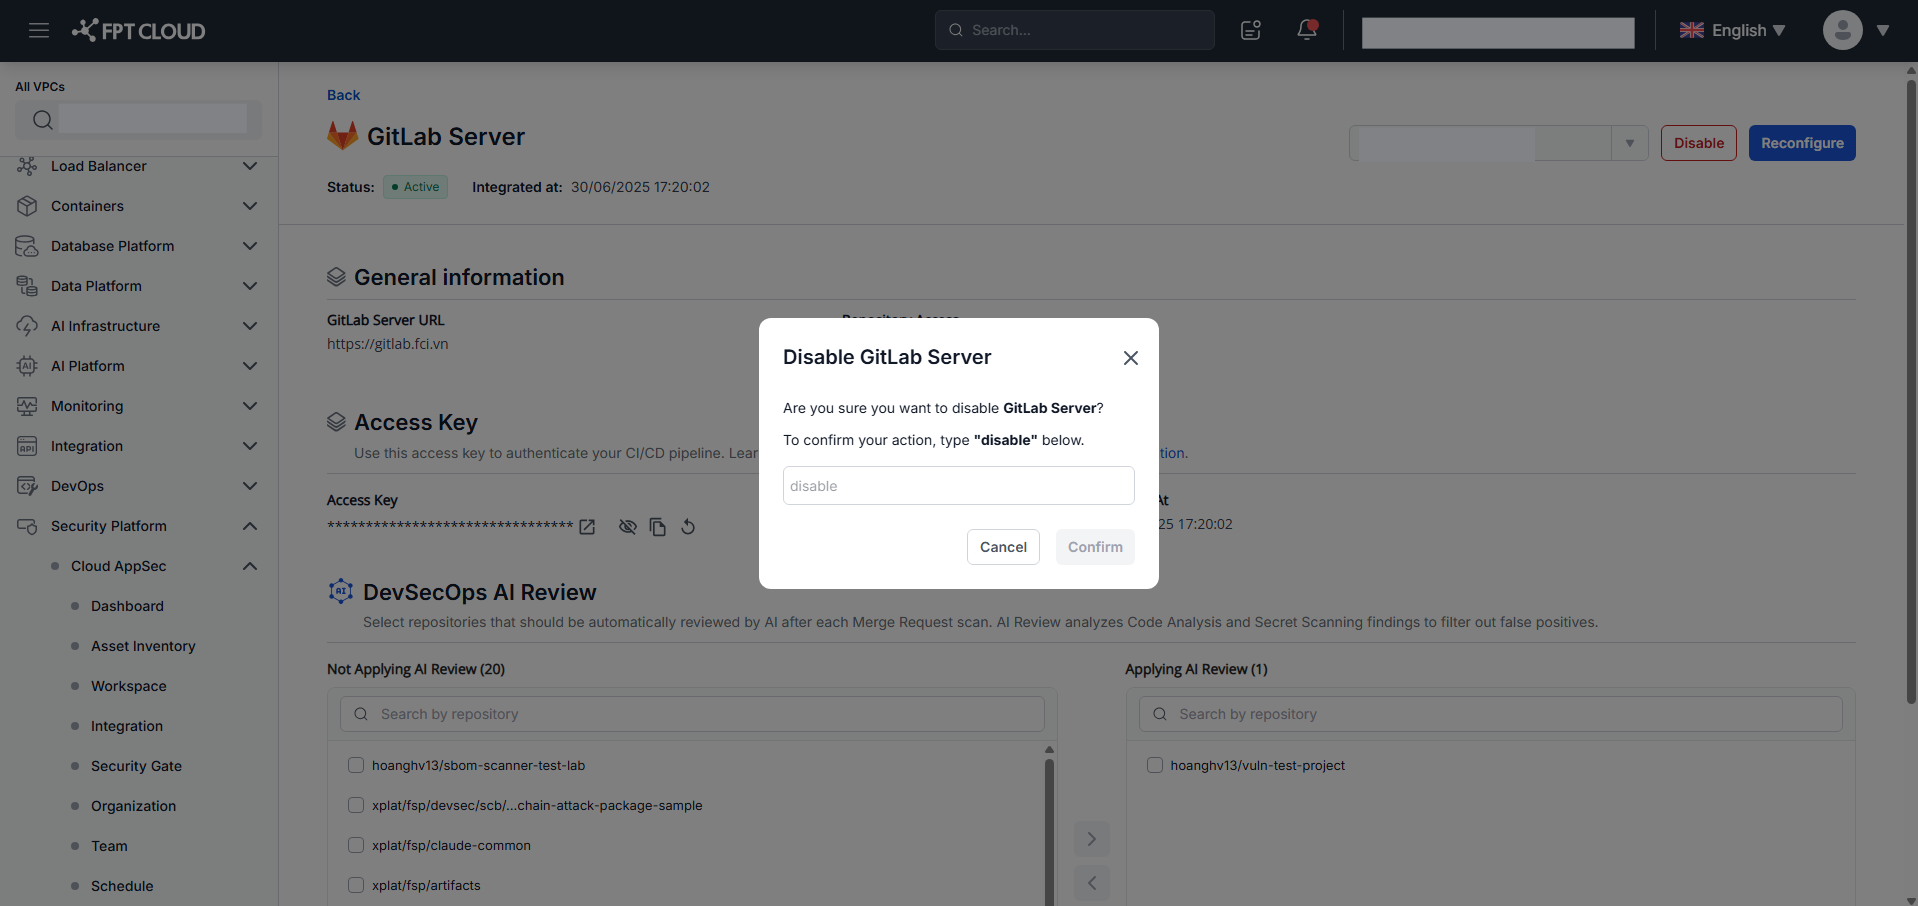
Step 1: Click Disable on the GitLab Server integration detail screen.
Step 2: Type disable and click Confirm.
Access key for CI/CD pipeline
In the detail screen you will find an access key to use in your CI/CD pipeline. See the CI/CD integration guide.
You can copy or reset the access key for CI/CD pipeline integration.