Harbor integration
Create a Robot Account in Harbor
Step 1: Go to your Harbor Server and select Administration > Robot Accounts.
Step 2: Click New Robot Account.

Step 3: Fill in Name, Description, and Expiration time, then click to proceed.

Step 4: Select the required system permissions.

Step 5: Select the projects the Robot Account needs access to and assign Permissions. Ensure the Robot Account has List, Read Artifacts and List, Pull, Read Repository permissions.


Step 6: After filling in all information, click Finish.

Step 7: After the Robot Account is created, copy the Robot Account name and secret for use in the FPT Portal integration screen.

Integrate Harbor
Only Org Admin and Team Manager have permission.
See permission details.
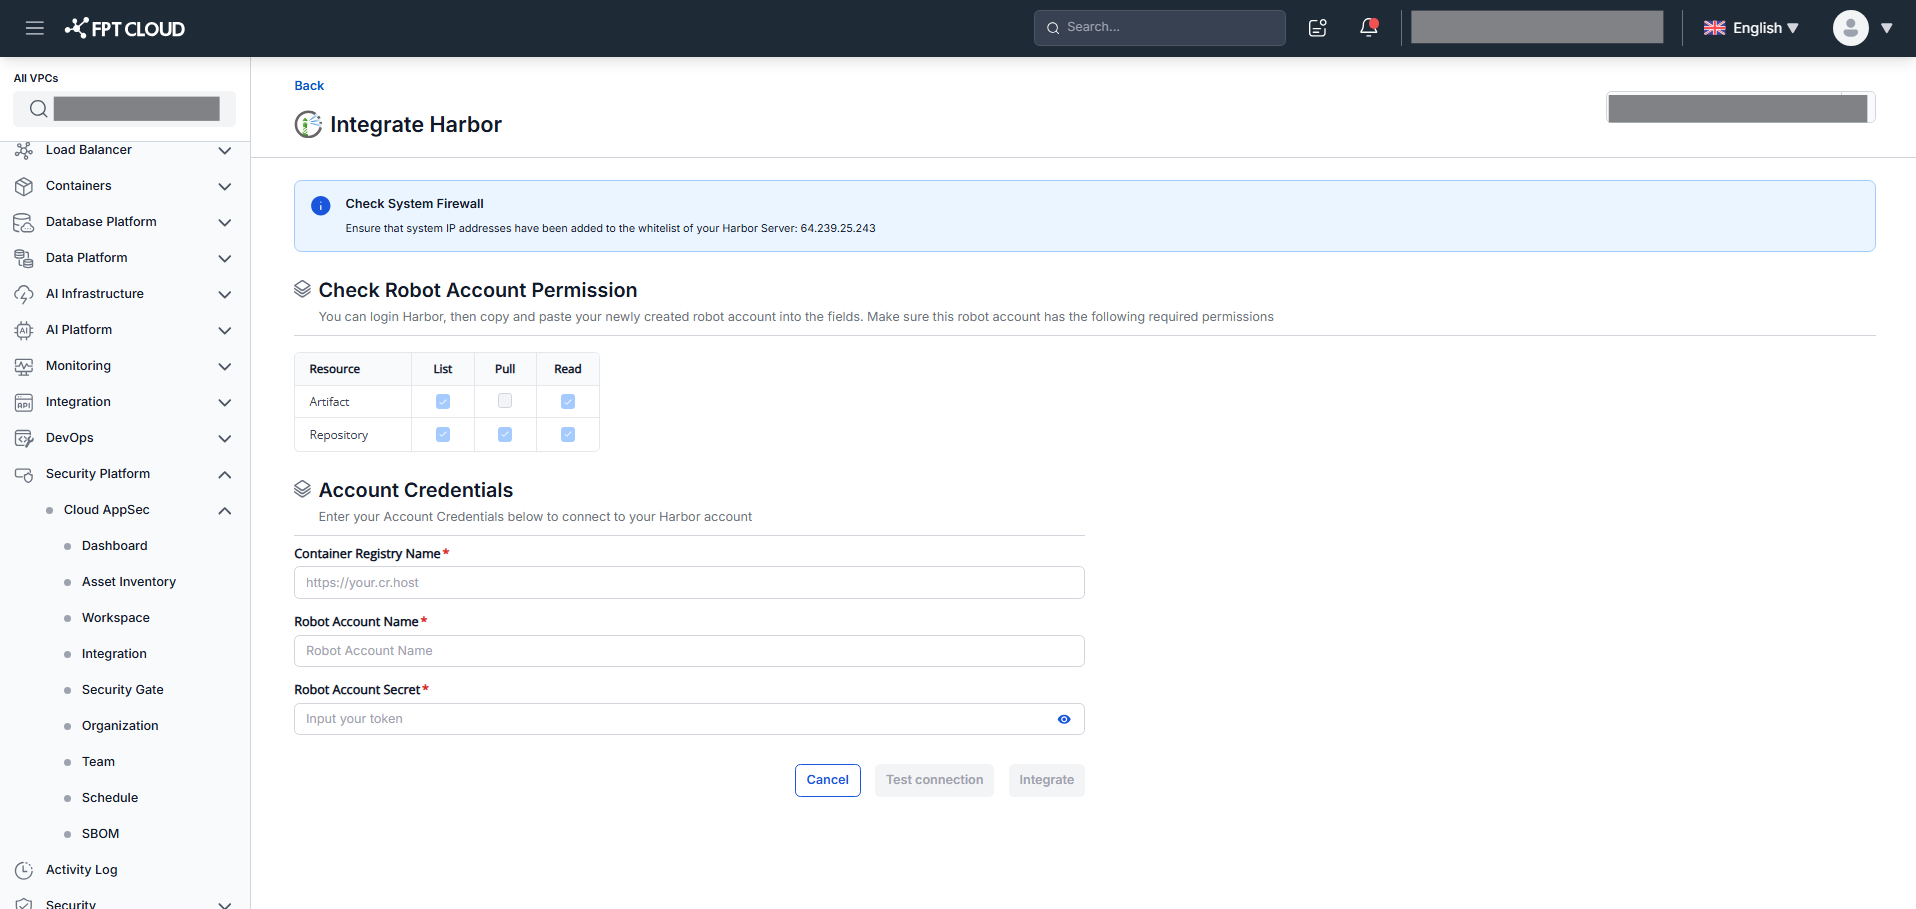
Step 1: After selecting an org/team, click Harbor to go to the integration screen.
Step 2: Enter the Container Registry Name (Harbor server URL), Robot Account Name, and Robot Account Secret.
Step 3: After filling in all fields, click Test Connection. If valid, the system shows Connected successfully and enables the Integrate button.
Step 4: After a successful connection test, click Integrate.
View Harbor integration details
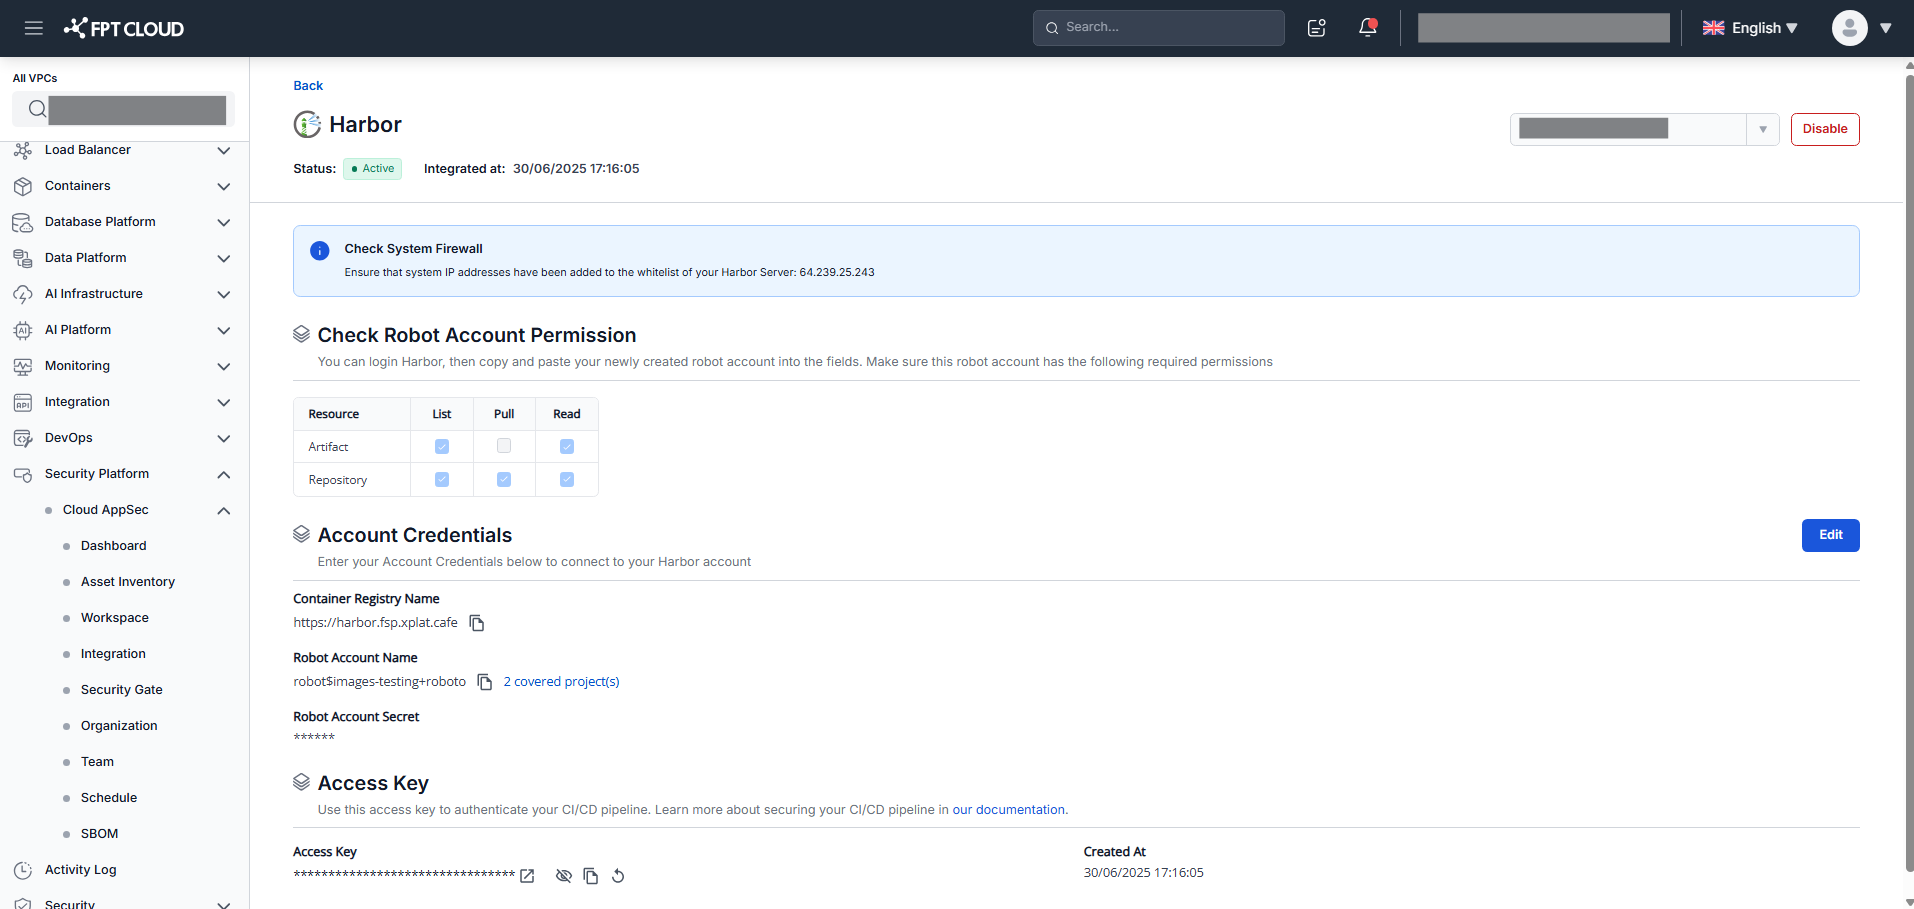
Only Org Admin and Team Manager can view integration details.
After selecting your org/team, click Configured Harbor to view the integration status, including Container Registry Name, Robot Account Name, and Access Key for CI/CD integration.
You can Reintegrate or Disable the Harbor integration.
Reintegrate Harbor
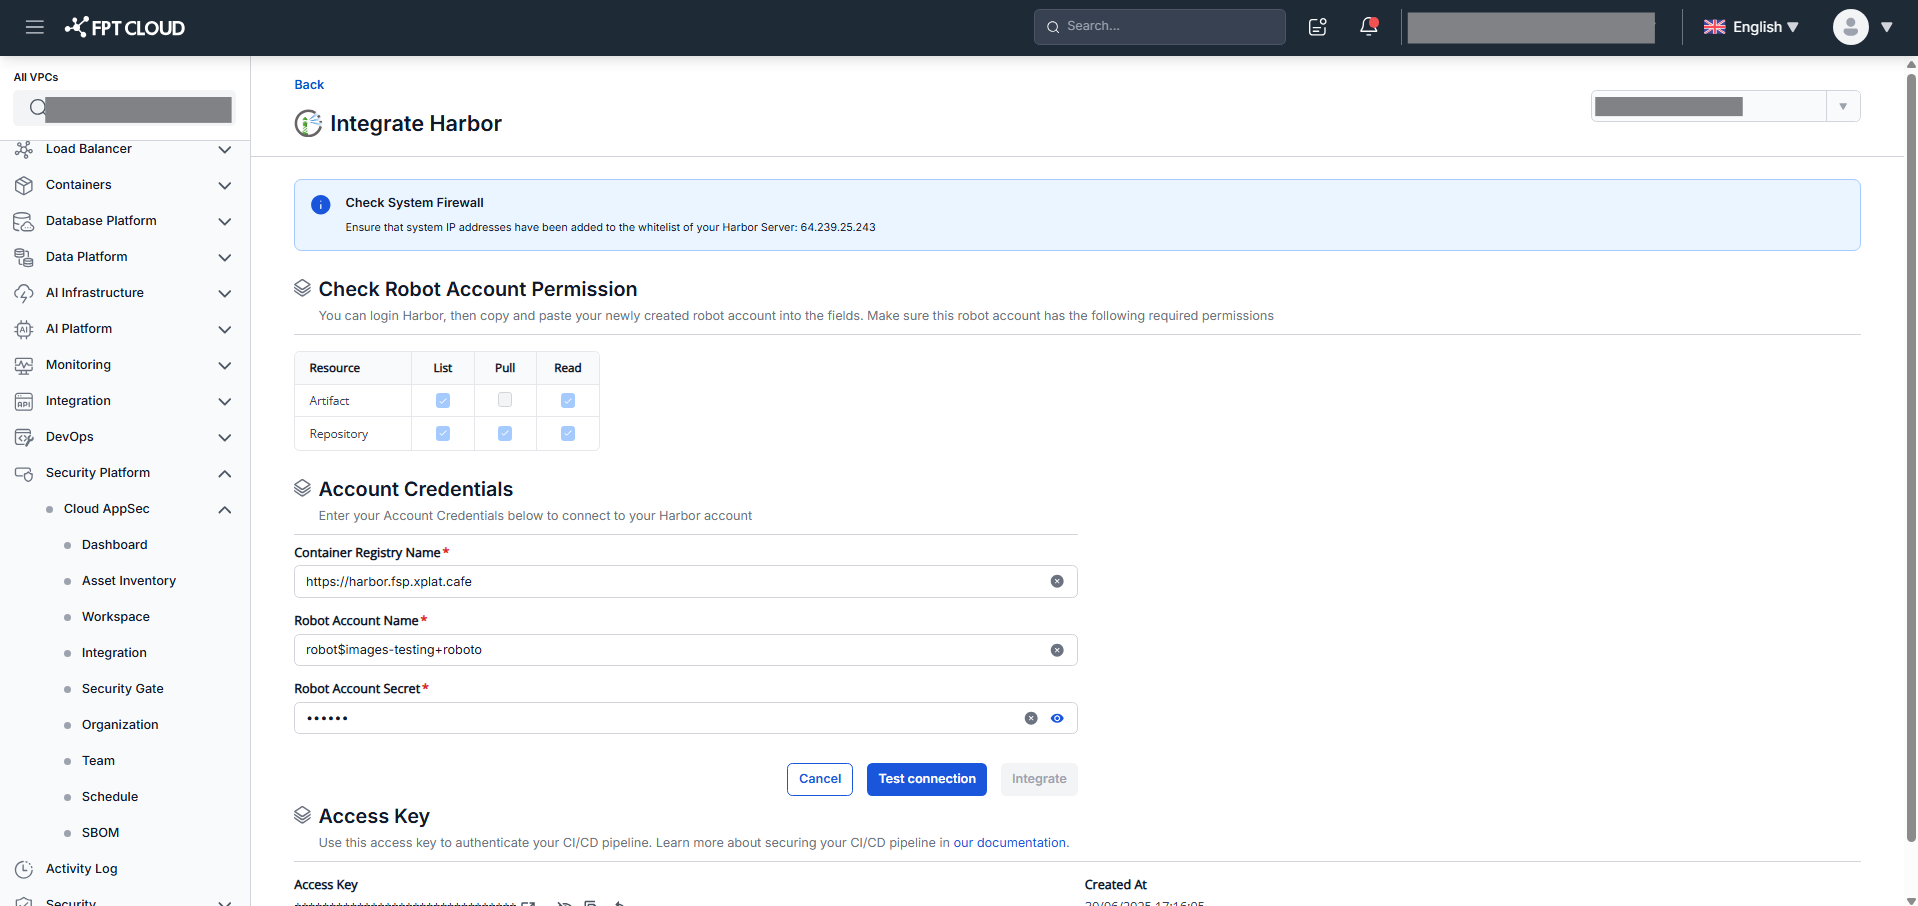
Go to the Harbor integration detail screen and click the Edit icon next to Account Credentials, then follow the same steps as Integrate Harbor.
Disable Harbor integration
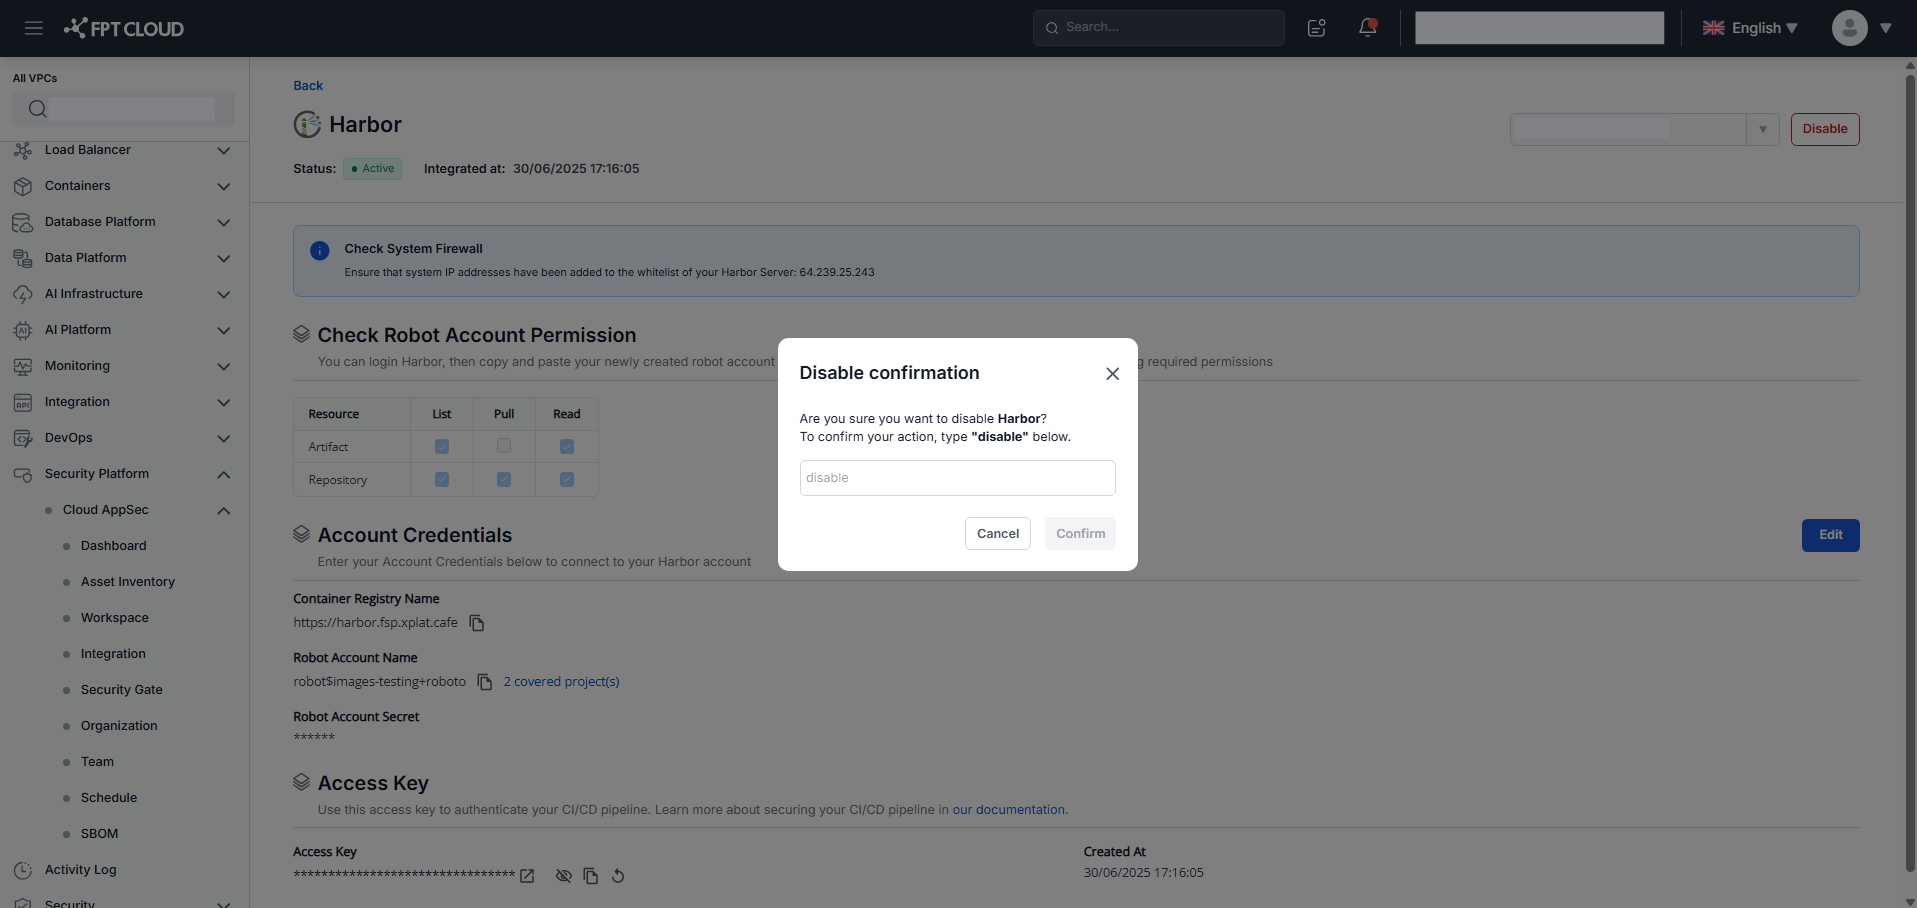
Step 1: Click Disable on the Harbor integration detail screen.
Step 2: Type disable and click Confirm.
Access key for CI/CD pipeline
In the detail screen you will find the access key to use in CI/CD pipelines. You can copy or reset the access key.