Create a schedule
Step 1: Open the creation screen.
Go to the Schedule menu — the system navigates to the Schedule Management screen. Click Create Schedule.
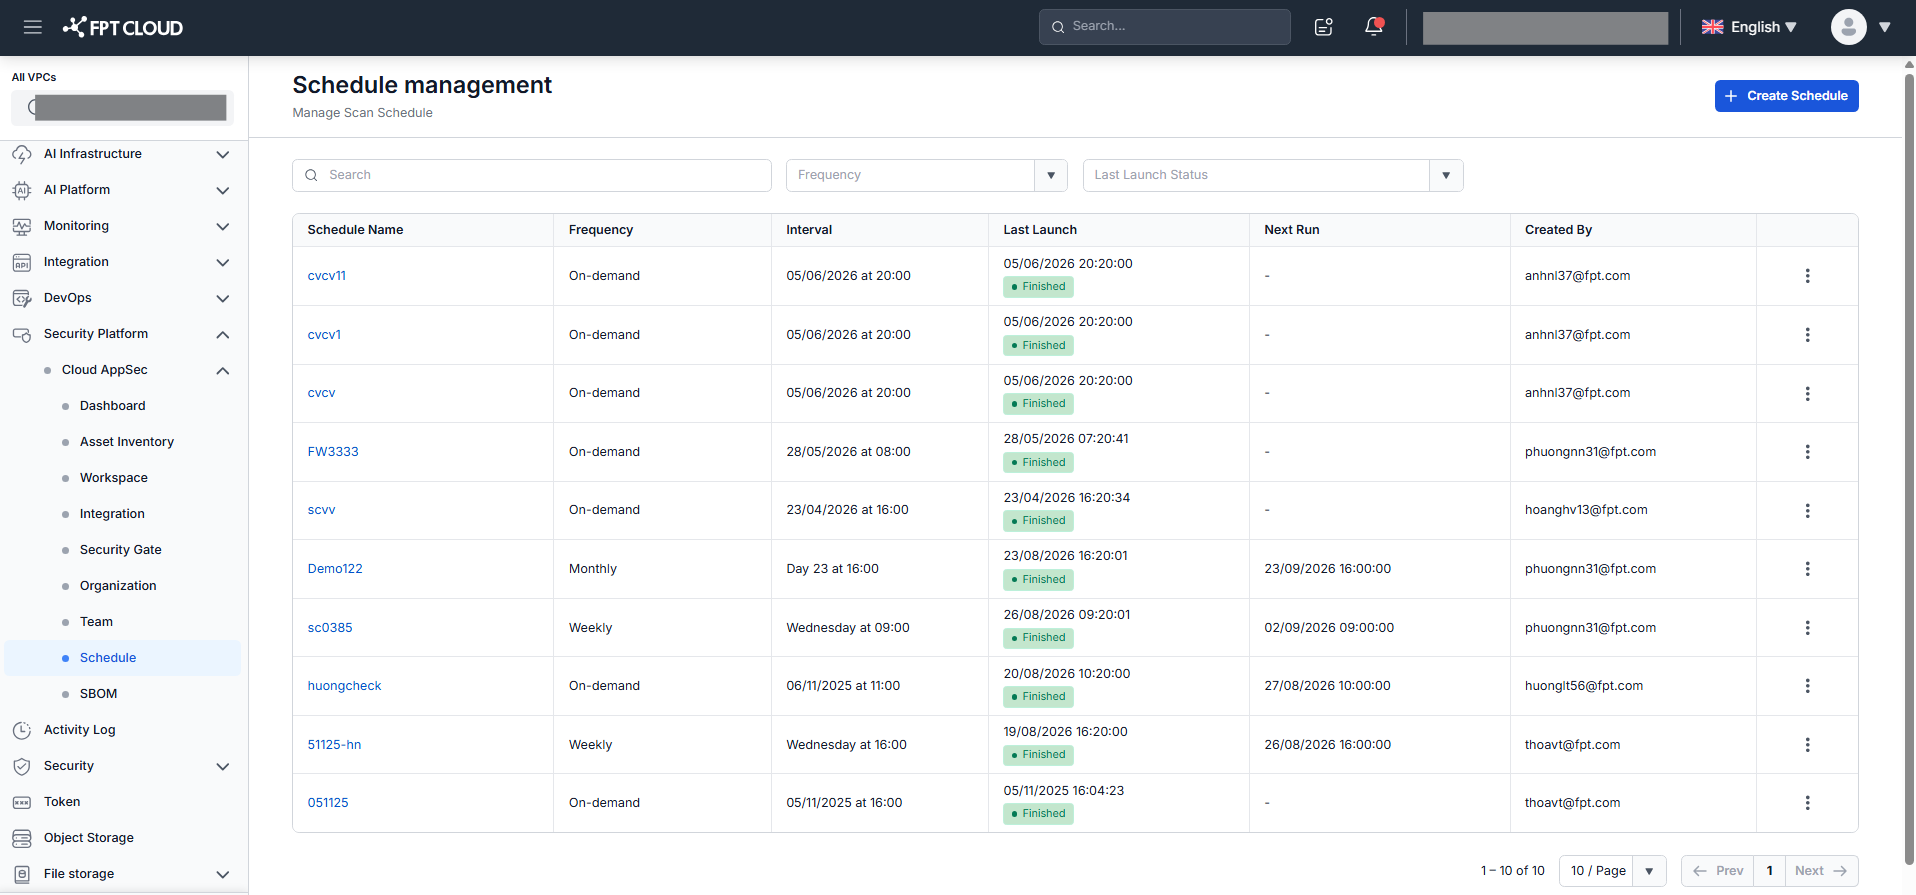
The creation screen appears with fields for General information and Scope configuration.
Step 2: Fill in the general information fields.
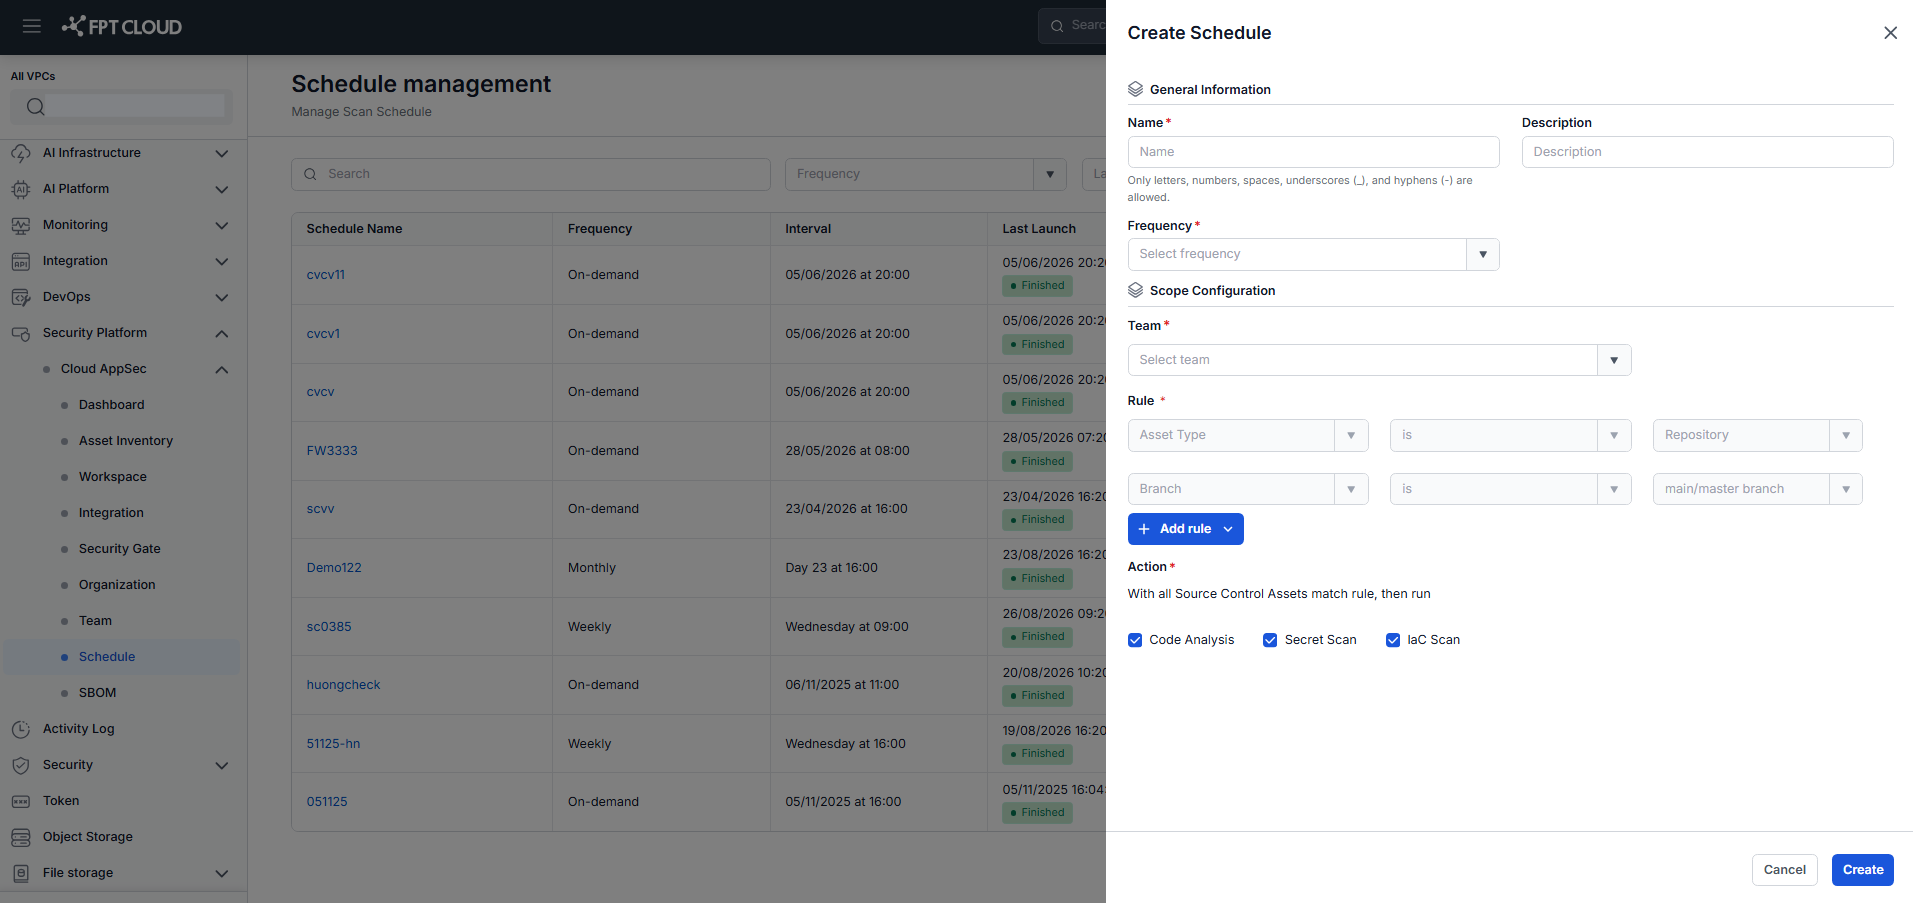
- Name (required): Enter a unique name for the schedule.
- Description (optional): Enter a short description (maximum 255 characters).
- Frequency (required): Select how often the schedule runs:
- On-demand — Runs manually once at a selected date and time (must be after today).
- Weekly — Select the day of the week (Monday – Sunday) and the time to run.
- Monthly — Select the day (1–31) and time, or choose Last to run on the last day of the month.
Step 3: Configure the scope.
- Select Team (required): Choose the team to apply the schedule to.
- Asset Type: In the current version, rules apply to Repository assets only. Not editable.
- Branch: Applies to main/master branches only.
- Source: Select the repository source (GitHub / GitLab / GitLab Server). If not selected, all sources are scanned.
- Last Scan: Define a time window — only repos not scanned within the last X days are included. If not selected, all eligible repos are scanned.
- Add rule: Click to add an additional rule (Source or Last Scan). Disabled once all rule types have been added.
Step 4: Select scan types in the Action section.
Choose one or more: Code Analysis, Secret Scan, IaC Scan. At least one must be selected. All three are selected by default.
Step 5: Click Create to save.
On successful creation, the system returns to the schedule list and displays "Created schedule successfully".