Configure Security Gate
You can enable Security Gate, adjust security thresholds for each scan type, and disable it when no longer needed. This page walks you through each step.
Prerequisites
- Logged in to ASPM with workspace admin permissions
- Familiar with how Security Gate works — see What is Security Gate
Open the Security Gate screen
- Select Security Gate in the navigation menu.
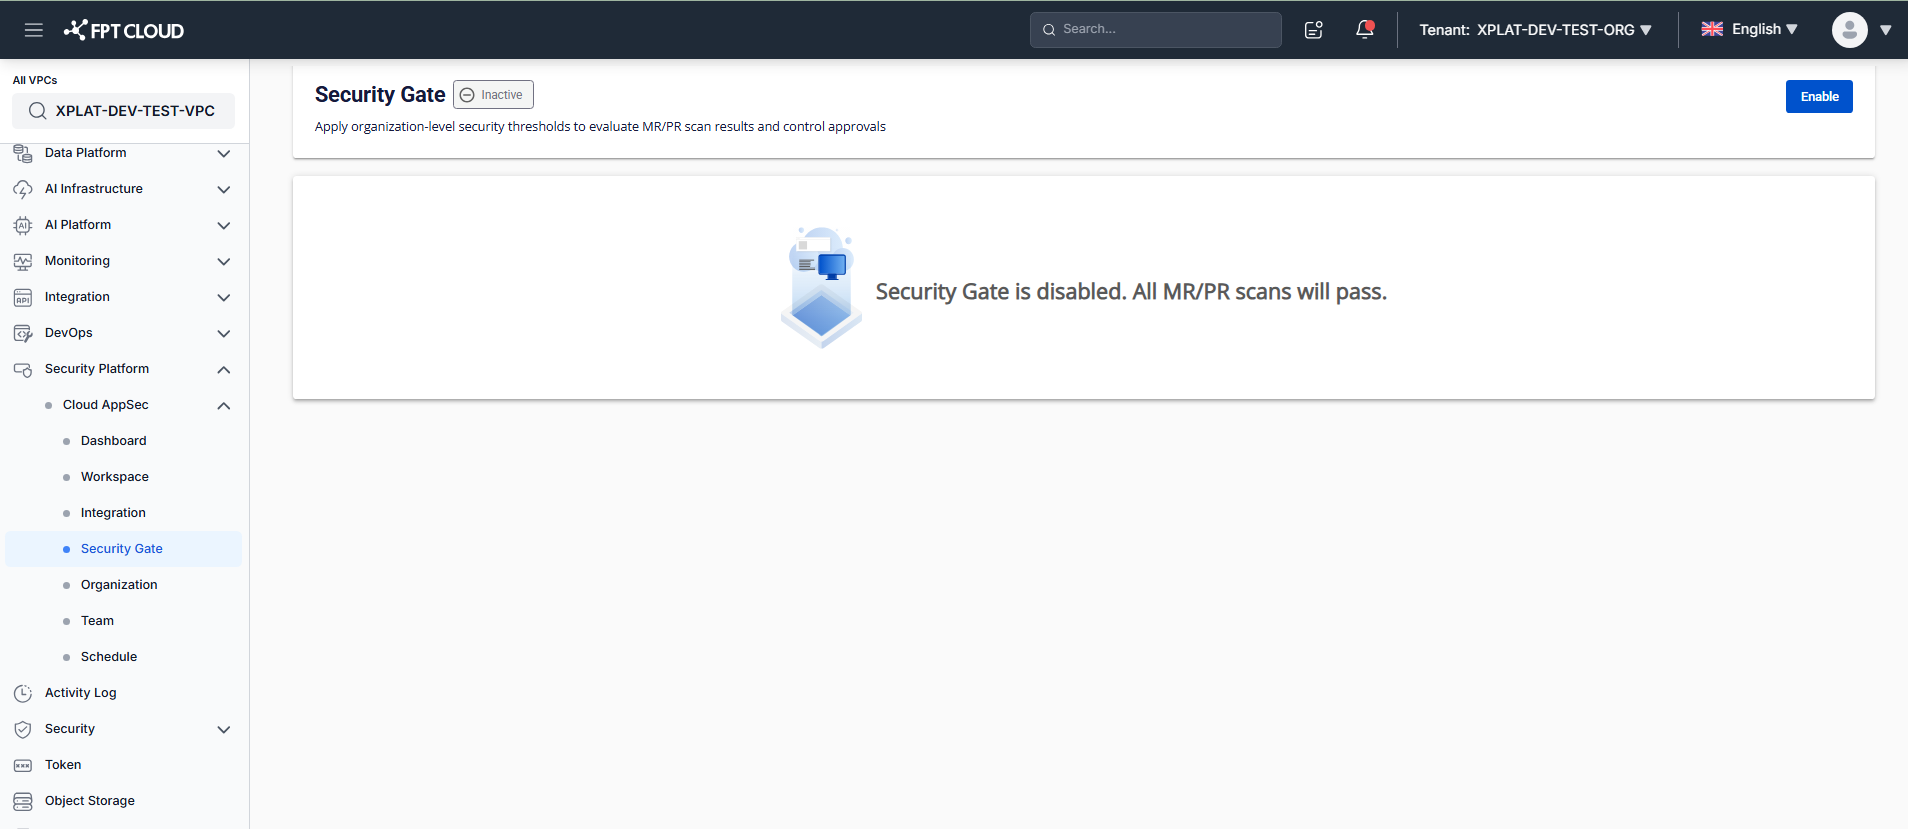
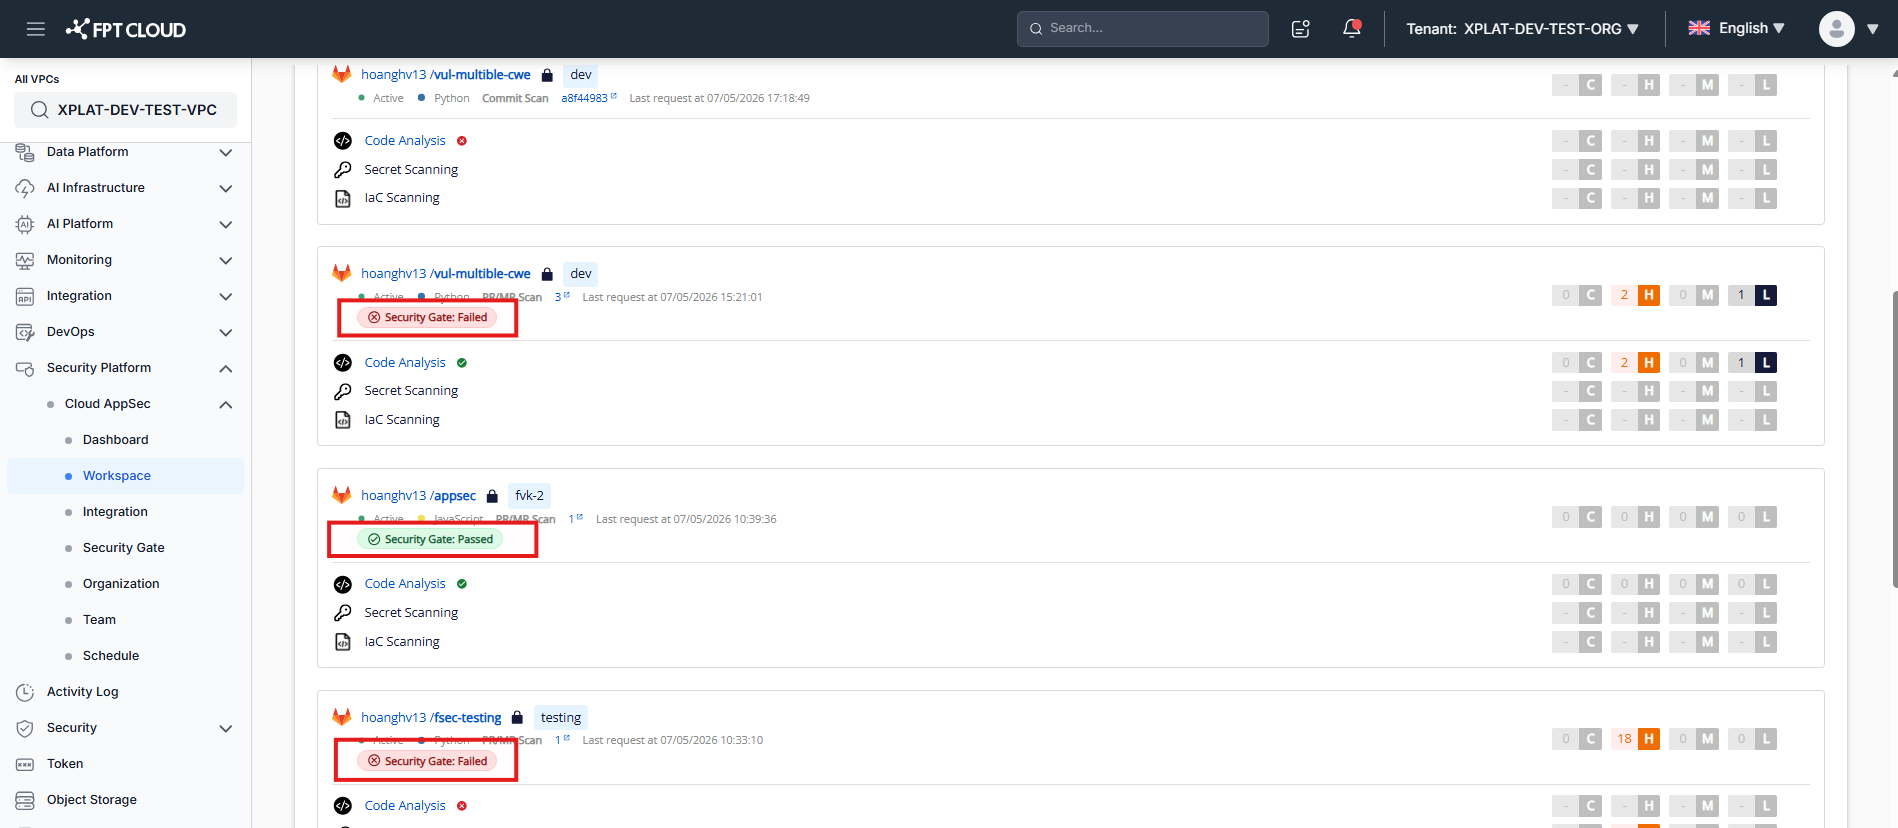
The screen shows the current Security Gate status:
Inactive state — all MR/PR scans pass:
Active state — Security Gate is being enforced:
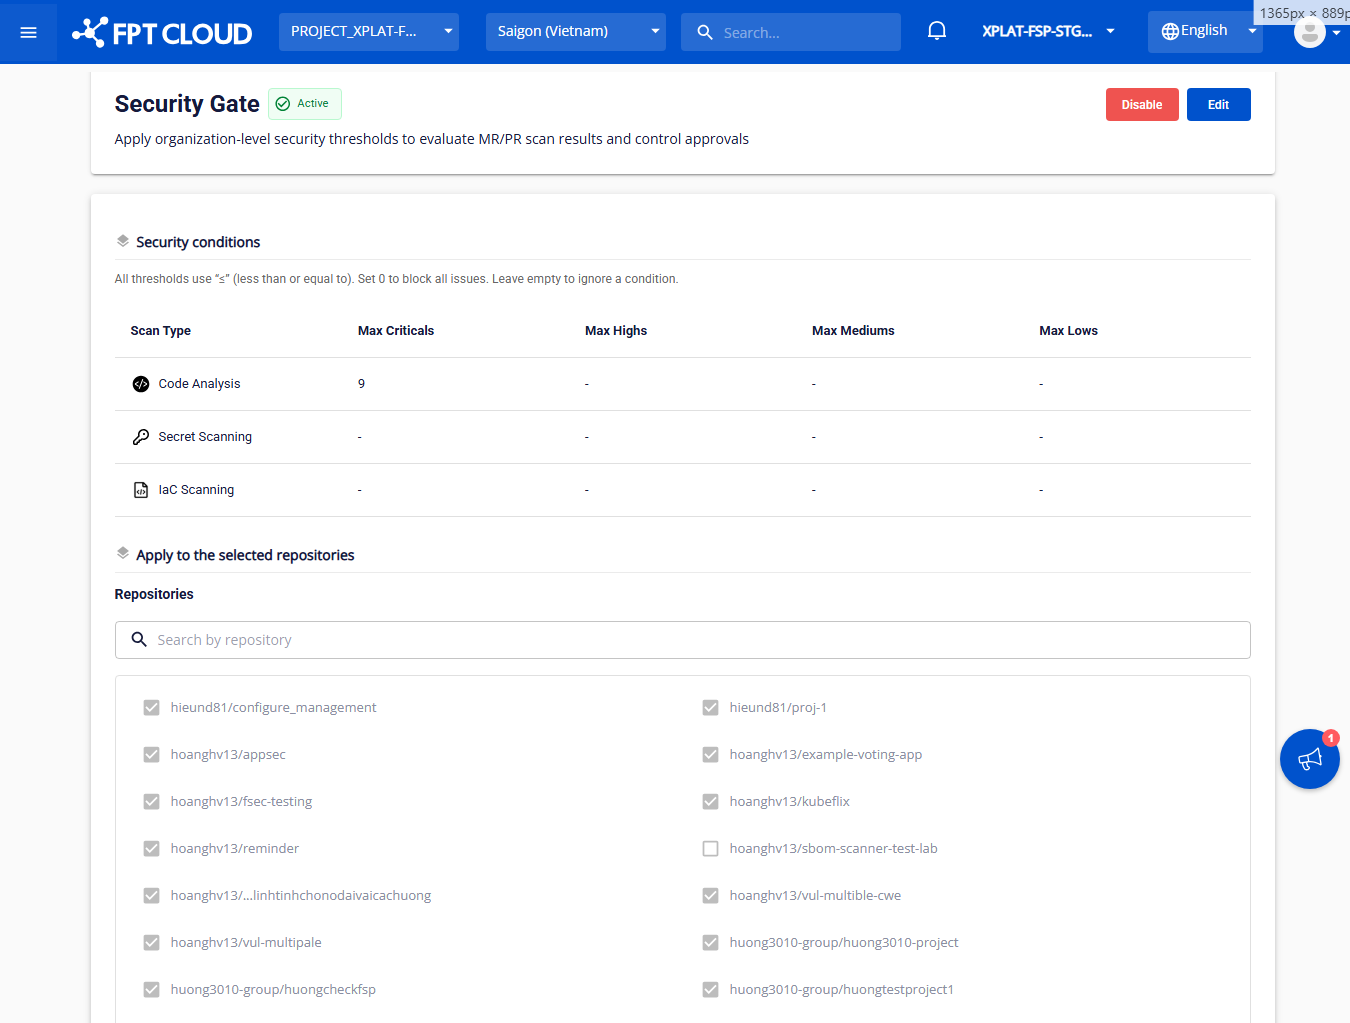
The screen displays:
- Security Conditions — the configured security conditions
- The list of repositories with Security Gate applied
Enable Security Gate
- Click Enable on the Security Gate screen in Inactive state.
- Confirm in the popup that appears.
Security Gate switches to Active state. From this point on, MR/PR scans are evaluated against the configured Security Conditions.
View and edit Security Conditions
- Click Edit on the Security Gate screen.
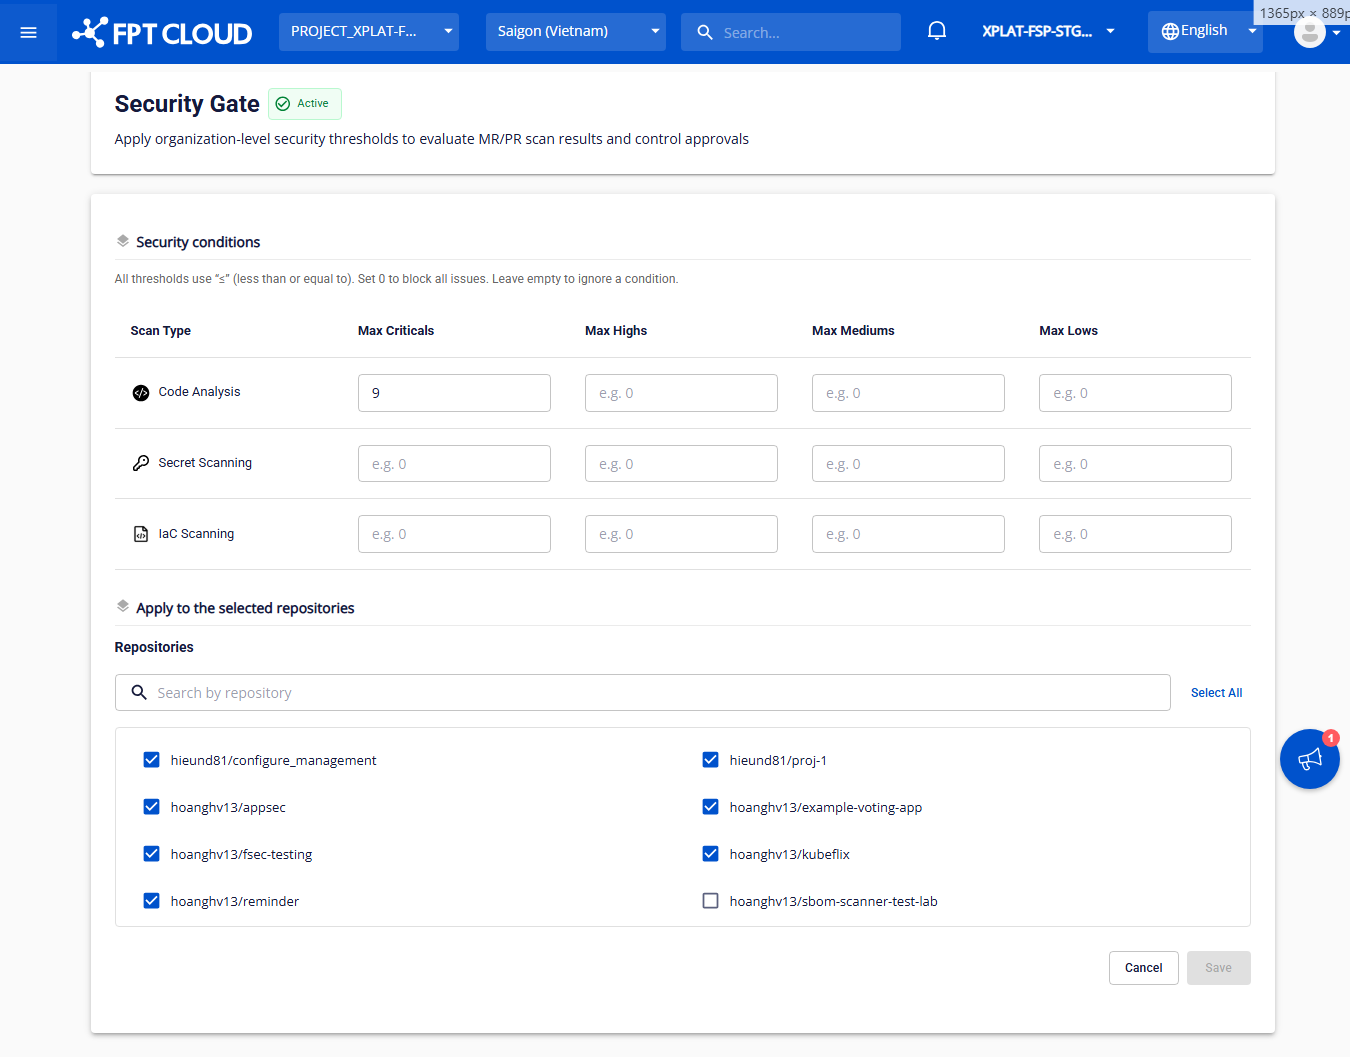
Configuration fields and the repository list become editable.
- Adjust the thresholds for each scan type (Code Analysis, Secret Scanning, IaC Scanning):
- Enter a non-negative integer for Max Criticals, Max Highs, Max Mediums, Max Lows
- Leave a field empty to skip that severity condition
- Select or deselect repositories to apply Security Gate. Use Select All to select all repositories at once, then deselect any you want to exclude. Use the search bar to filter by name or repository path.
- Click Save to apply the configuration.
Changes take effect on the next MR/PR scan.
Setting a severity threshold to 0 blocks all issues at that severity — an MR/PR will FAIL as soon as a single matching Critical/High/Medium/Low issue is found.
Disable Security Gate
- Click Disable on the Security Gate screen in Active state.
- Confirm in the popup that appears.
Security Gate switches to Inactive state. All MR/PR scans will pass without checking Security Conditions.
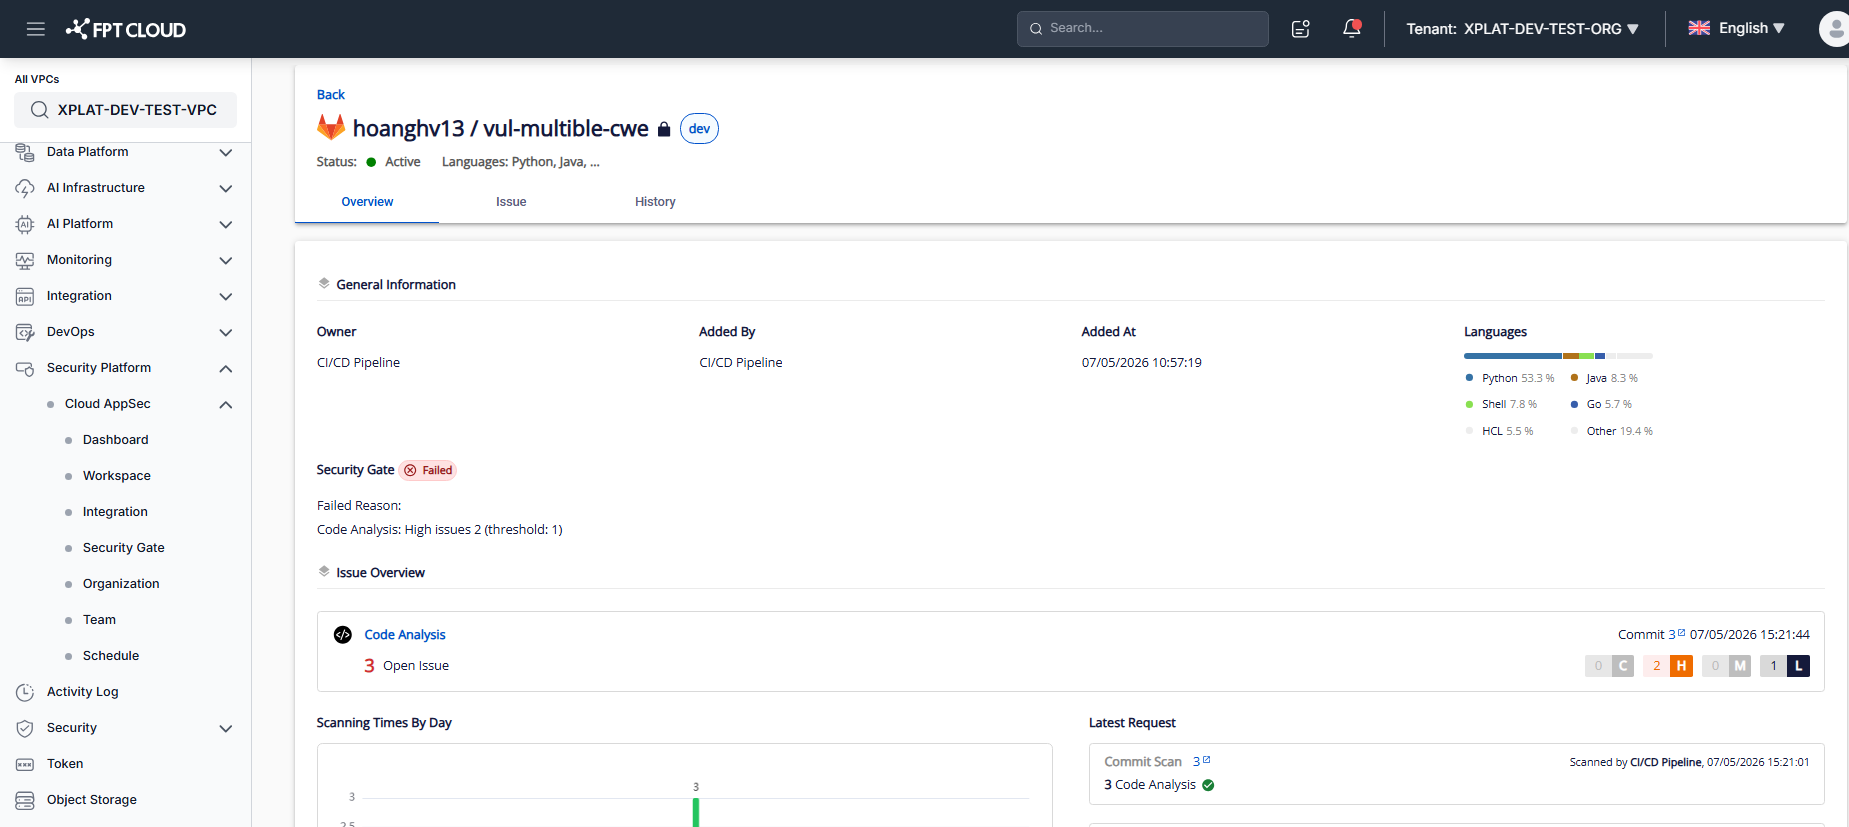
View Security Gate results
After Security Gate is enabled and an MR/PR scan is performed, the PASS/FAIL result is returned through the API in your CI/CD pipeline.
You can also view the Security Gate status in two places in the UI:
Asset Management screen:
Asset Detail screen → Overview tab: