Security policies
The Security Policies tab lets FSP Admins configure multi-layer security for a domain through a 3-step pipeline evaluated left to right: IP Rules → Rate Limit → WAF/OWASP. All changes accumulate as a draft and are applied only when you click "Save Changes".
The Security Policies tab is only accessible when WAF is On. If WAF is Off, the tab area is replaced by a "WAF is turned off" warning panel — re-enable WAF first.
Access security policies
- From Domain Details, click the "Security Policies" tab. The pipeline header "How Rules Are Evaluated" appears with 3 step buttons and "Discard" / "Save Changes" buttons (disabled when no changes exist).
Rule evaluation order (left to right, first match wins):
IP Rules → Rate Limit → WAF / OWASP (Custom → FPT Managed → OWASP CRS) → Origin
- IP Allow → bypasses Rate Limit and WAF entirely; request goes to Origin immediately
- IP Block → returns 403; stops evaluation
- Rate Limit match → Block (403) or Challenge (Browser Verification)
- WAF/OWASP match → Block / Allow / Challenge / Log only
Step 1 — IP Rules
- Click the "1. IP Rules" step button (active by default when the tab opens). The IP Rules table appears.
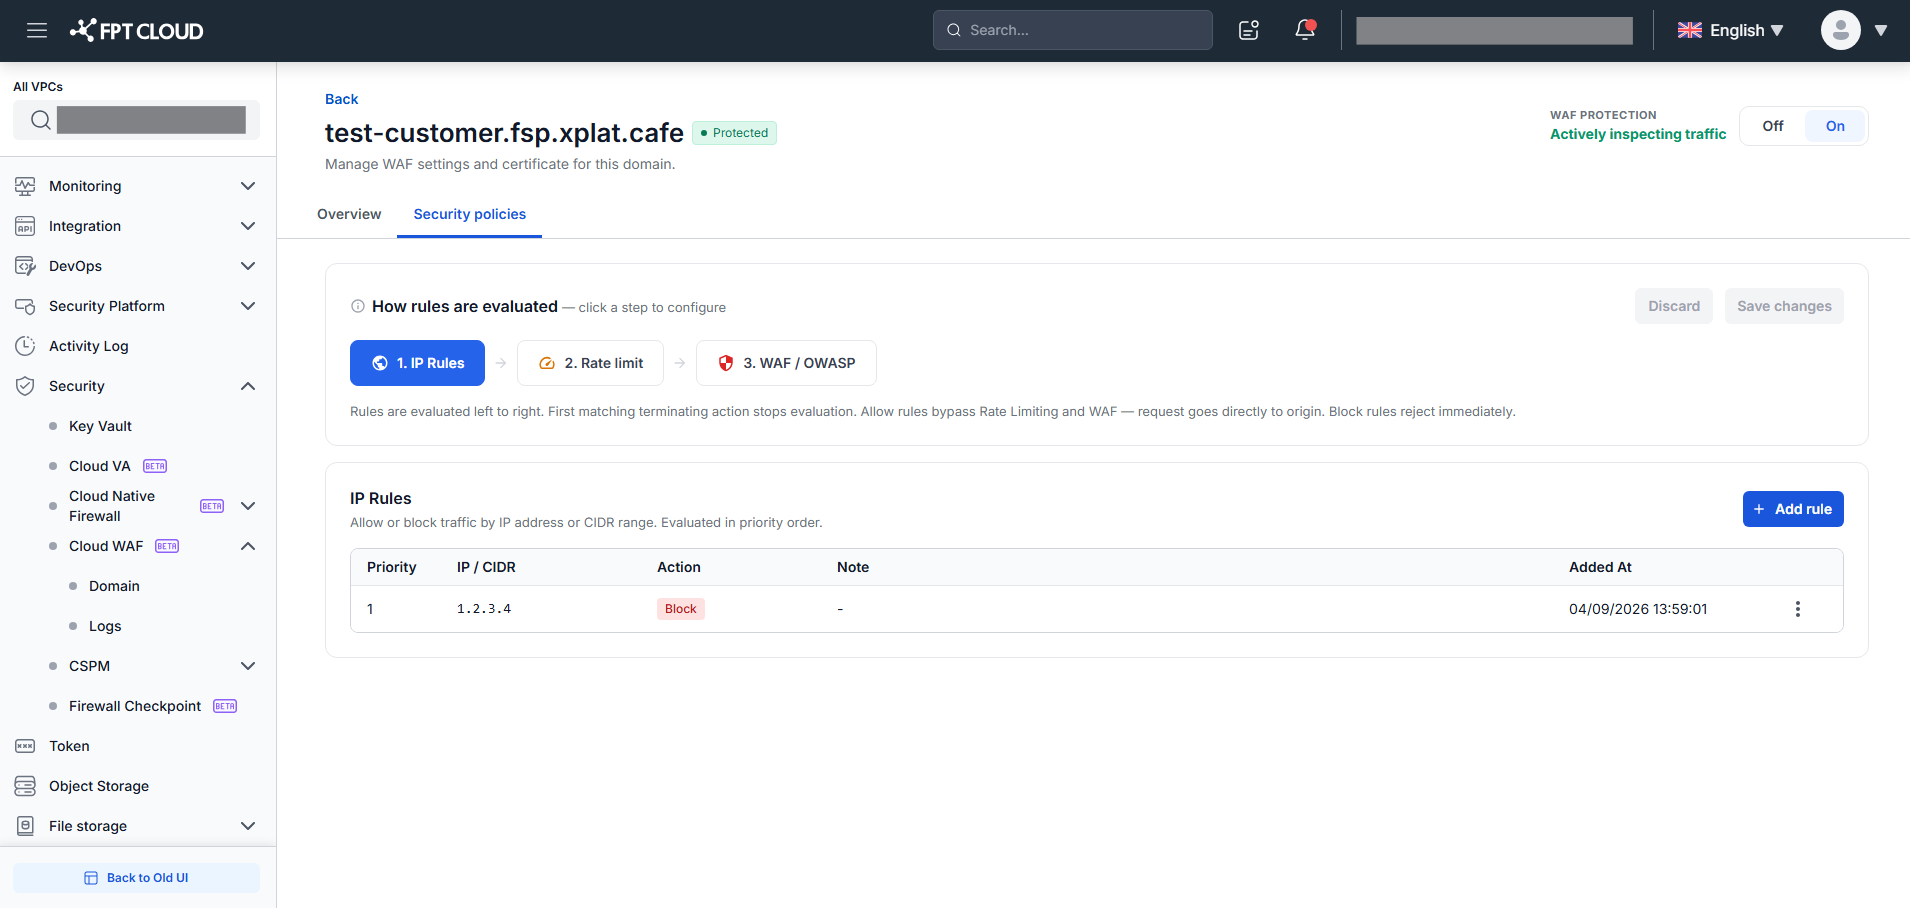
The table shows: Priority · IP/CIDR · Action (Allow = green / Block = red) · Note · Added At — sorted by Priority ascending (lower number = evaluated first).
Add an IP rule
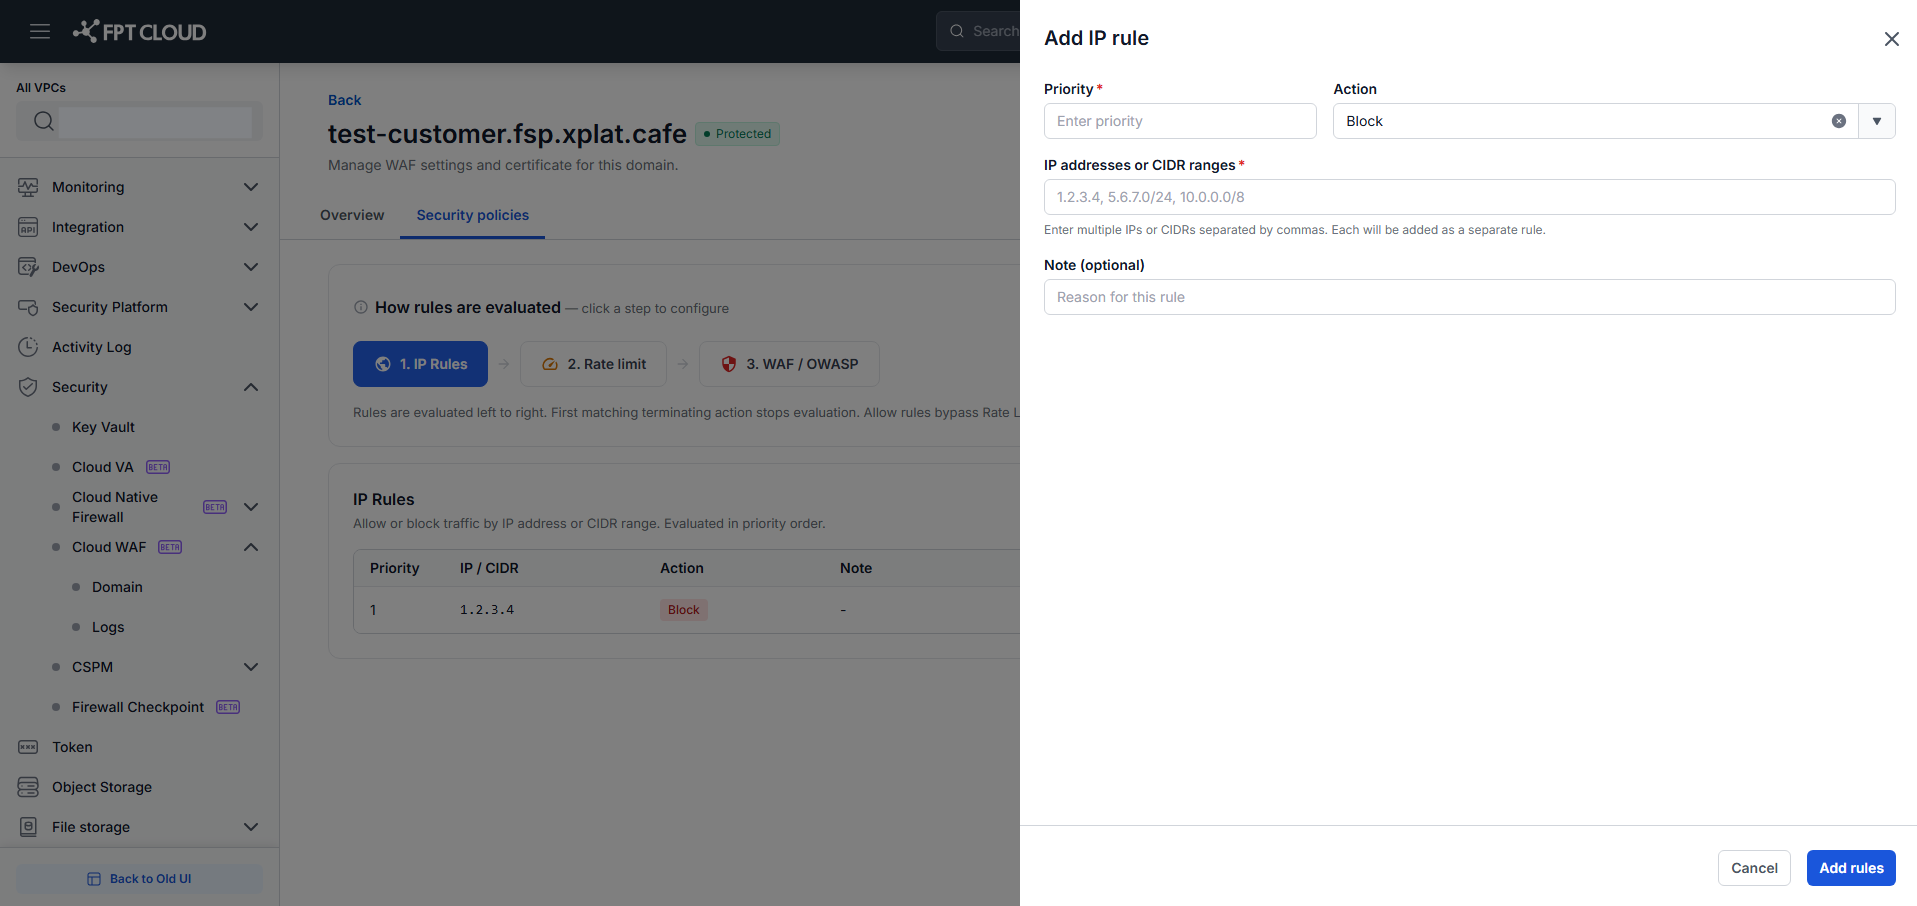
- Click "Add IP Rule" → the dialog opens.
-
Fill in the fields:
- Priority (required) — positive integer; lower = higher priority. Must be unique.
- IP addresses or CIDR ranges (required) — one or more values separated by commas (e.g.,
1.2.3.4, 10.0.0.0/8). Each value creates a separate rule. IPv4 and CIDR IPv4 only. - Action —
Block(default) /Allow - Note (optional) — description of the rule's purpose (e.g., "Block known malicious range")
-
Click "Add IP Rule" → rules are added to the draft table; dialog closes.
Edit an IP rule
- Click ⋮ (More actions) → Edit → the Edit dialog opens with pre-filled data.
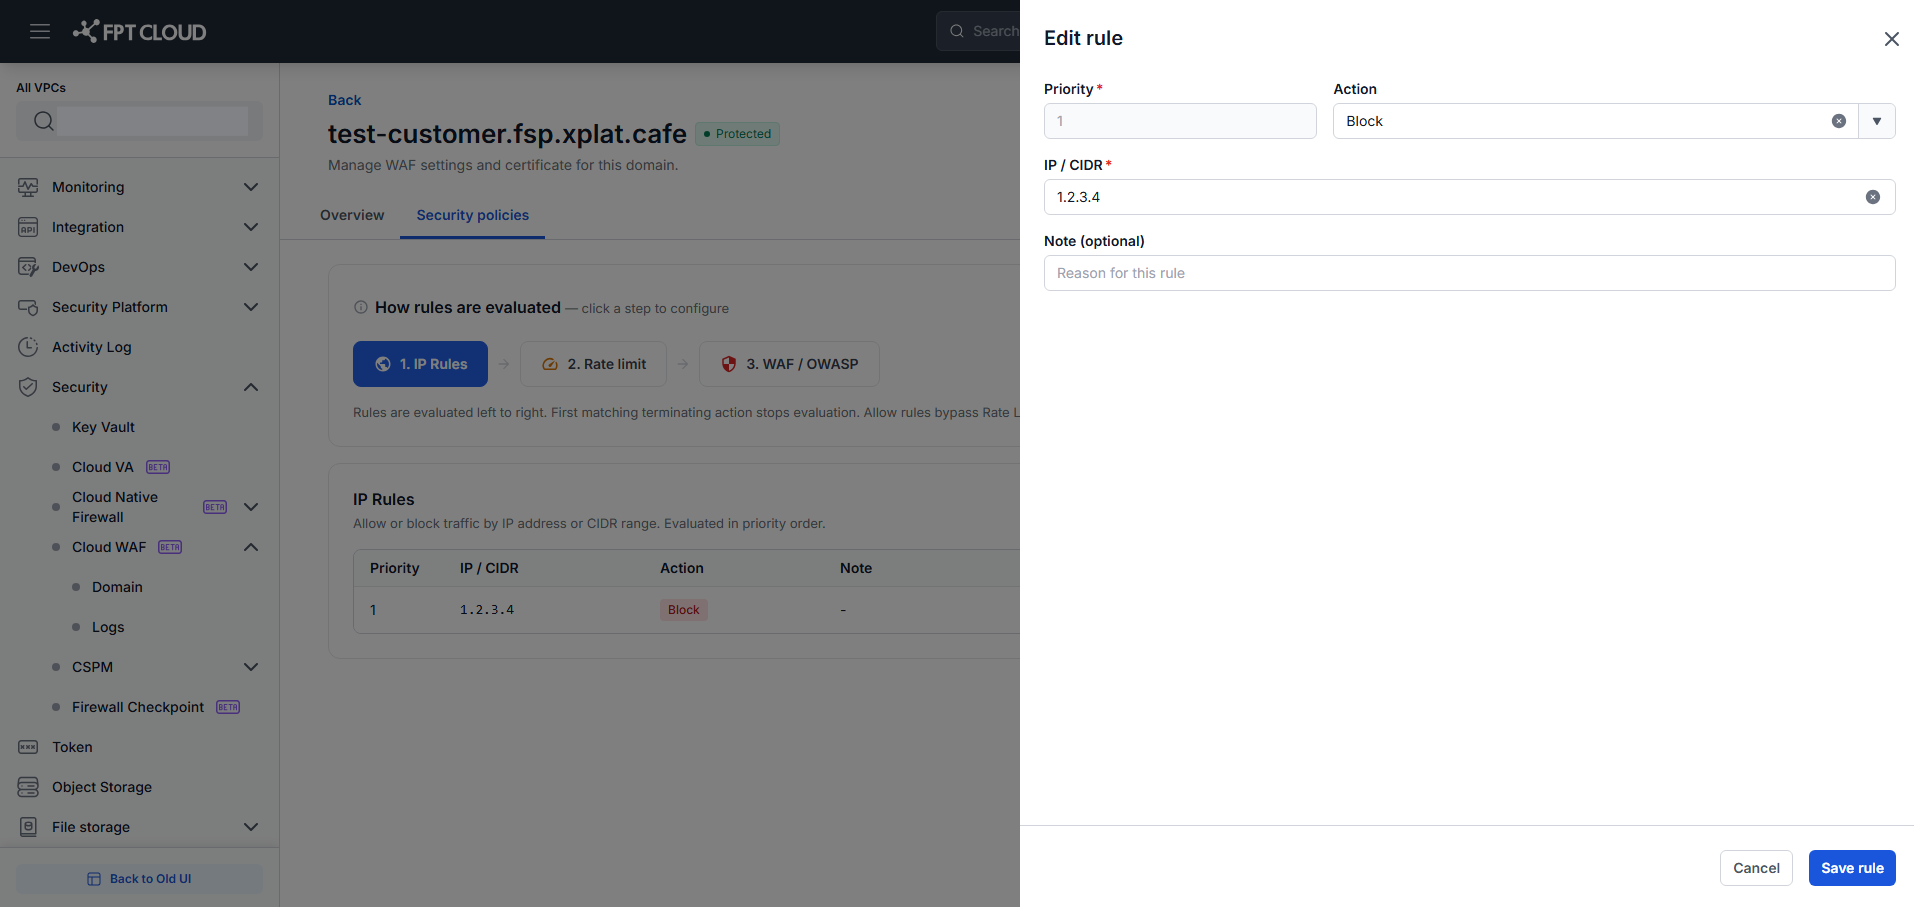
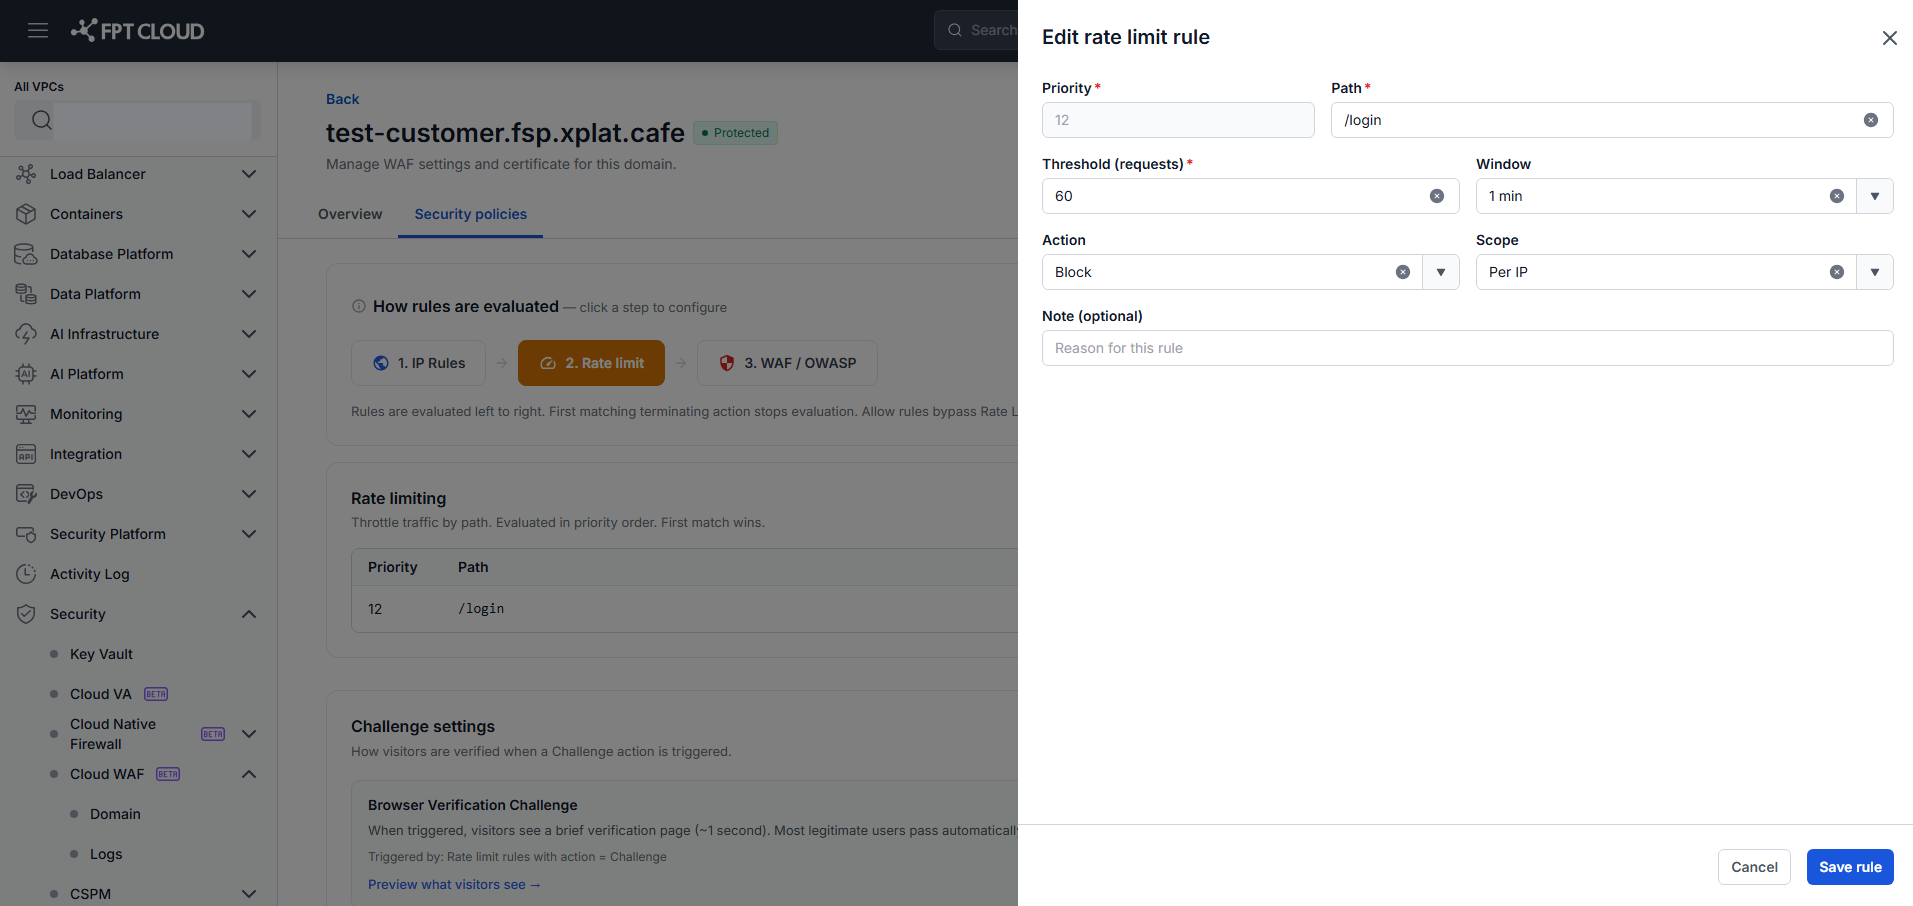
- Update IP/CIDR, Action, or Note. Priority is read-only after creation.
- Click "Save Rule" to save changes to the draft.
Delete an IP rule
Click ⋮ → Delete → the rule is removed from the draft immediately (no confirmation required).
An Allow rule for a specific IP can be shadowed by a Block rule for a broader CIDR if the Block has a lower Priority (evaluated first). Place specific IP rules at lower Priority numbers than catch-all CIDR rules.
Step 2 — Rate Limit
- Click the "2. Rate Limit" step button. The Rate Limit Rules table and the Challenge Settings card appear.
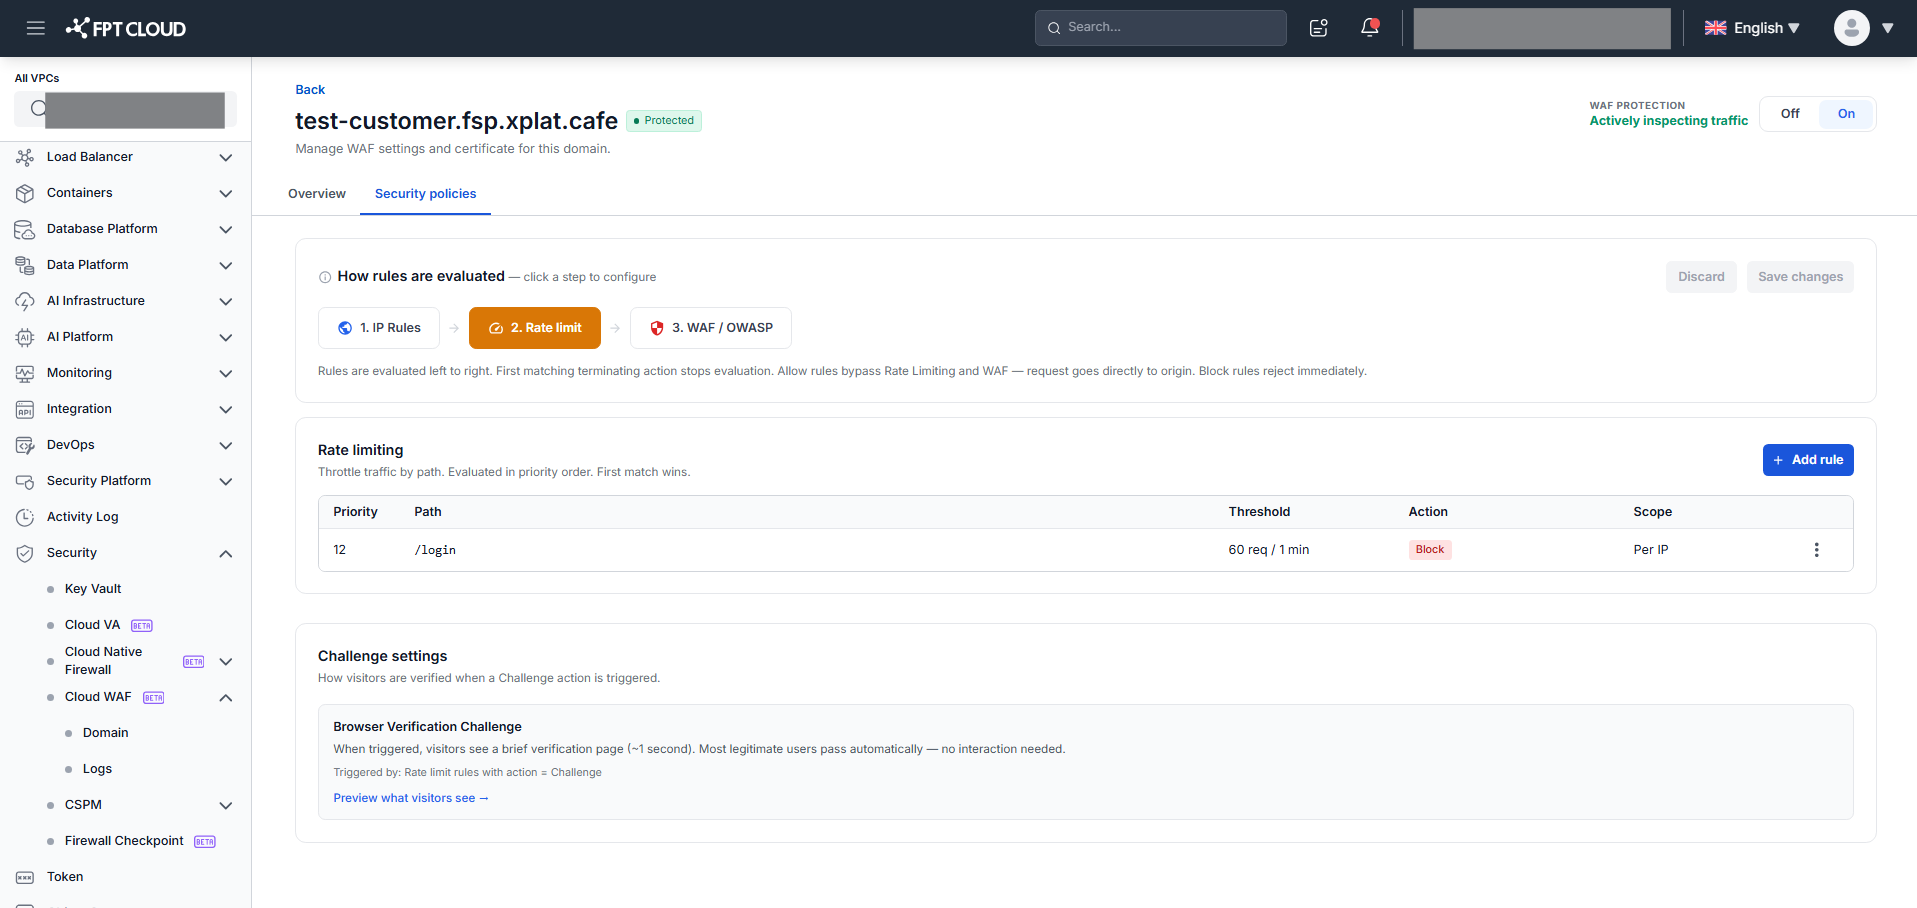
The table shows: Priority · Path · Threshold (e.g., 100 req / 1 min) · Action (Block = red / Challenge = amber) · Scope (Per IP or Per IP + Path) — sorted by Priority ascending.
Add a rate limit rule
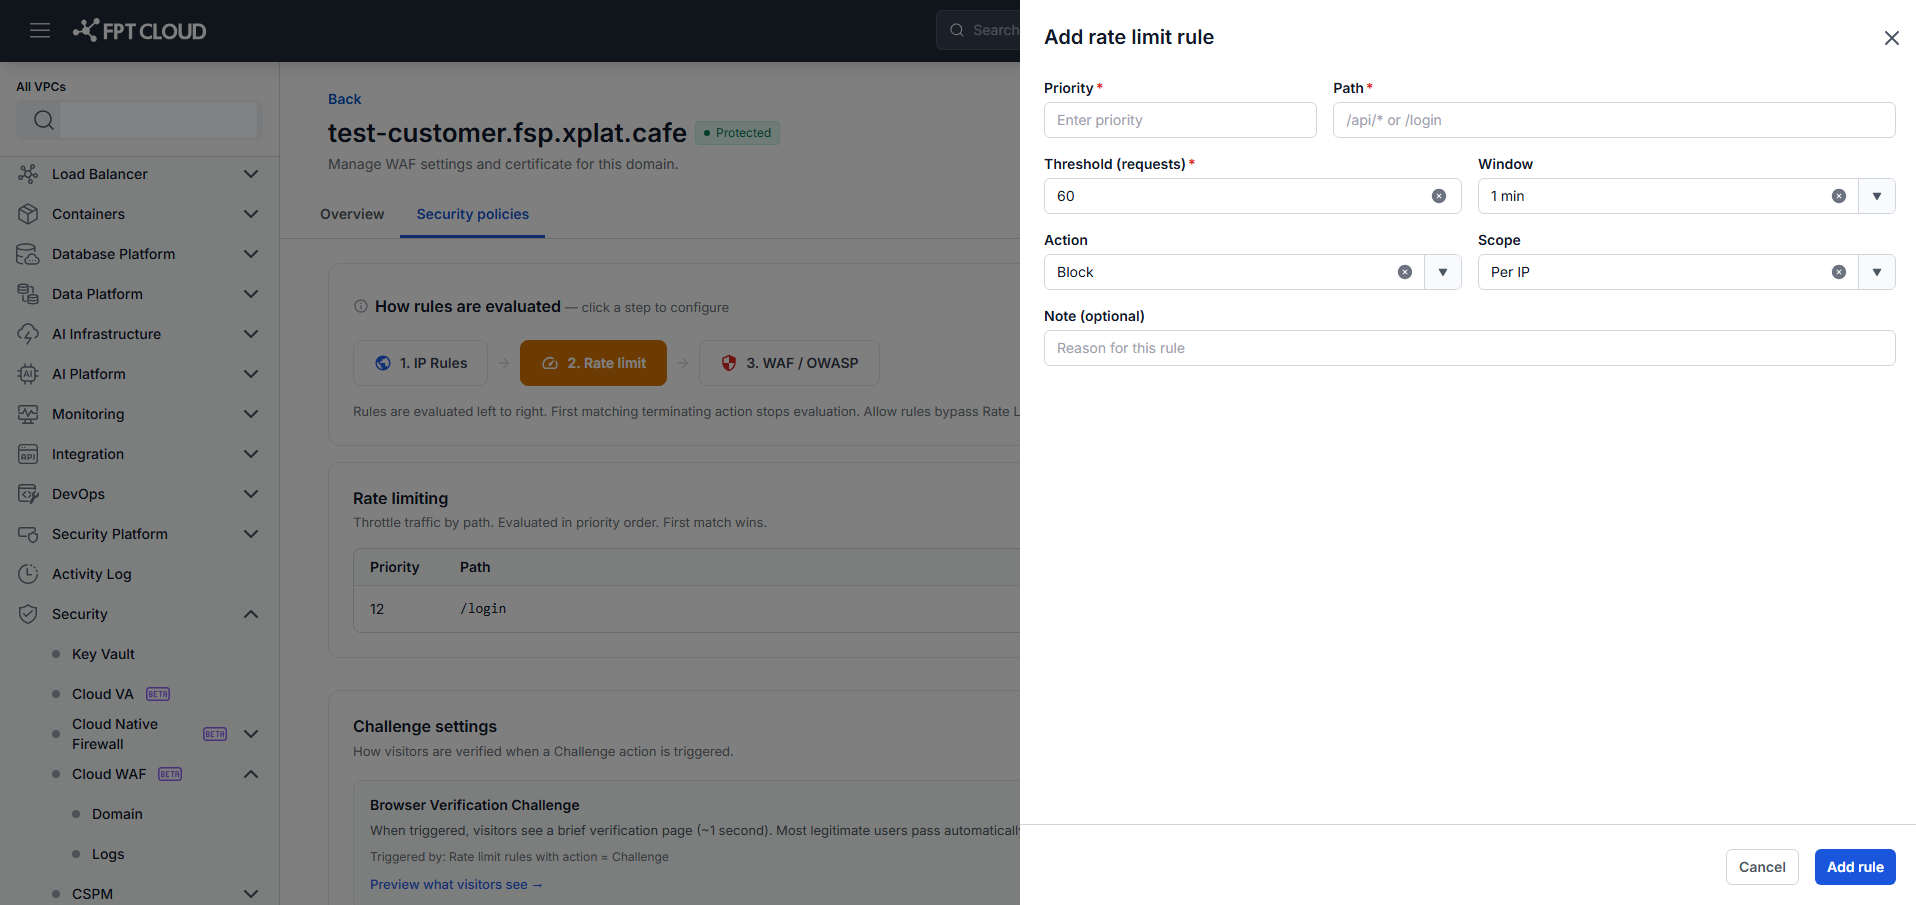
- Click "Add Rate Limit Rule" → the dialog opens.
-
Fill in the fields:
- Priority (required) — positive integer; must be unique
- Path (required) — URL path pattern to rate-limit (e.g.,
/login,/api/*,/checkout) - Threshold (requests) (required) — maximum requests per window (default
60) - Window — counting interval:
10 sec/30 sec/1 min(default) /5 min/10 min/1 hour - Action —
Block(return 403) /Challenge(Browser Verification Challenge) - Scope —
Per IP(default) orPer IP + Path
-
Click "Add Rate Limit Rule" → rule is added to the draft; dialog closes.
Example: To protect a login page from brute-force: Path = /login, Threshold = 5, Window = 1 min, Action = Block, Scope = Per IP.
Challenge Settings
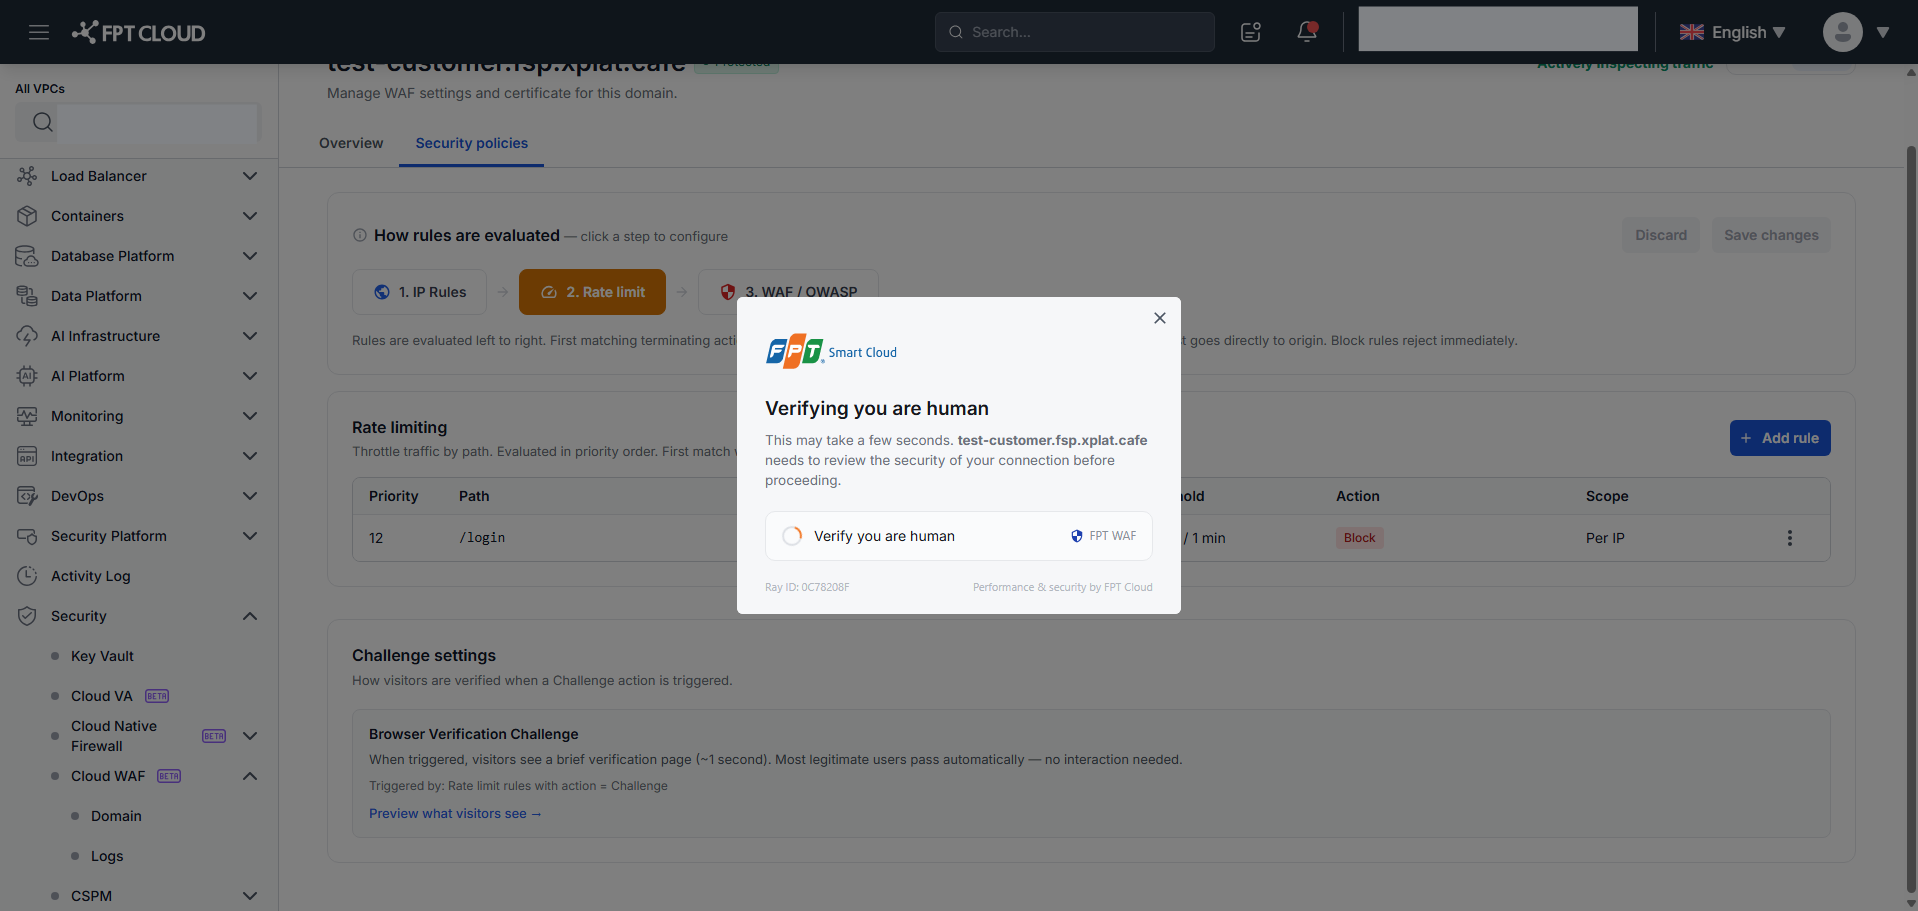
The Challenge Settings card is always visible in Step 2. It describes how Browser Verification Challenge works when Action = Challenge: visitors see a brief verification page (~1 second) that most legitimate users pass automatically. Click "Preview what visitors see →" to preview the challenge page.
Edit / Delete a rate limit rule
Click ⋮ → Edit or Delete — same behavior as IP Rules.
Step 3 — WAF / OWASP
- Click the "3. WAF / OWASP" step button. Four sections appear.
Rule evaluation priority (read-only)
A 3-block diagram shows the evaluation order: Custom Rules (green) → FPT Managed Rules (blue) → OWASP CRS (red) → Origin. First match wins within each block.
OWASP Protection Level — Paranoia Level
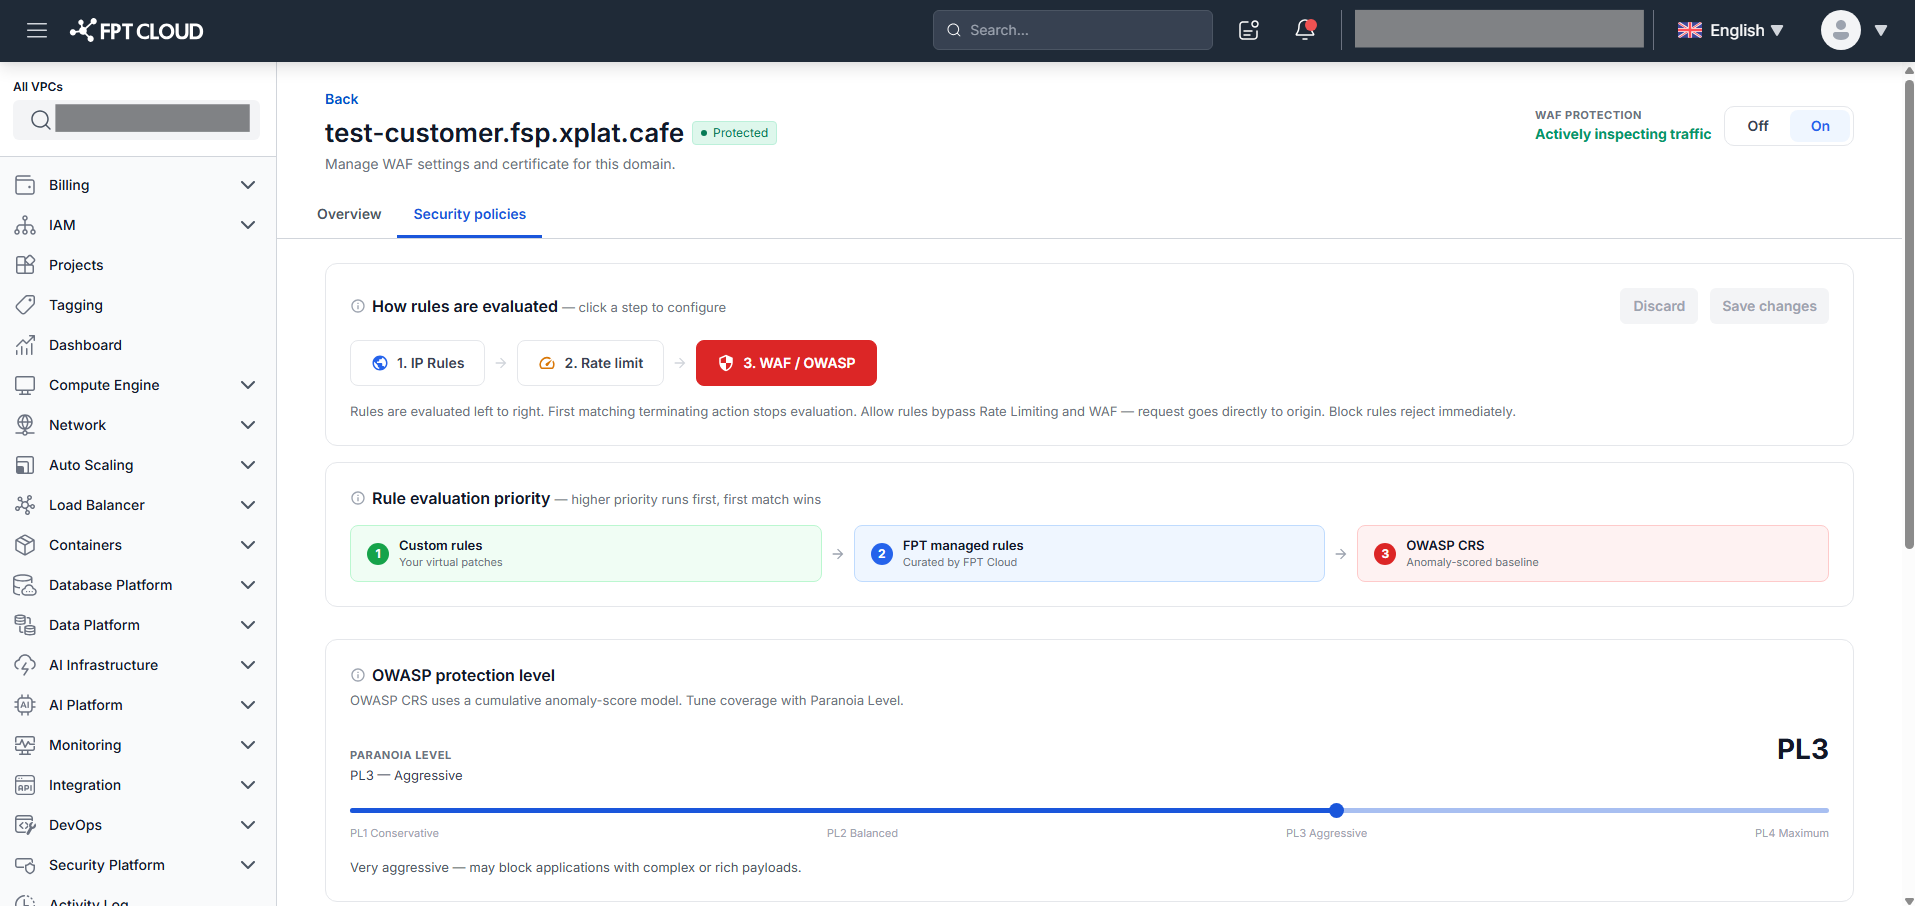
Drag the Paranoia Level slider (PL1–PL4) to adjust OWASP CRS sensitivity. The label, large indicator (top right), and description update immediately:
| Level | Name | Description |
|---|---|---|
| PL1 | Conservative | Baseline — low false positives, safe to enable in production immediately |
| PL2 | Balanced | Detects more sophisticated attacks; false positives increase |
| PL3 | Aggressive | Very strict — may block apps with complex or rich-content payloads |
| PL4 | Maximum | Extremely strict — use only for apps with rigorous input validation |
Start at PL1 and monitor WAF Logs before increasing to PL2+. Test for false positives carefully before applying PL3/PL4 to production.
FPT Managed Rules (read-only)
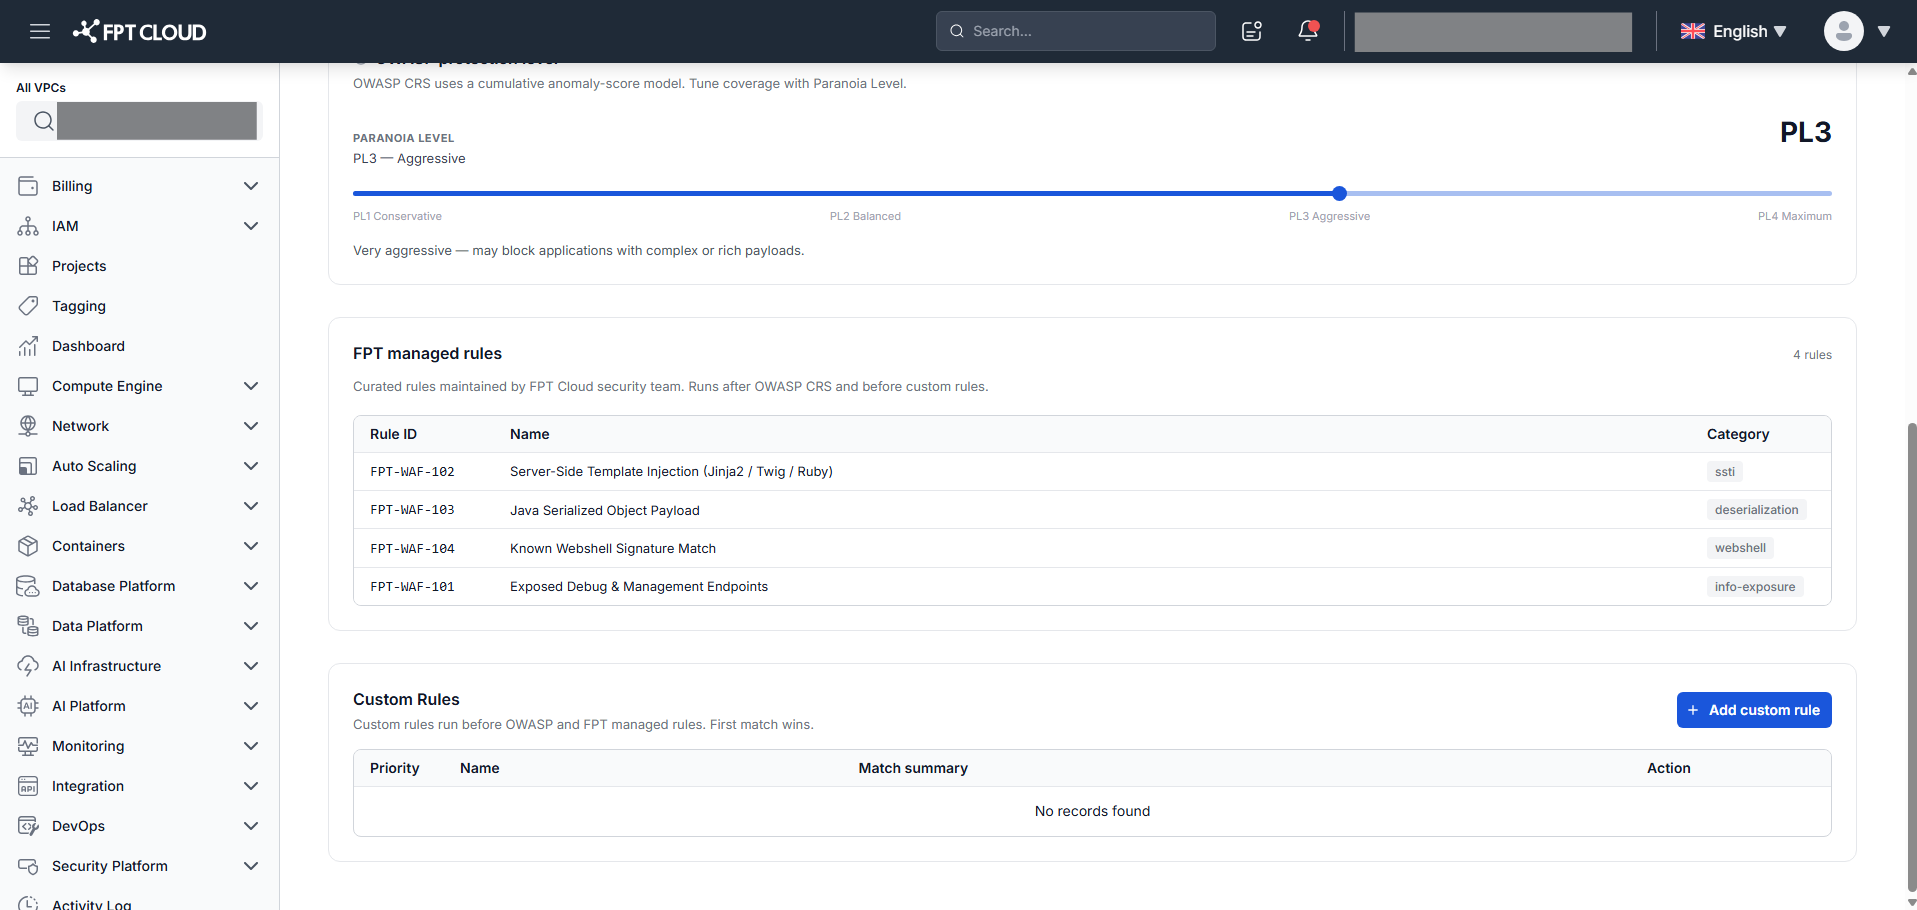
A read-only table of rules maintained and updated by the FPT Cloud security team. Cannot be added, edited, or deleted. Columns: Rule ID · Name (with short description) · Category (Fraud / CVE / Webshell / Bot / Upload).
Custom Rules
A table for user-defined rules with columns: Priority · Name · Match Summary · Action · ⋮
Action badges:
Block(red) — return 403Allow(green) — bypass all subsequent rules; request goes to origin immediatelyChallenge(amber) — Browser Verification ChallengeLog only(gray) — record in logs only; continue evaluating subsequent rules
Add a custom rule
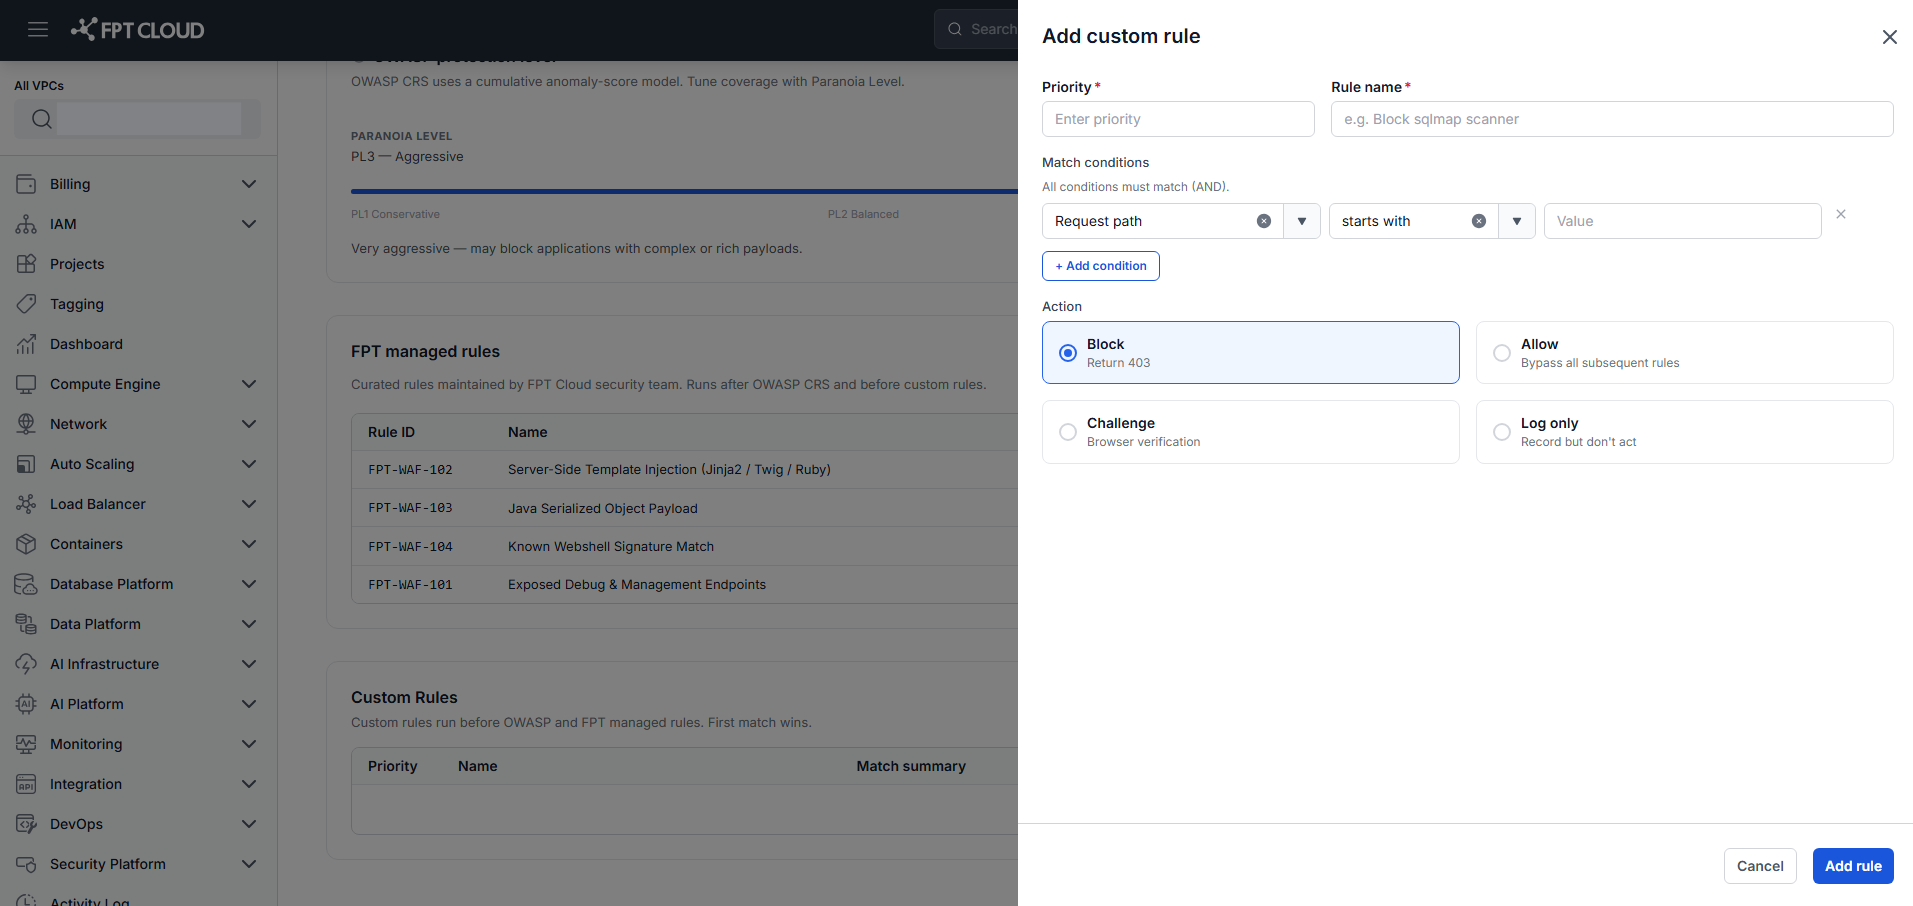
- Click "Add Custom Rule" → the Custom Rule Builder dialog opens.
-
Fill in:
- Priority (required) — must be unique among Custom Rules
- Rule name (required) — descriptive label (e.g., "Block sqlmap scanner")
- Match conditions — each condition has: Field + Operator + Value
- Field: Request path / Source IP or CIDR / HTTP method / User-Agent / Request header / Query string / Request body
- Operator: equals / starts with / ends with / contains / matches regex
- Value: the value to match
- Click "Add Condition" to add more (multiple conditions combine with AND logic — all must match)
- Click "Remove condition" to delete a condition (disabled when only 1 remains)
- Action: Block / Allow / Challenge / Log only
-
Click "Add Custom Rule" → rule is added to the draft; dialog closes.
Example: Block requests with User-Agent containing "sqlmap": Field = User-Agent, Operator = contains, Value = sqlmap, Action = Block.
Edit a custom rule
Click ⋮ → Edit → the Edit Custom Rule dialog opens.
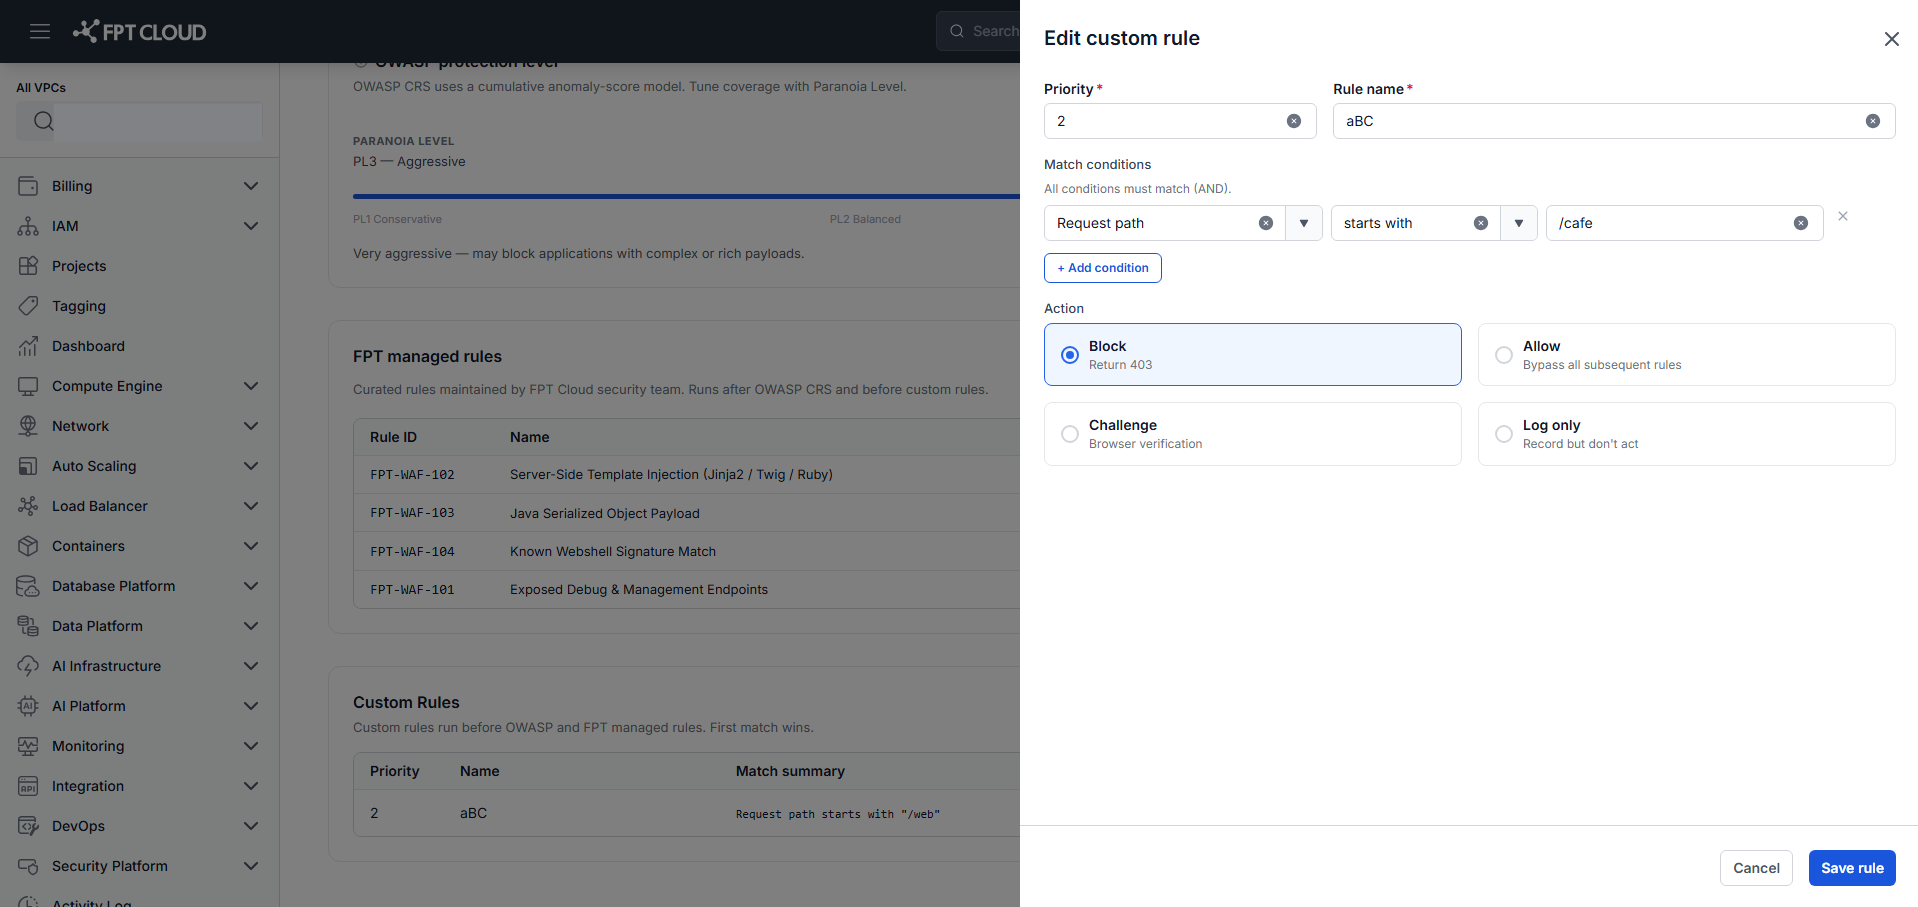
Update any field and click "Save Rule" to apply changes to the draft.
Save and discard changes
Any add/edit/delete of rules or a Paranoia Level change creates a Dirty state — "Unsaved changes" text appears in the pipeline header, and both "Save Changes" and "Discard" buttons become enabled.
- "Save Changes" → applies the entire policy configuration → toast "Changes saved." → buttons return to disabled (Clean state).
- "Discard" → the "Discard Changes" dialog appears.
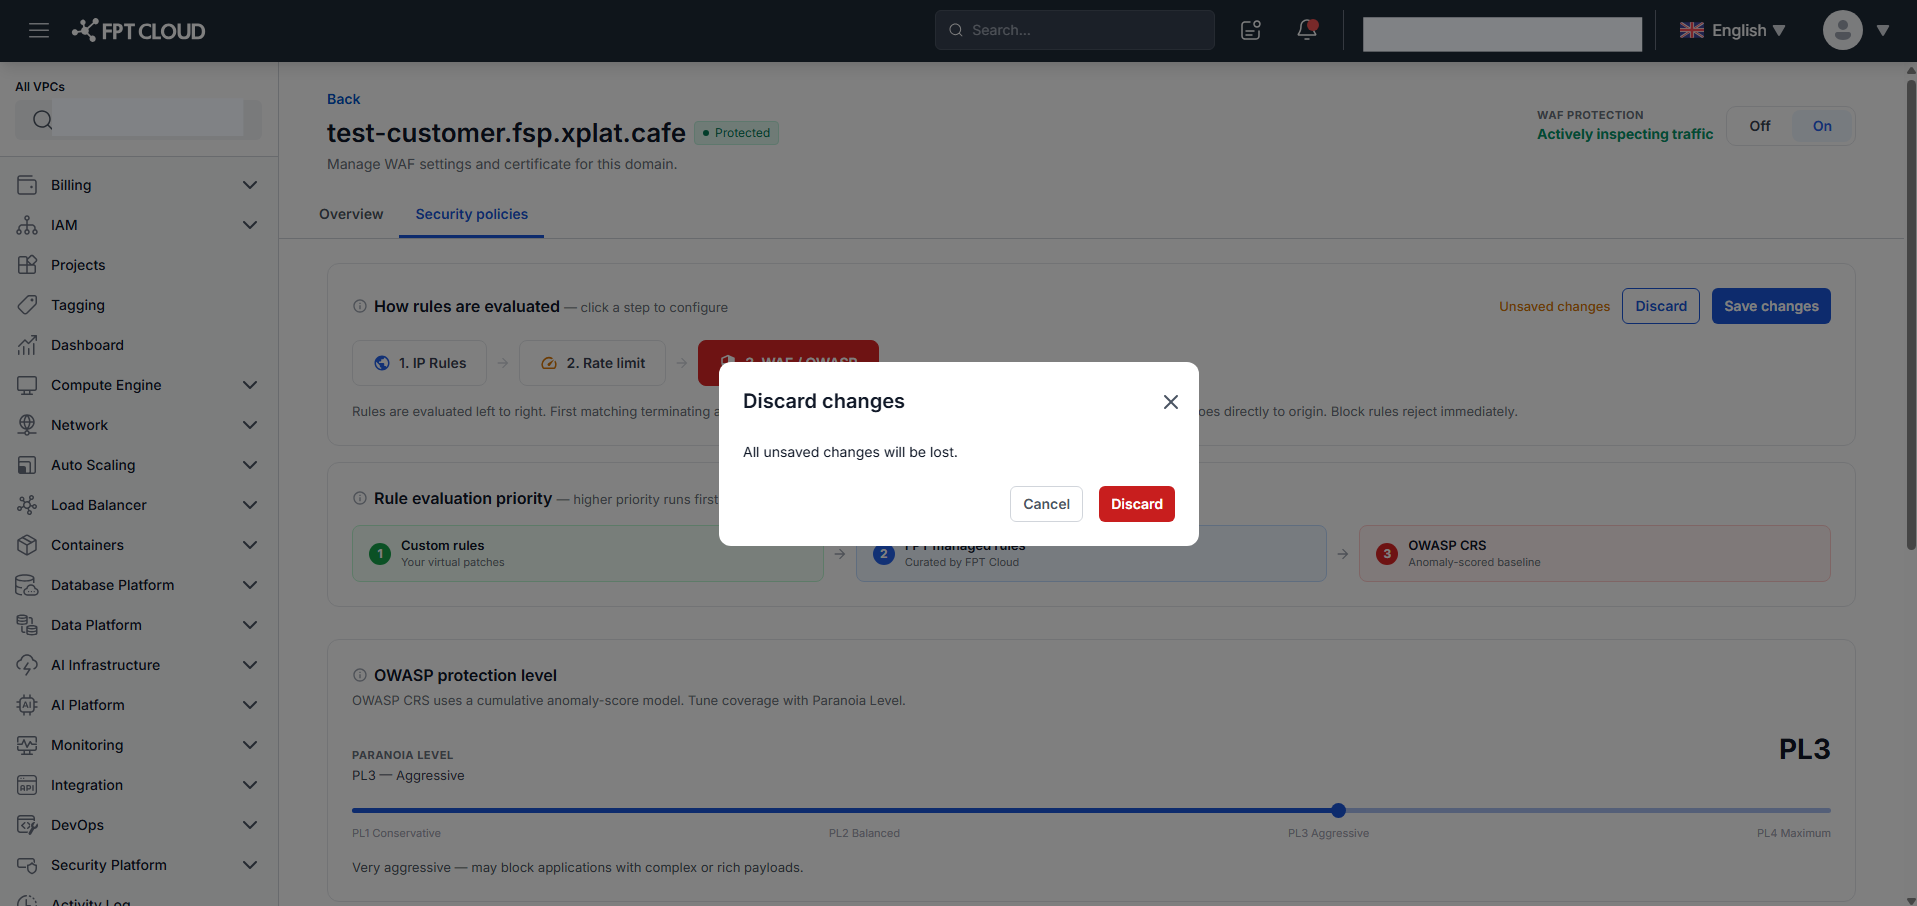
Click "Discard" (red) → reverts all changes to the last saved state → Clean state. Click "Cancel" or × → closes dialog, draft is preserved.
Navigation guard: If you try to navigate away from Security Policies (click Back, switch tabs, use the sidebar) while in Dirty state, an "Unsaved Changes" dialog appears.
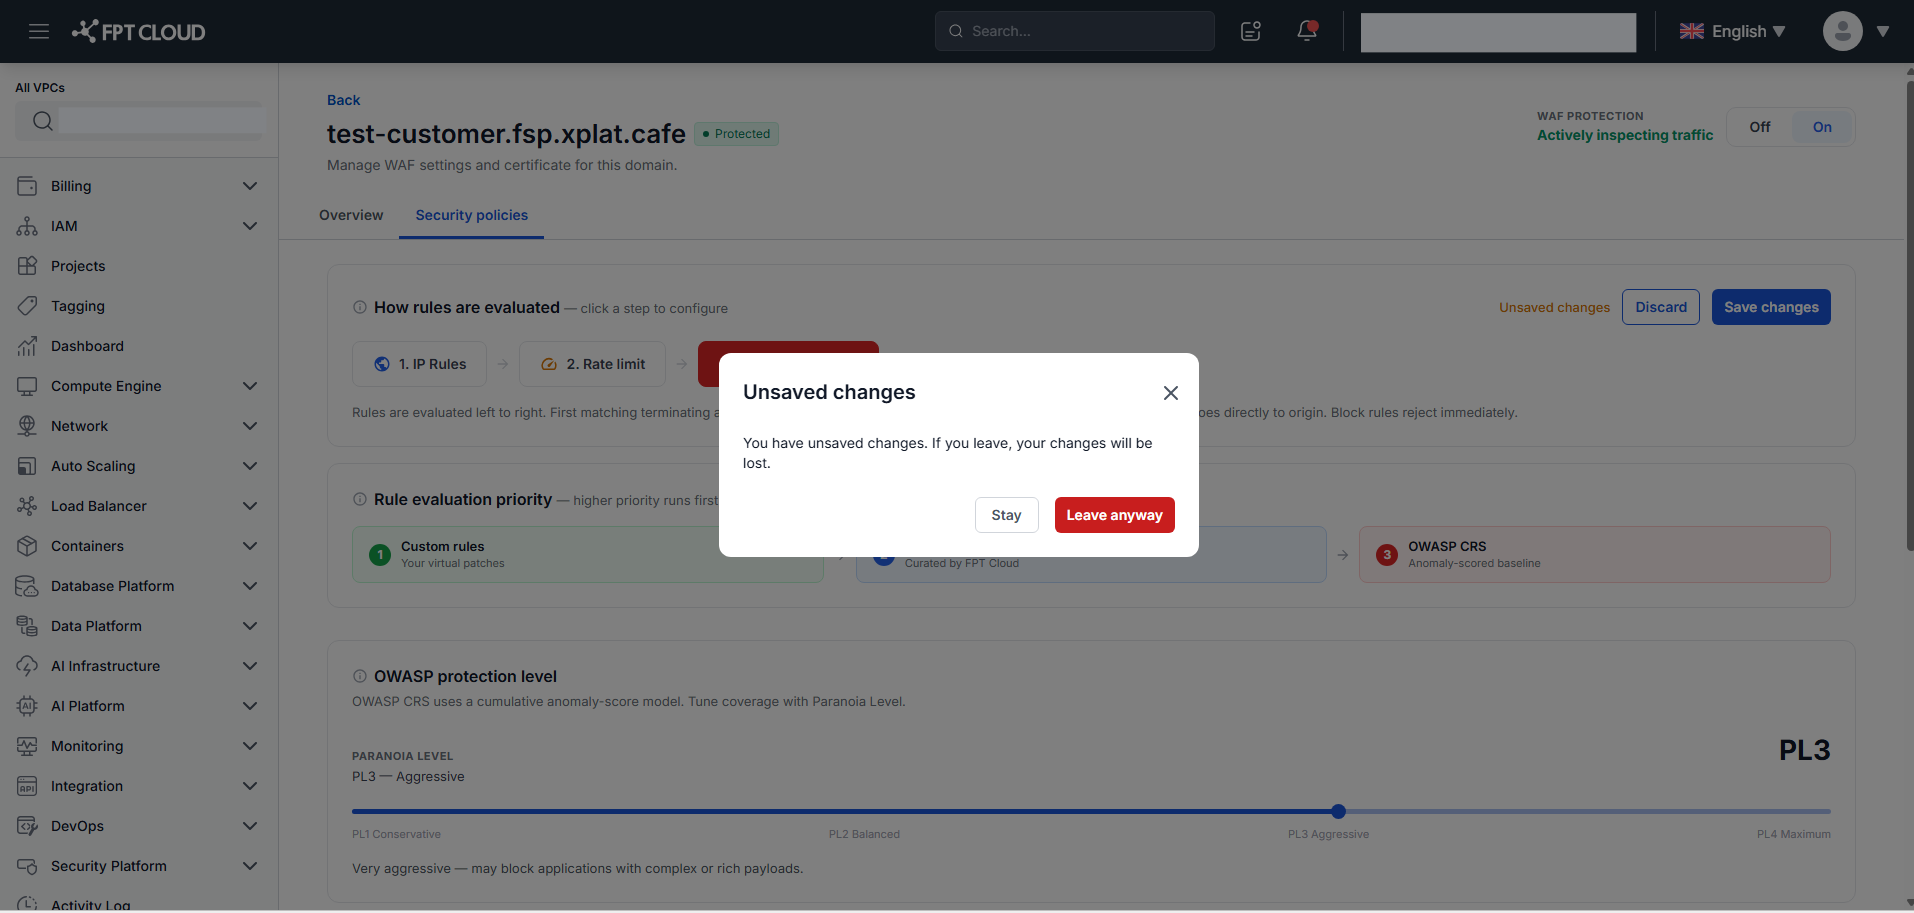
- "Stay" → remain on the page; draft is preserved.
- "Leave Anyway" → exit and discard all unsaved changes.
Switching between the 3 steps (IP Rules ↔ Rate Limit ↔ WAF/OWASP) does not trigger this dialog — the draft is preserved when switching steps.
What's next
- WAF Logs — monitor traffic and verify your policies are working.