Issue List
The Issue List shows every security issue detected across your cloud resources. Filter to focus on what matters most, then change issue status individually or in bulk.
Access via Security → Security Hub → Issues.
View issues
-
Go to Security → Security Hub → Issues.
The Issue List appears with all detected issues for your organization.
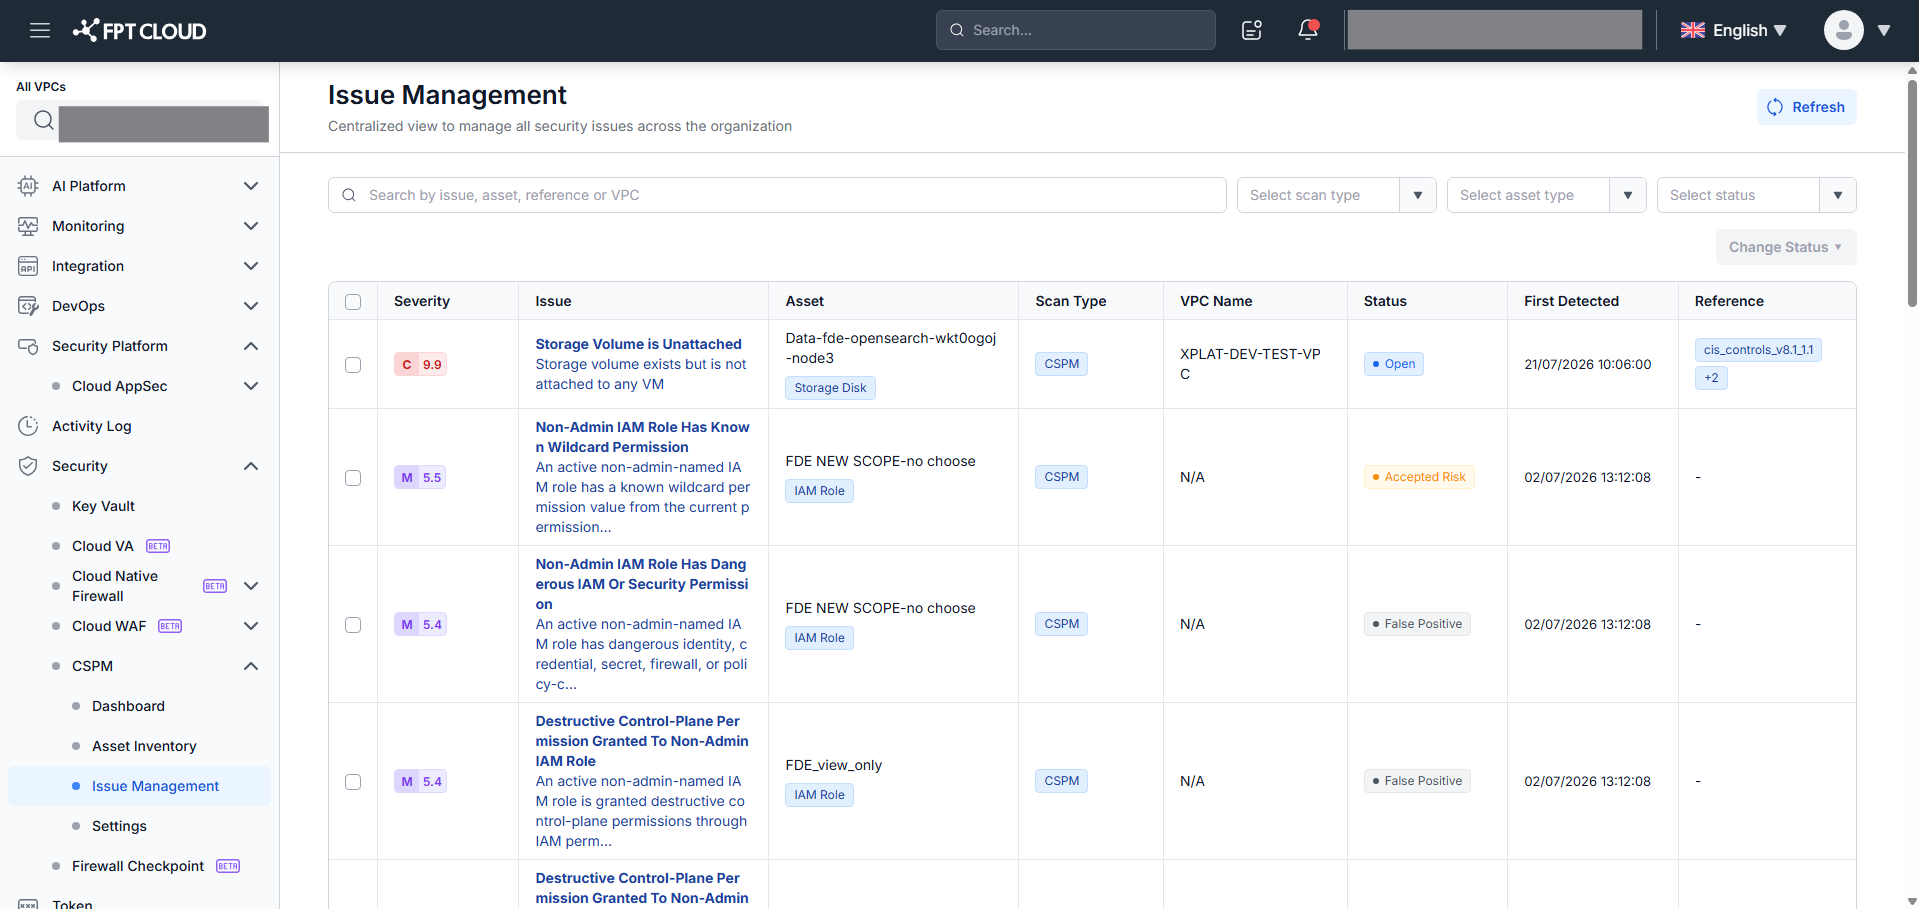
- Review the columns.
| Column | Description |
|---|---|
| Severity | Risk level and score — Critical, High, Medium, or Low |
| Issue | Issue name and short description |
| Asset | Name of the affected resource |
| Asset Type | Type of the affected resource |
| Scan Type | Scan type that detected the issue: CSPM or KSPM |
| VPC Name | VPC that contains the asset |
| Status | Current status: Open / False Positive / Accepted Risk / Resolved |
| First Detected | Date and time when Security Hub first detected this issue |
Search and filter
The filter bar provides four options (left to right):
| Filter | Description |
|---|---|
| Search | Find by issue name, description, asset name, reference, or VPC. Type a keyword and press Enter. |
| Scan Type | Filter by scan type: CSPM / KSPM |
| Asset Type | Filter by the type of affected resource |
| Status | Filter by status: Open / False Positive / Accepted Risk / Resolved |
All filters combine with AND logic. Use Status → Open before a bulk action to ensure you only act on the intended issues.
Change issue status
Tenant Admins can manually move issues between Open, False Positive, and Accepted Risk statuses. Resolved status is system-managed and cannot be set manually.
Select issues
-
Check the checkbox next to one or more issues.
- Use the Select all checkbox in the header row to select all non-Resolved issues currently visible.
- Issues with Resolved status have a disabled checkbox — they cannot be selected for manual status changes.
-
Click Change Status ▾ to open the action dropdown.
The Change Status button is enabled when at least one non-Resolved issue is selected.
Mark as False Positive
Use this when you confirm the detected misconfiguration is not a real issue in your organization's context — for example, an intentional configuration controlled by another mechanism.
- Select one or more non-Resolved issues.
- Click Change Status ▾ → Mark as False Positive.
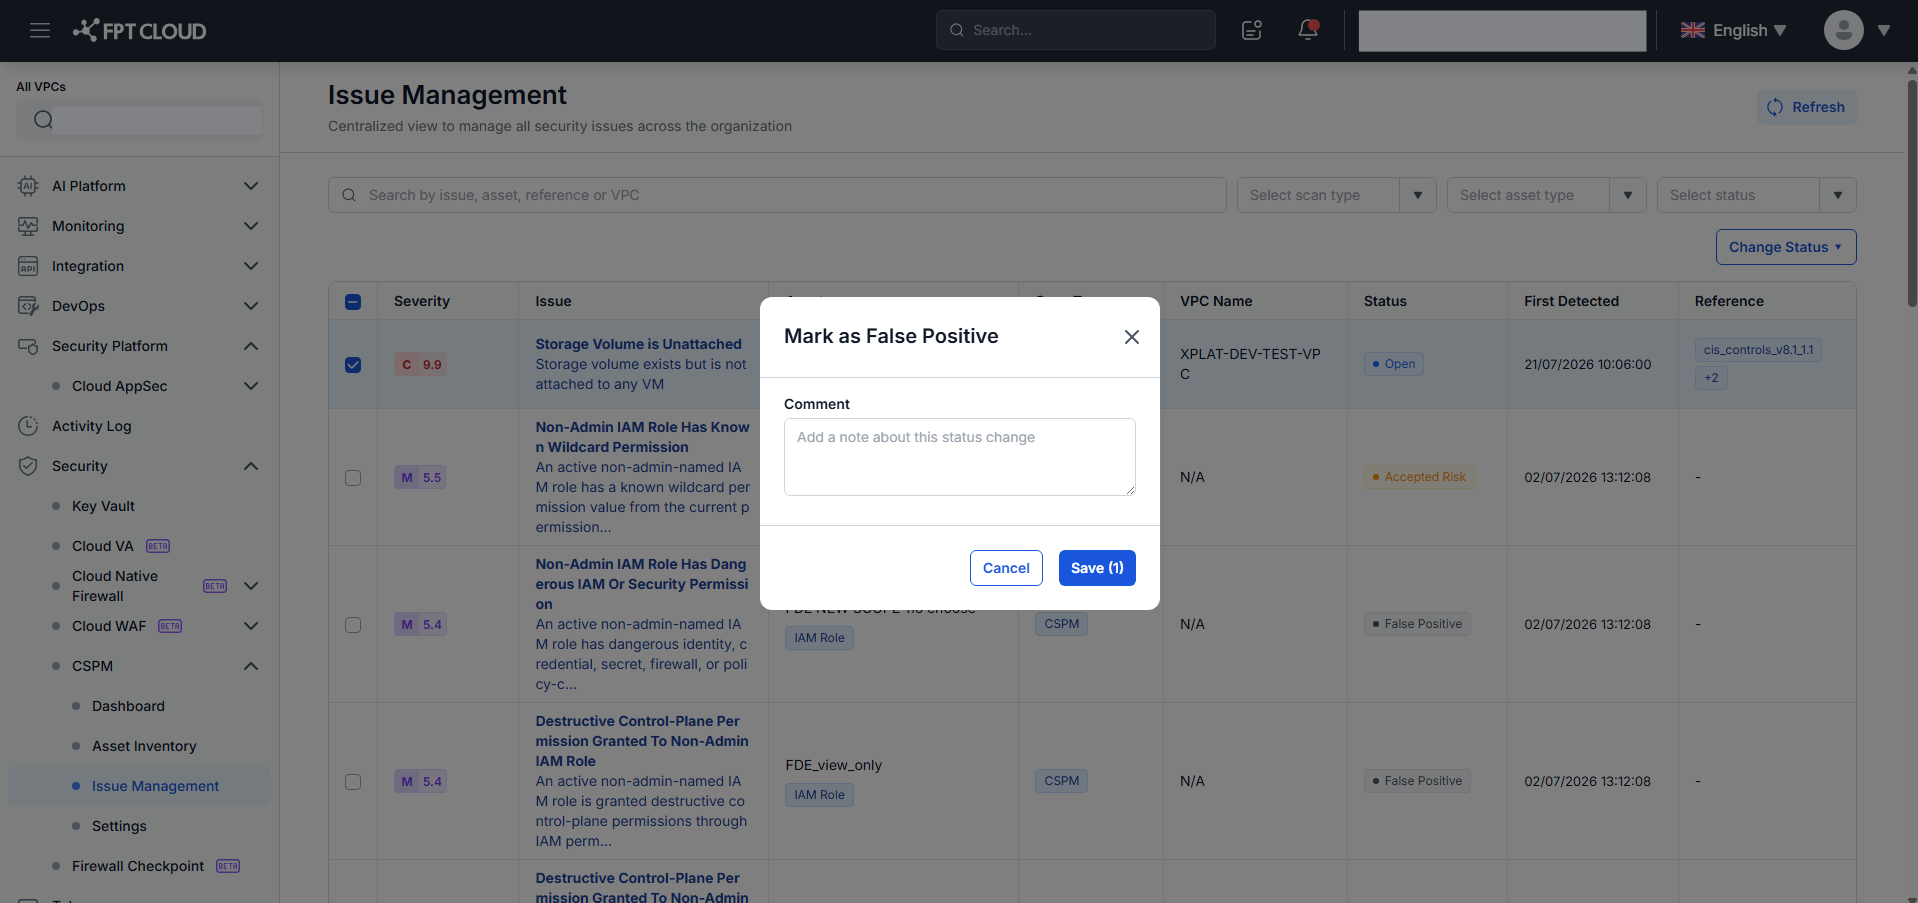
- The Mark as False Positive dialog opens.
-
Optionally, enter a Comment (up to 500 characters) to document your reasoning.
-
Click Save (N) to confirm.
A confirmation toast appears: "Status updated for N issues."
Mark as Accepted Risk
Use this when you have reviewed the risk and decided to accept it without immediate remediation.
- Select one or more non-Resolved issues.
- Click Change Status ▾ → Mark as Accepted Risk.
- Optionally enter a Comment.
- Click Save (N) to confirm.
Reopen
Use this to return an issue to Open status from False Positive or Accepted Risk.
- Select one or more issues in False Positive or Accepted Risk status.
- Click Change Status ▾ → Reopen.
- Optionally enter a Comment.
- Click Save (N) → the issue returns to Open.
The number N in "Save (N)" shows exactly how many issues will actually change status — equal to the selected issues minus any that are already at the target status. For example: 5 selected (3 Open + 2 False Positive) → "Mark as False Positive" shows Save (3).
Open an issue
Click any issue row to open Issue Detail and view its full description, remediation guidance, and activity history.