Configure WAF server connection
Connect the WAF server to the web server
- If the web server is in the same VPC as the WAF server on FPT Cloud, ensure the web server belongs to the WAF server's subnet.
- If the web server is outside the FPT Cloud VPC, the WAF server must connect to the web server via its public IP address.
Add a proxy host to forward requests
-
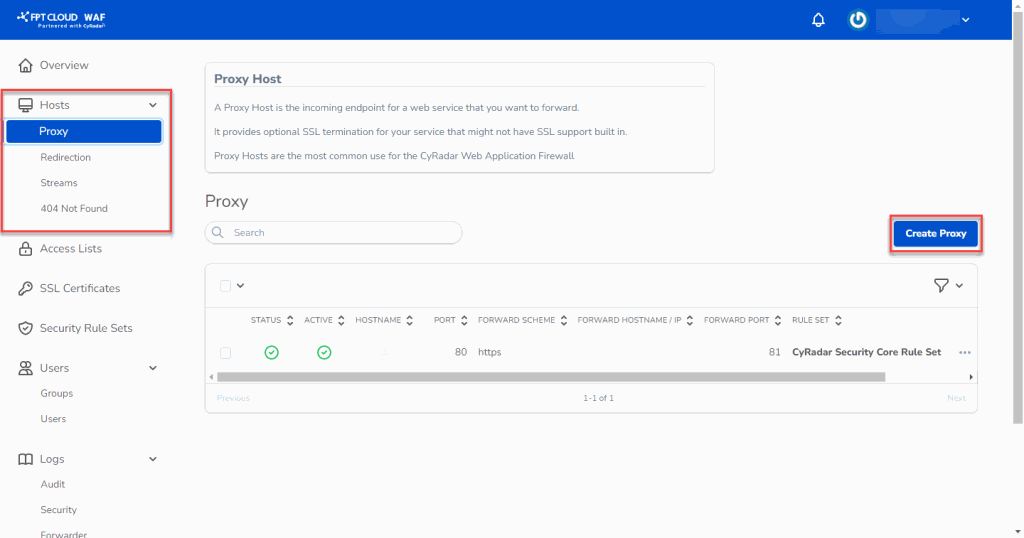
In WAF Dashboard, select Hosts > Proxy, then click Create Proxy.
-
Enter the configuration details:
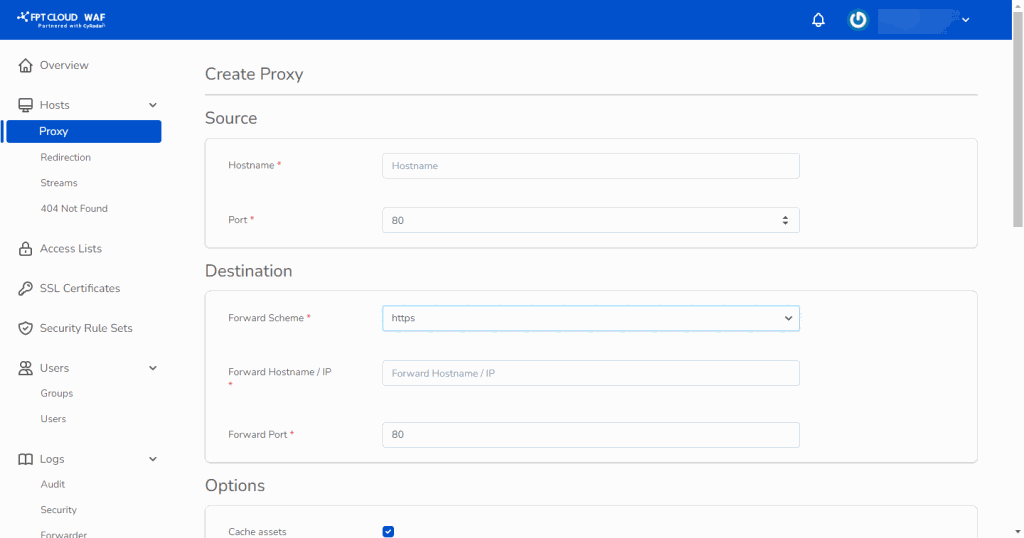
- Source:
- Hostname: Enter the domain name.
- Port: Default is 80; if you have an SSL certificate, use port 443.
- Destination:
- Forward Scheme: Choose http or https.
- Forward Hostname/IP: Enter the public IP or domain of the web server. If the WAF and web server share the same subnet, you can use a private IP.
- Forward Port: Enter the port used by the web server.
noteForward Port must be an open connection port on the web server.
- Security: Select the default rule (** CyWAF Rule**) to apply FPT Cloud WAF's optimized rule set.
- Source:


Add an SSL certificate
-
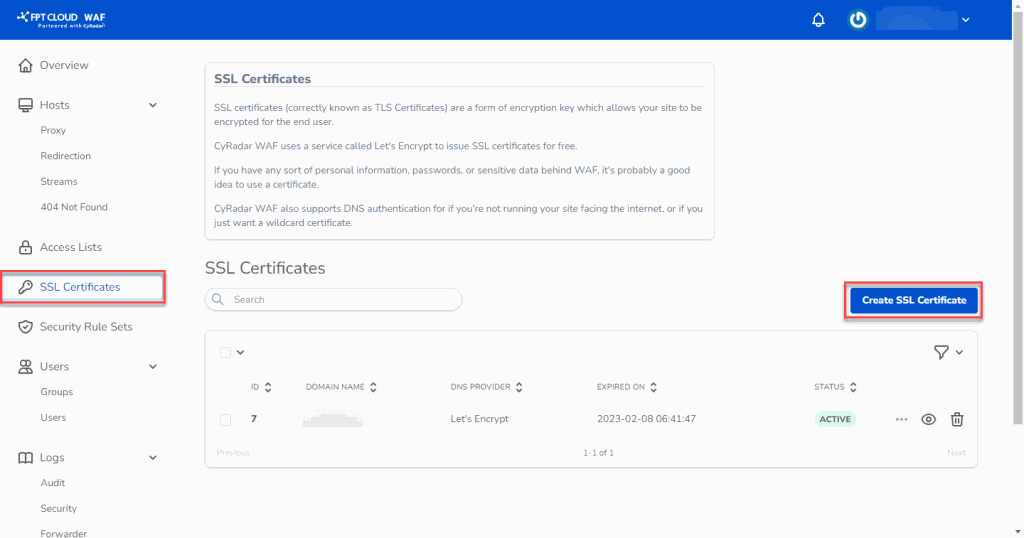
In WAF Dashboard, select SSL Certificates, then click Create SSL Certificates.
-
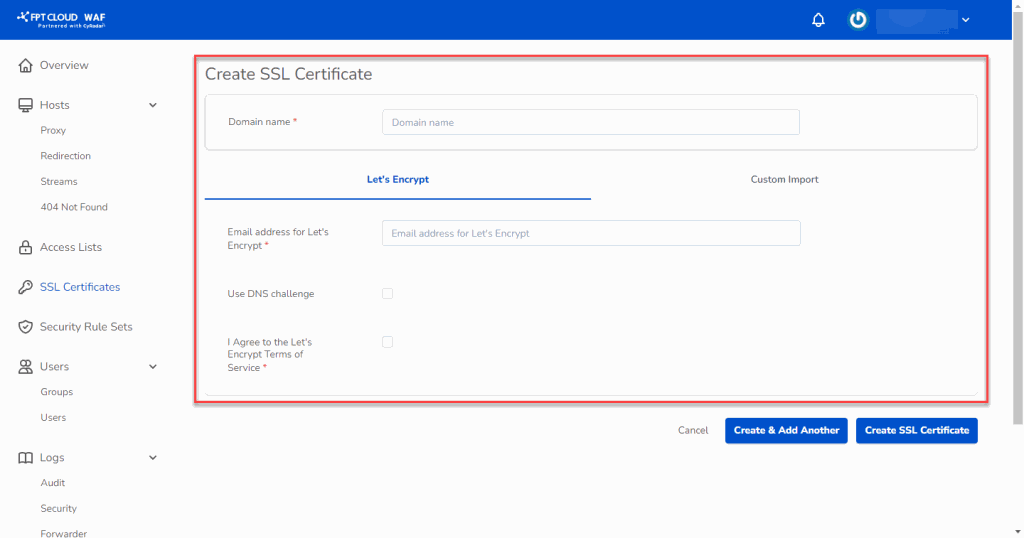
Enter the details as described in Manage SSL certificates.


Monitor the Dashboard Overview
After successfully connecting your domain or website to the WAF server, return to the Overview page to monitor WAF server status.
