Organization
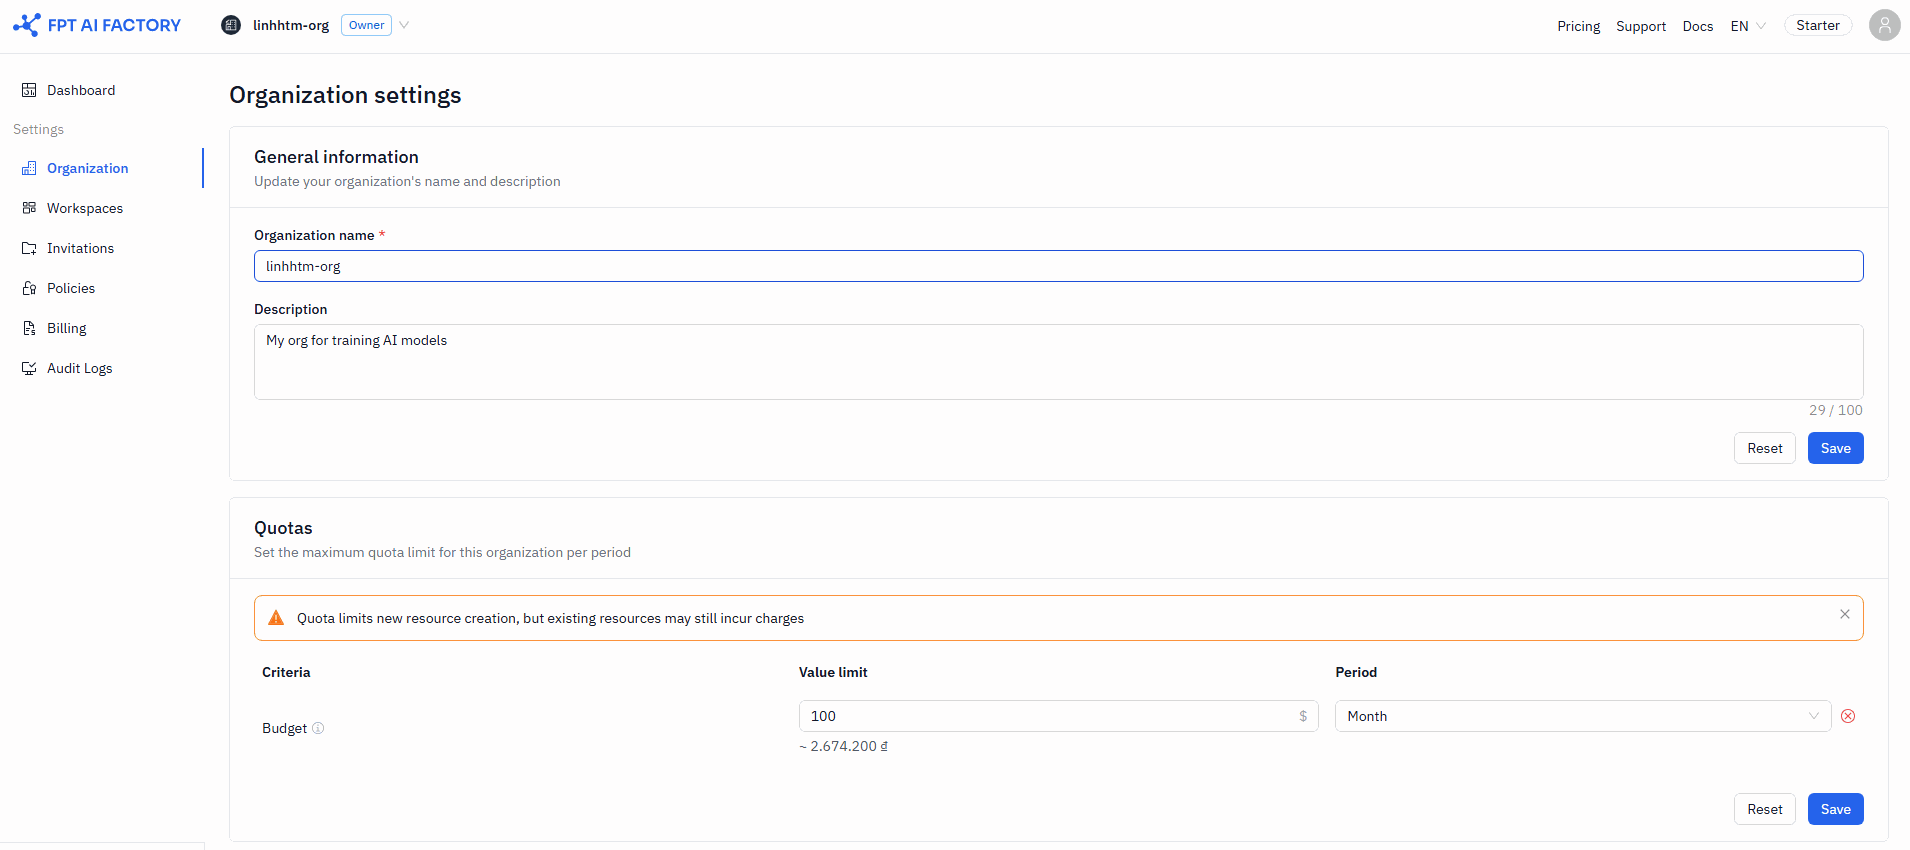
The Organization Settings page lets the Organization Owner manage general information, spending limits, workspaces, and members — all from a single scrollable page.
Only the Organization Owner can edit organization settings.
To open it: click Settings in the left sidebar, then select Organization setting.
General information
The General information section shows your organization name and description.
| Field | Rules |
|---|---|
| Organization name | Required. 3–50 characters. Allowed: A–Z, a–z, 0–9, -, _. No spaces. Cannot start with a digit. |
| Description | Optional. Maximum 100 characters. |
Click Save to apply changes, or Reset to revert to the last saved values.
Quotas
The Quotas section sets a credit spending limit for the entire Organization. This limit is the ceiling that all Workspaces share — no single Workspace can exceed it, and the combined spend of all Workspaces cannot exceed this limit.
Key points:
- Value limit — Non-negative integer. Leave blank for unlimited.
- Period — Day or Month. This constrains all Workspaces: if Daily, all Workspaces must be Daily; if Monthly, Workspaces can use Monthly or Daily.
For detailed information on quota hierarchy, period rules, and how to resolve conflicts, see Quotas.
User list
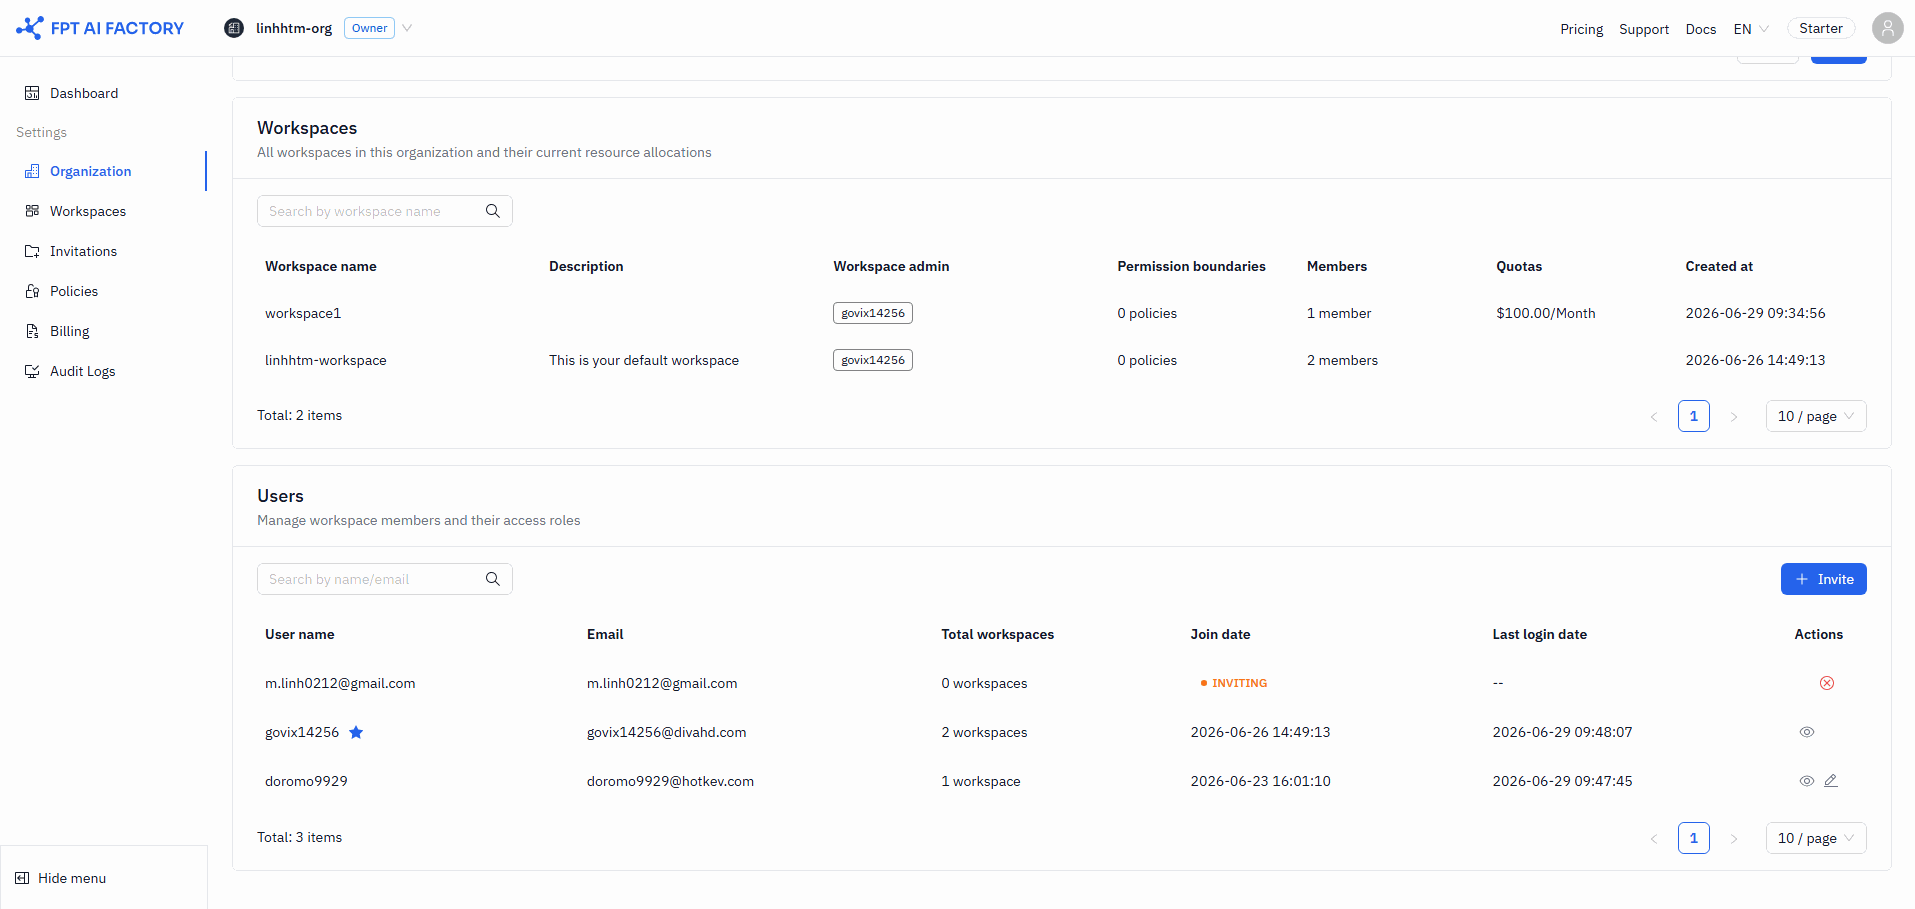
The User list section shows all members in your Organization and lets you invite new users, view member details, edit workspace assignments, and remove members.
Member table
| Column | Description |
|---|---|
| Name | Username. The Organization Owner is marked with a star icon. |
| Member's email address | |
| Workspaces | Number of workspaces the member belongs to |
| Join date | Date joined; shows INVITING tag for pending invitations |
| Last login | Most recent login time |
| Actions | View / Edit / Remove (see below) |
Actions
| Action | Available for | What it does |
|---|---|---|
| View | All active members | Opens a read-only drawer showing workspace roles, policies, quota, and the member's audit log |
| Edit | All members except the Org Owner | Opens a drawer to change which Workspaces the member belongs to, and which org-level policies are attached to them |
| Remove | All members except the Org Owner | Removes the member from the Organization |
| Cancel invite | Pending (INVITING) members only | Cancels the pending invitation |
The Organization Owner cannot be edited or removed.
Inviting a new member
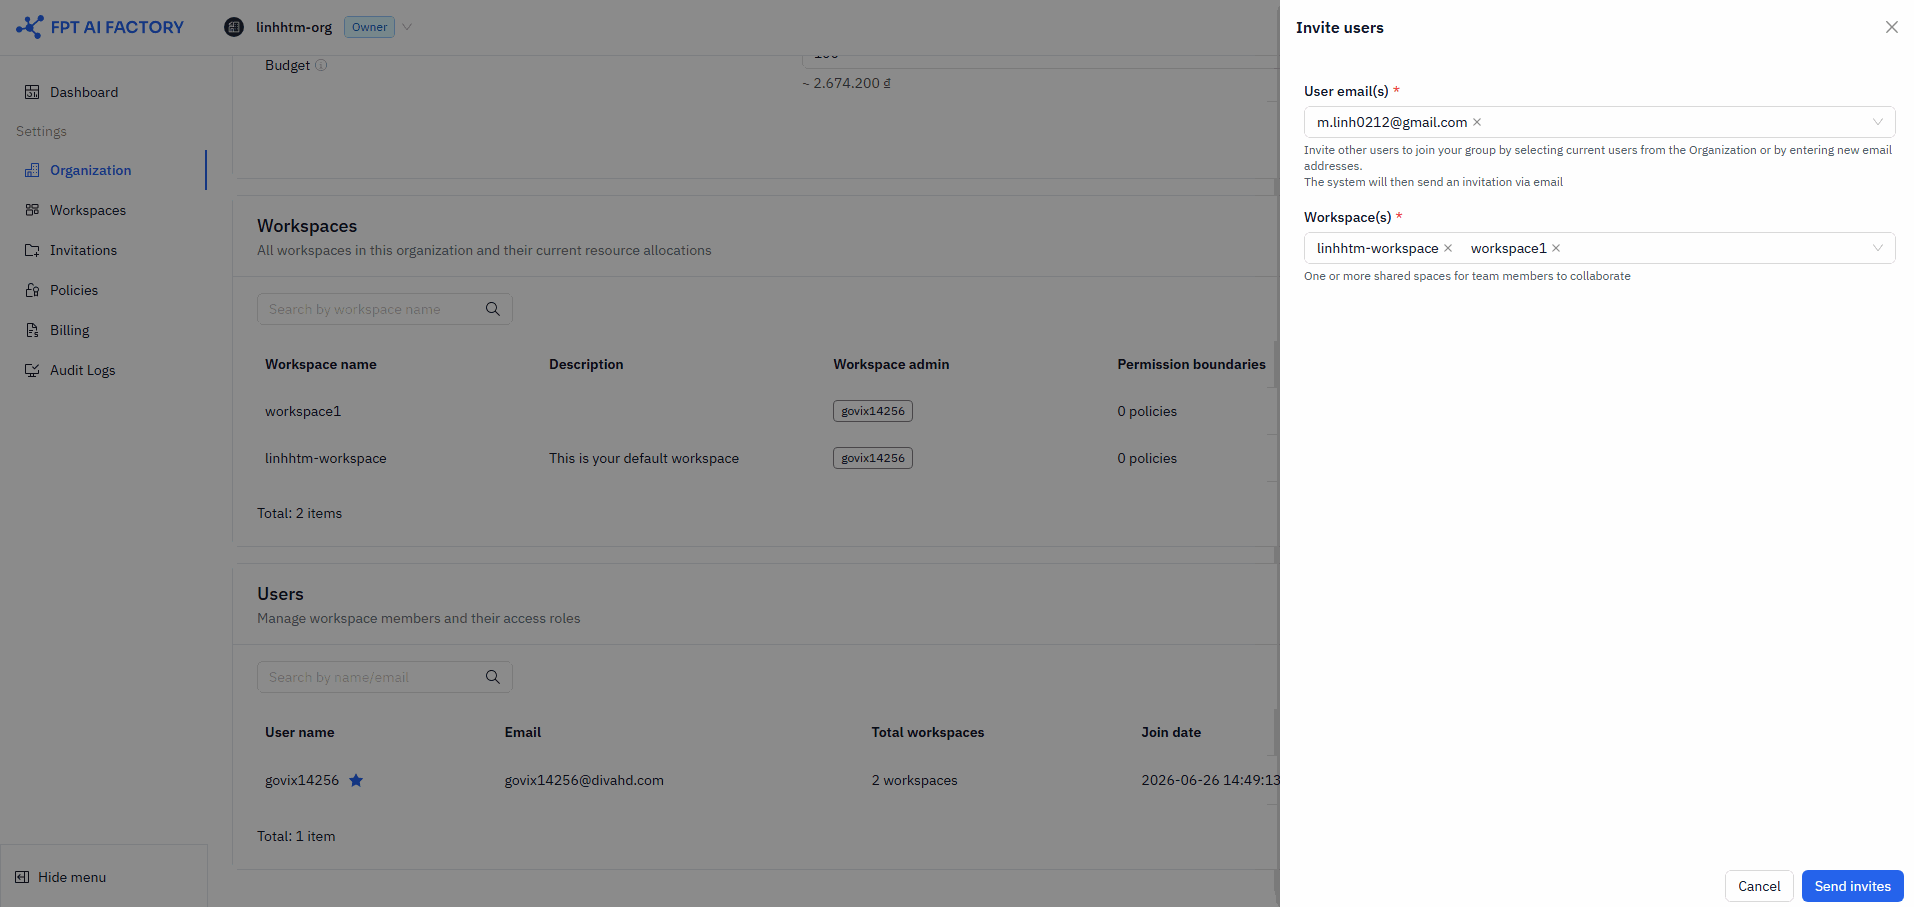
Click Invite user to open the invite drawer. Enter the email address and select which workspaces to add the member to.
What's next
- Workspaces — create and manage isolated environments for your teams.
- Quotas — how quota hierarchy, period rules, and conflict warnings work.
- Understanding billing — credits, Quotas, and how costs are tracked.