Deploy Config & Deploy Application
Deployment Configuration lets you configure a Deploy Job in your Pipeline to deploy an application to a Kubernetes environment using a Rolling Update strategy.
Deploy Application then lets you select the Image version to deploy, trigger the deployment manually or automatically, monitor progress, and re-deploy when needed.
1. Before You Start
Before configuring Deployment, make sure that:
- You have permission to edit the Pipeline.
- The Pipeline has been created successfully.
- The Pipeline already has a Build Job or uses a Registry Source.
- An Environment (Kubernetes Cluster) has been configured.
- You have access to the Environment that will be used for deployment.
⚠️ Deployment currently supports the Rolling Update deployment strategy only.
2. Configure Deployment
2.1 Add Deploy Job
Steps
- Open the Pipeline Editor.
- Click Add Job.
- Select Deploy as the Job type.
Result
- The Deploy Job is added to the Pipeline.
- The system displays the Deployment configuration screen.
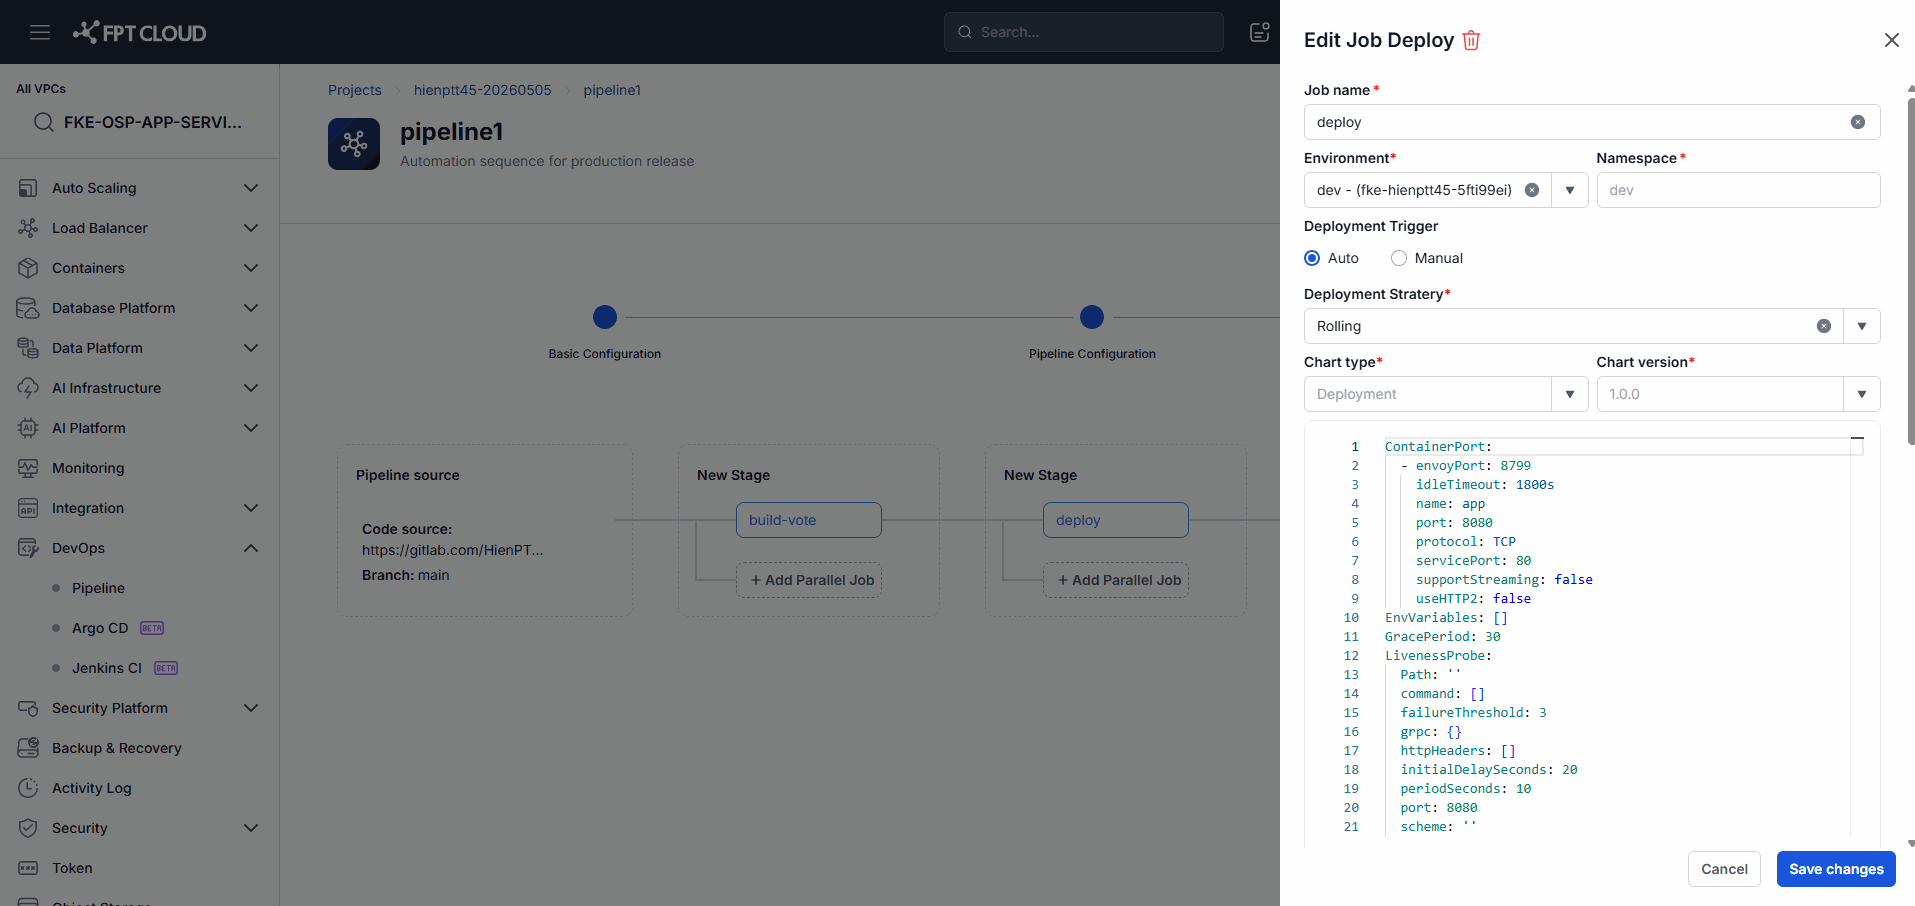
2.2 Configure Basic Information
Steps
- Enter the Job Name.
- Select the Trigger Type.
Trigger Type
| Value | Meaning |
|---|---|
| Manual | The user initiates the Deploy manually |
| Auto | The system deploys automatically when the Pipeline completes successfully |
Result
- The basic information for the Deploy Job is saved.
2.3 Select Deployment Environment
Steps
- Click Deploy to Environment.
- Select the target Environment.
- Select the corresponding Namespace.
Result
- The Deployment is linked to the selected Environment and Namespace.
💡 Only Environments that have been configured appear in the list.
2.4 Configure Deployment Strategy
Steps
- Select Rolling as the Deployment Strategy.
Result
- The Deployment Strategy is saved to the Deploy Job.
⚠️ The current version supports Rolling Strategy only.
2.5 Configure Helm Chart
Steps
- Select the Chart Type.
- Select the Chart Version.
Result
- The Helm Chart is linked to the Deployment Configuration.
💡 Chart Versions are pulled from the configured Helm Chart Repository.
2.6 Configure Values YAML
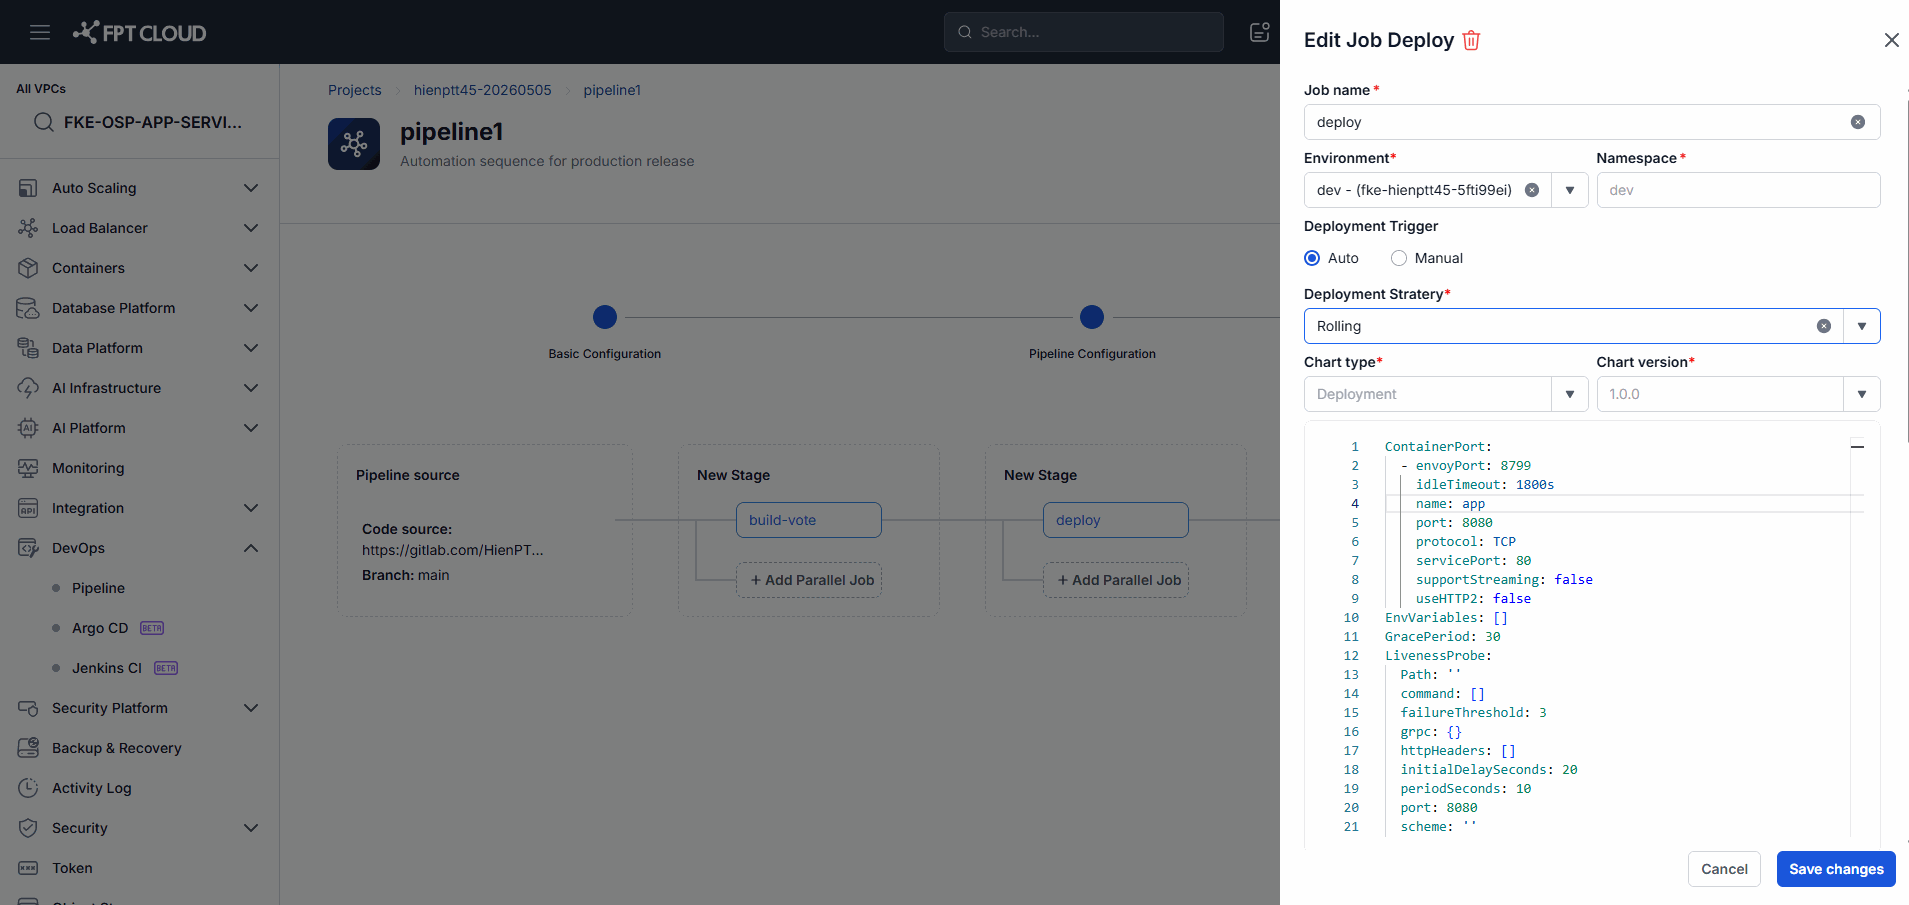
Steps
- Enter or edit the Values YAML.
- Review the configuration content.
- Confirm the YAML is valid.
Values YAML is typically used to configure:
- Replica Count
- Image Repository
- Image Tag
- Service Port
- Ingress
- Resource Limits
- Environment Variables
Result
- The Values YAML is saved to the Deployment Configuration.
⚠️ Invalid YAML cannot be saved.
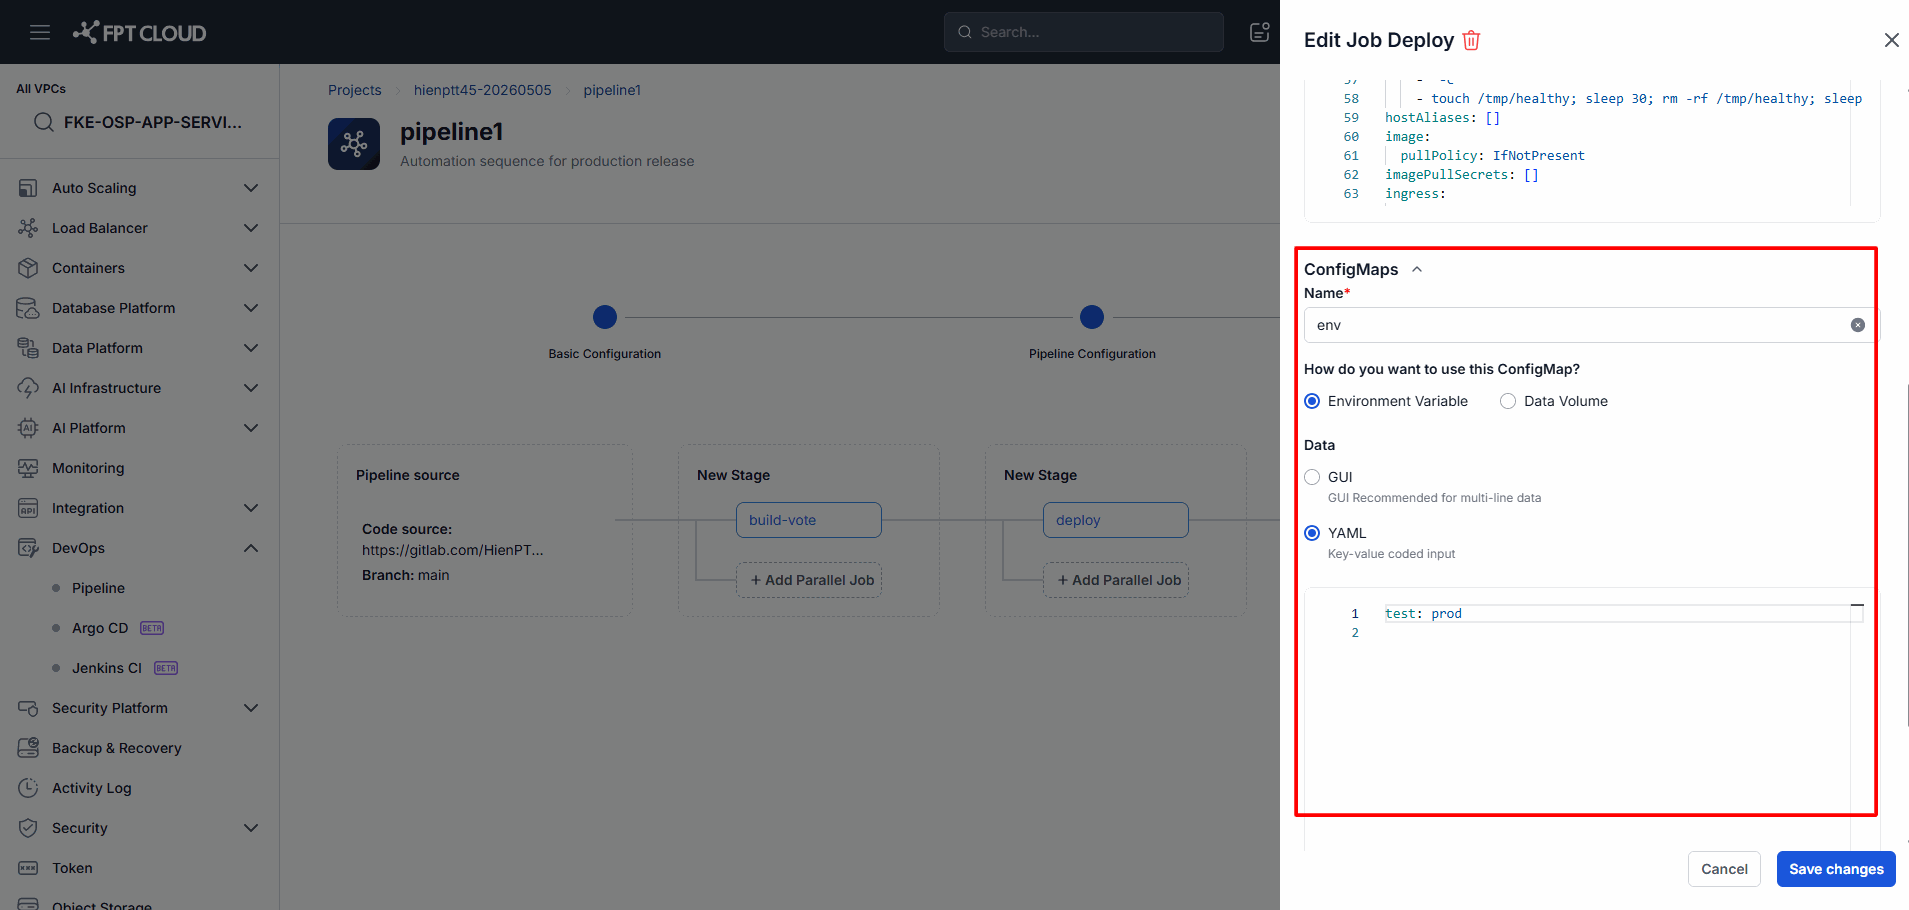
2.7 Configure ConfigMap (Optional)
Steps
- Open the ConfigMap section.
- Enter the ConfigMap name.
- Select the ConfigMap usage method.
- Select the data input format.
- Enter the configuration data.
ConfigMap Type
| Type | Meaning |
|---|---|
| Environment Variable | Inject data as environment variables into the Container |
| Data Volume | Mount data as files inside the Container |
| GUI | Enter data as Key/Value pairs |
| YAML | Enter data directly in YAML format |
Result
- The ConfigMap is linked to the Deployment.
💡 You can add multiple Key/Value pairs within a single ConfigMap.
2.8 Save Deployment Configuration

Steps
- Review all configuration details.
- Click Save.
Result
- The Deployment Configuration is saved successfully.
- The Deploy Job appears in the Pipeline.
- The Pipeline is ready to execute a Deploy.
3. Deploy Application
3.1 Open the Deploy Pipeline
Steps
- Go to the Project.
- Open the Pipeline to deploy.
- Select the configured Deploy Job.
Result
- The Deployment information is displayed.
- You can now initiate a Deploy.
3.2 Select Image Version
Steps
- Select the Image Repository.
- Select the Image Version to deploy.
Result
- The Image Version is assigned to the current Deploy run.
💡 Confirm the correct Image Version before deploying.
3.3 Start Deployment
Steps
- Click Deploy.
- Confirm the action if prompted.
Result
- A new Deployment Run is created.
- The Deployment begins executing.
3.4 Monitor Deployment Progress
While deploying, you can monitor:
- Deployment Status
- Environment
- Namespace
- Image Version
- Start Time
- Duration
Result
- The Deploy status updates in real time.
3.5 Verify Deployment Result
After completion, the system displays the final Deployment status.
| Status | Meaning |
|---|---|
| Running | Deployment is in progress |
| Success | Deployment completed successfully |
| Failed | Deployment failed |
| Cancelled | Deployment was cancelled |
3.6 Re-deploy Application
Steps
- Open a completed Deployment.
- Click Re-deploy.
- Confirm the version to deploy.
Result
- A new Deployment Run is created.
- The deployment process is repeated.
💡 Re-deploy is useful when you need to redeploy the current version or after resolving an environment issue.
3.7 Automatic Deployment
Auto Deploy lets the system deploy your application automatically when the Pipeline completes successfully, without any manual action.
This is configured in the Configure Deployment step by setting Trigger Type = Auto.
Flow
- The Pipeline is triggered.
- Build and processing steps complete successfully.
- The system automatically creates a new Deployment Run.
- The application is deployed to the configured Environment.
- The Deploy status is recorded in the Pipeline Run.
Result
- No manual Deploy action is required.
- The system deploys the new version automatically.
💡 Auto Deploy is recommended for Development or Staging environments.
⚠️ Consider carefully before enabling Auto Deploy on a Production environment.
4. Common Issues
| Issue | Cause | Resolution |
|---|---|---|
| Cannot save Deployment | Job Name is missing | Enter a valid Job Name |
| Cannot save Deployment | No Environment selected | Select an Environment |
| Cannot save Deployment | No Deployment Strategy selected | Select a Deployment Strategy |
| Cannot save Deployment | No Chart Version selected | Select a Chart Version |
| Invalid YAML format | Values YAML has a syntax error | Review and correct the YAML |
| ConfigMap Name is required | ConfigMap name not entered | Enter a ConfigMap name |
| Duplicate ConfigMap Key | Duplicate Key in ConfigMap | Use a different Key |
| Environment not available | Environment has not been configured | Configure the Environment first |
| No edit permission | Insufficient permissions | Contact your Project Admin |
| Namespace not found | Namespace does not exist in the Environment | Check the Environment settings |
| Image Version not visible | No Image has been built or pushed | Check the Build Pipeline |
| Auto Deploy not running | Trigger Type not set to Auto | Check the Deployment Configuration |
| Auto Deploy not running | Pipeline completed with Failed status | Check the Pipeline Run |
| Deployment Failed | Deployment Configuration is invalid | Review the Deployment Configuration |
| Deployment Failed | Environment is unavailable | Check the Cluster and Namespace |
5. Notes & Tips
💡 Use Auto Trigger for Development or Staging environments.
💡 Use Manual Trigger for Production environments.
💡 Use separate Namespaces for each environment.
💡 Manage application configuration through ConfigMap rather than hard-coding it in the image.
💡 Validate the Values YAML before saving to reduce deployment risk.
💡 Name the Deploy Job to reflect its purpose, such as deploy-dev or deploy-production.
💡 Always confirm the correct Image Version before deploying.
💡 Use Re-deploy to redeploy a previously running version, especially after resolving a temporary environment issue.
⚠️ The Environment must be configured before creating a Deployment.
⚠️ Invalid YAML will prevent the configuration from being saved.
⚠️ Changing the Deployment Configuration may affect subsequent Deploy runs.
⚠️ Trigger Type = Auto may deploy a new version automatically without any manual action.
⚠️ Deploying to Production may directly affect end users.