Build Triggers
1. Before You Start
Before using this feature, make sure that:
- You have an account on the FPT Cloud DevOps Platform.
- At least one Pipeline has been created.
- A GitLab Connection has been configured.
- You have administrator access to the Repository on GitLab.
- The Pipeline has been saved successfully.
⚠️ Auto Trigger currently supports GitLab only.
2. Configure Auto Trigger(s)
2.1 Enable Auto Trigger
Steps
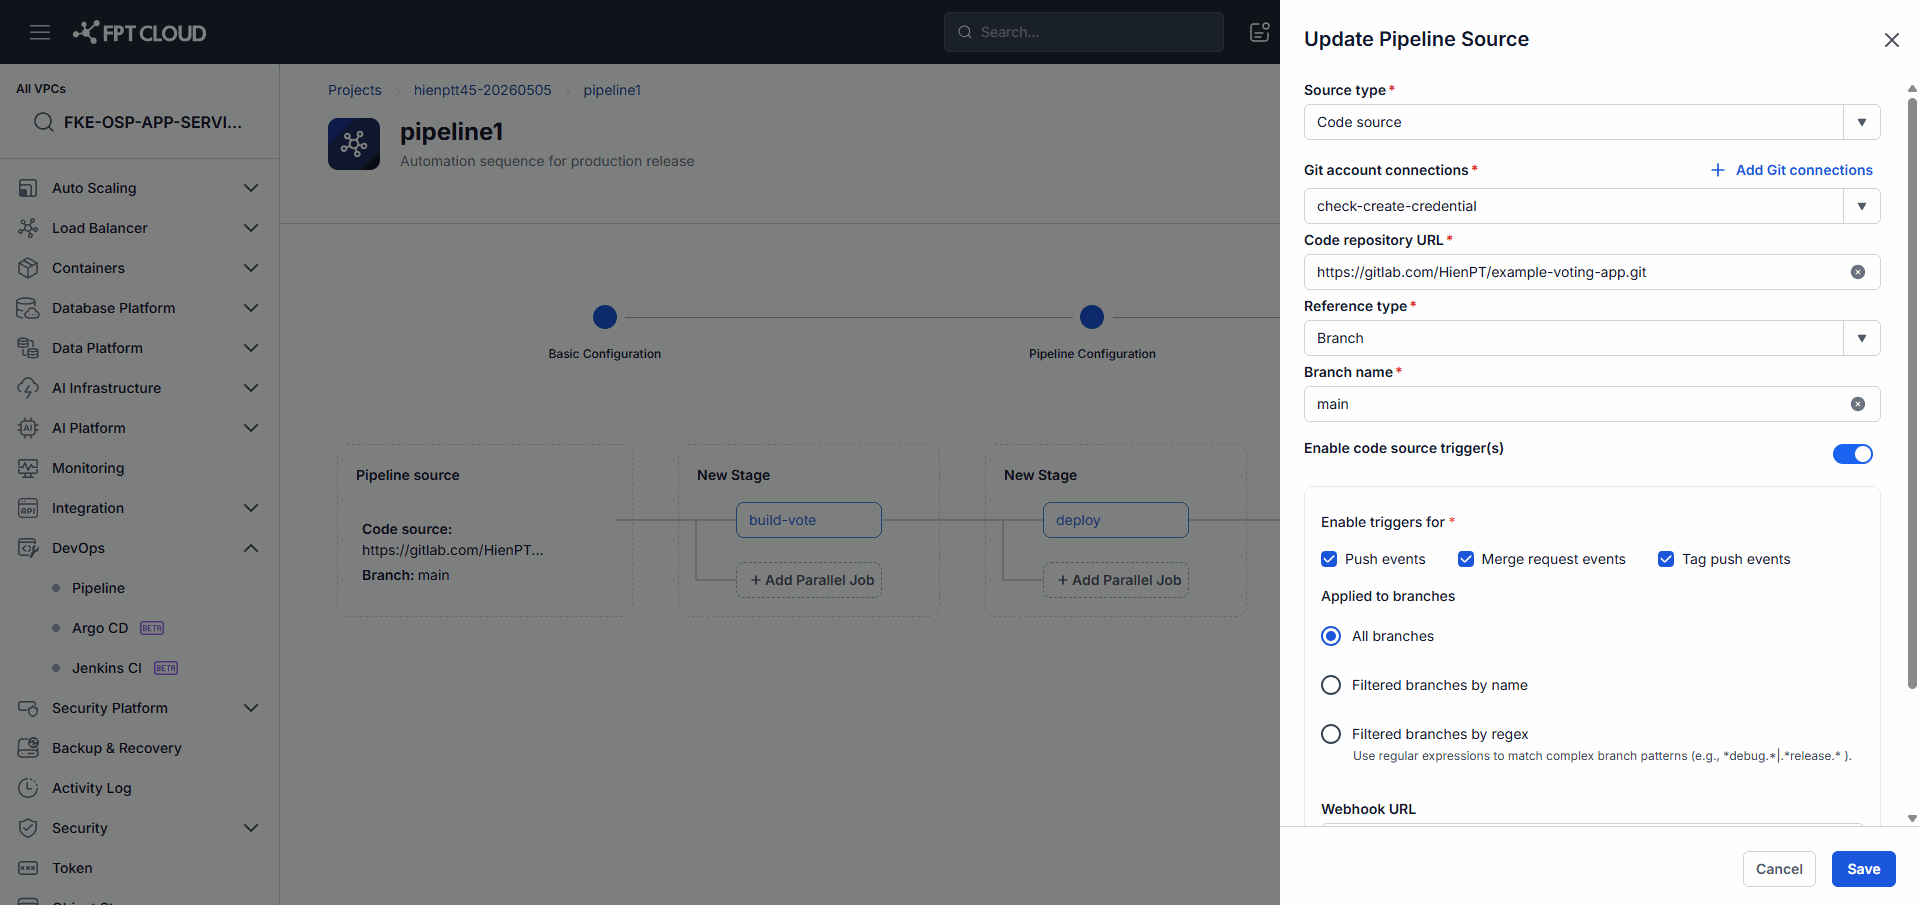
- Go to the Trigger(s) step while configuring the Pipeline.
- Turn on the Enable code source trigger(s) option.
- The system displays the Trigger configuration area.
Result
- Auto Trigger is enabled.
- You can now configure the Event and Branch Filter.
2.2 Select Event Types
You must select at least one event type.
| Event Type | Triggers When | Use Case |
|---|---|---|
| Push | A new Commit is Pushed | Continuous Integration |
| Merge Request | A Merge Request is created or updated | Code Review Validation |
| Tag | A new Git Tag is created | Release Pipeline |
Result
- The Pipeline runs whenever the corresponding event occurs.
2.3 Configure Branch Filter by Name
Include Branches
- main
- develop
- feature/*
- release/*
Exclude Branches
- test/*
- hotfix/*
Result
- The Trigger only runs on branches that match the configured conditions.
💡 If you leave Include Branches empty, the Trigger runs on all branches (except those listed under Exclude).
2.4 Configure Branch Filter by Regex
| Regex | Meaning |
|---|---|
^main$ | The main branch only |
^(develop|staging)$ | The develop or staging branch only |
.*feature.* | All branches containing feature |
.*release.* | All branches containing release |
Result
- The Trigger only runs on branches that match the Regex condition.
⚠️ Invalid Regex is rejected by the system.
2.5 Manage Webhook
Webhook URL and Token
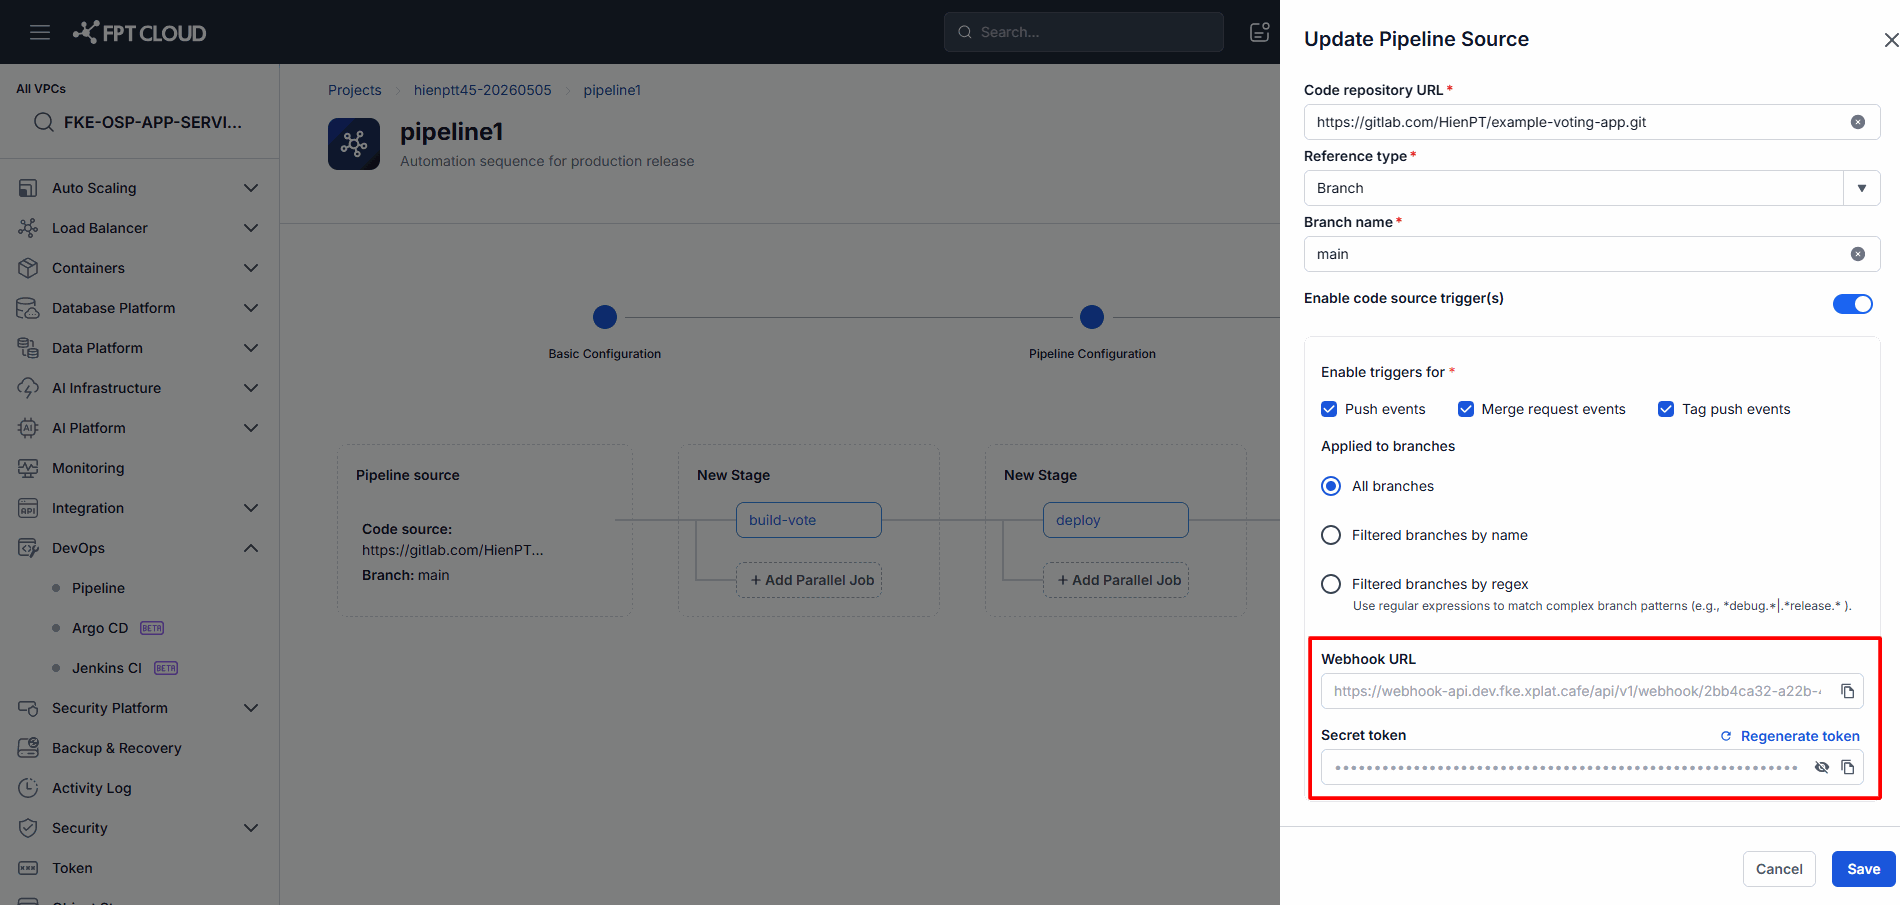
| Element | Description |
|---|---|
| Webhook URL | The endpoint that receives events from GitLab |
| Token | The Webhook authentication code |
| Copy | Copies the value to the Clipboard |
These values are generated automatically by the system and cannot be edited directly.
Register the Webhook in GitLab
- Copy the Webhook URL.
- Copy the Token.
- Open the GitLab Repository.
- Go to Settings → Webhooks.
- Create a new Webhook.
- Paste the URL and Token.
- Select the relevant events.
- Click Add Webhook.
Result
- GitLab can send events to the FPT Cloud DevOps Platform.
- The Pipeline is triggered automatically when a matching event occurs.
3. Manage Trigger(s)
3.1 Open the Trigger(s) Screen
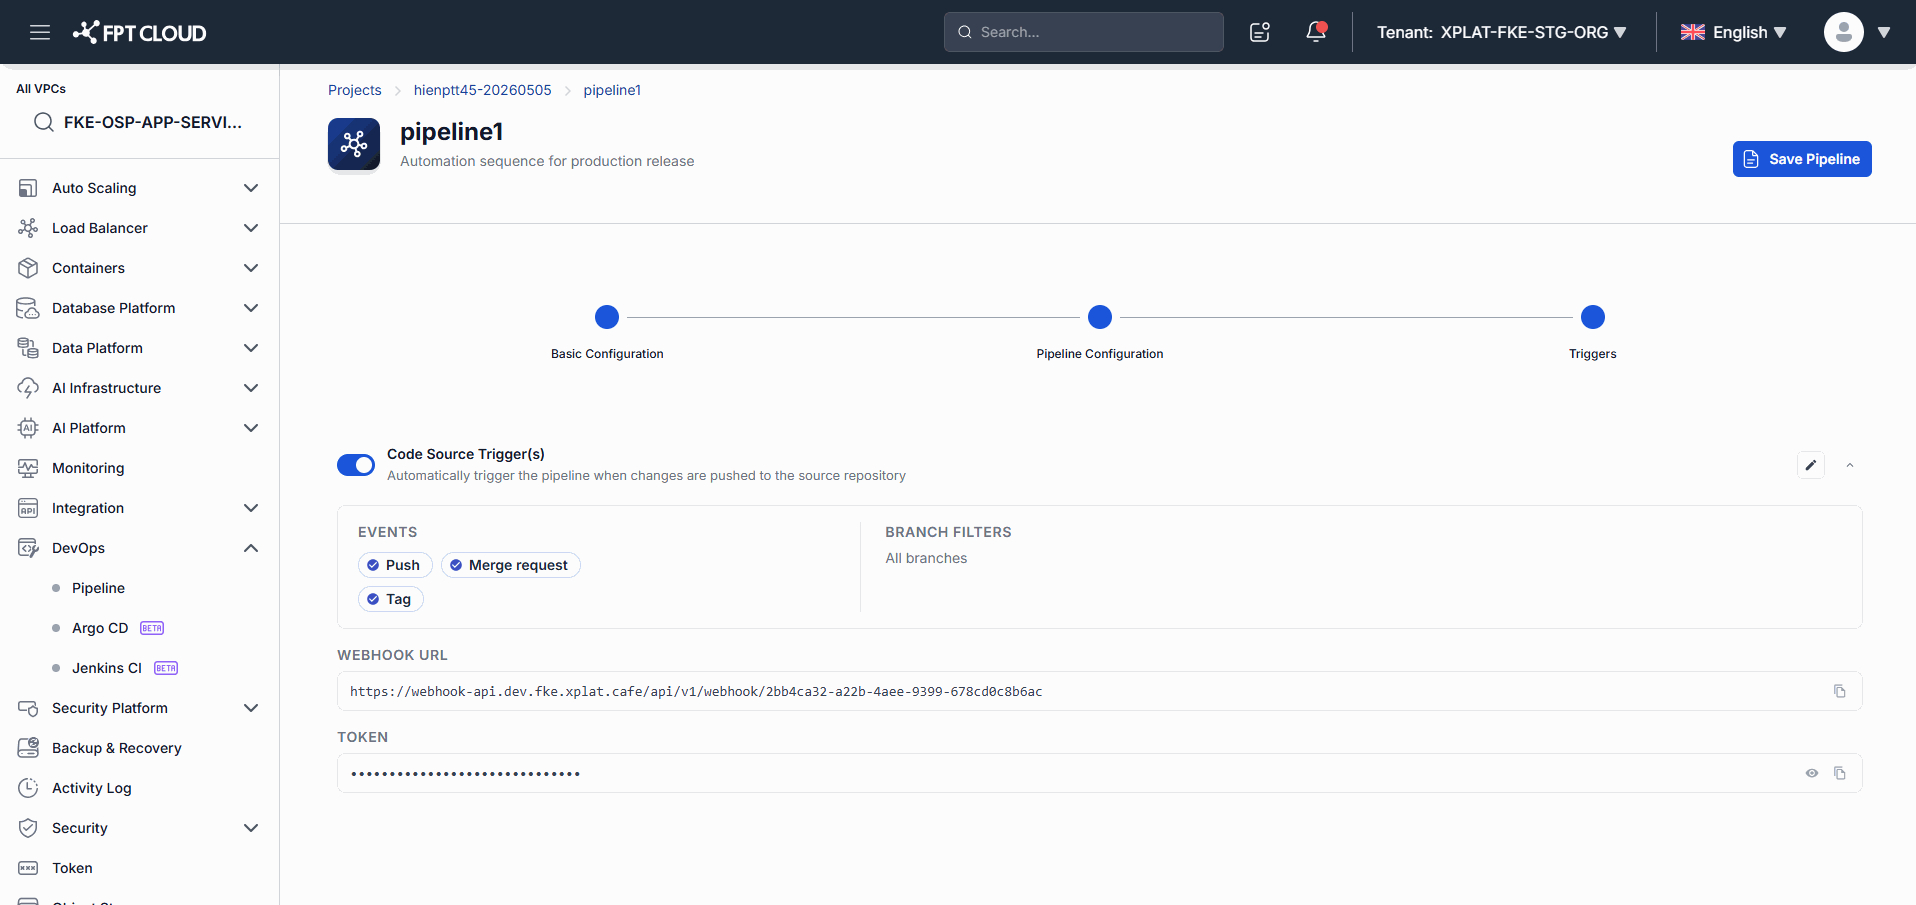
The screen displays:
- Trigger status
- The configured Event
- The current Branch Filter
- Webhook URL
- Token
3.2 Edit a Trigger
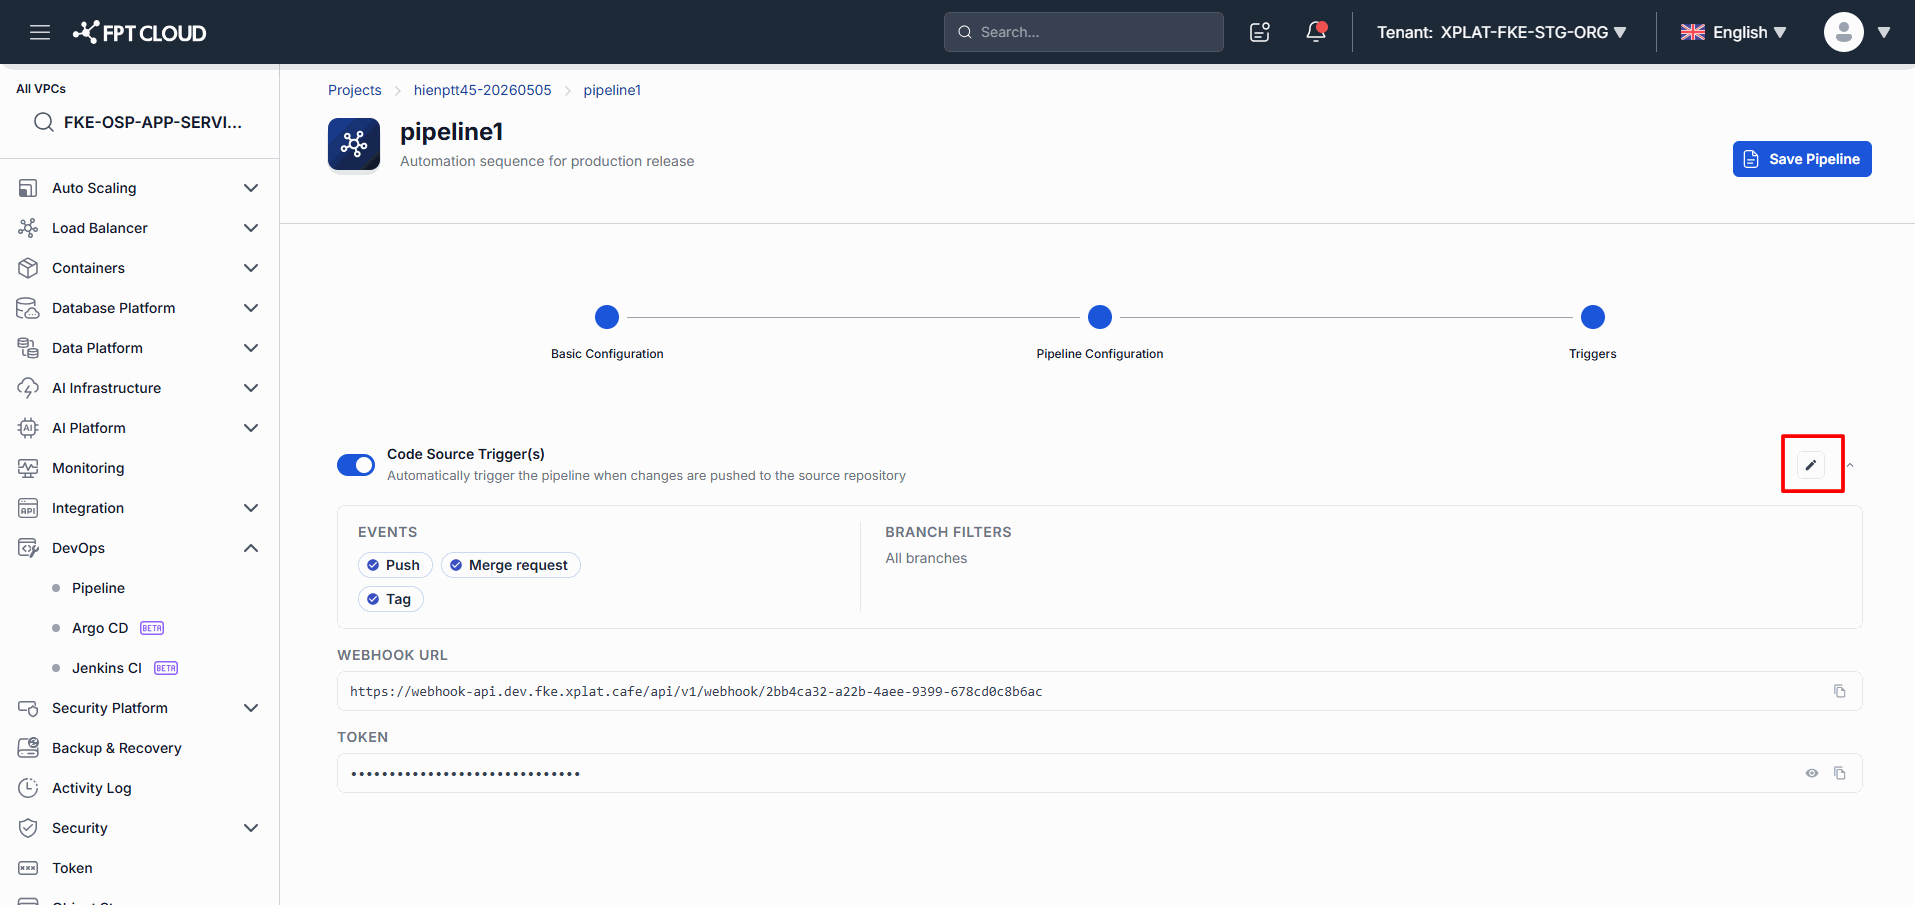
- Open the Trigger(s) screen.
- Click the Edit icon.
- Update the Trigger configuration.
- Click Save Pipeline.
Result
- The Trigger configuration is updated successfully.
3.3 Regenerate Token
- Open the Trigger(s) screen.
- Select Regenerate Token.
- Confirm the action.
Result
- The system generates a new Token.
- The old Token is invalidated immediately.
⚠️ After you Regenerate the Token, update the Token in the GitLab Webhook.
4. Common Issues
| Issue | Cause | Resolution |
|---|---|---|
| Pipeline does not run automatically | Auto Trigger is not enabled | Check the Trigger Configuration |
| Code is Pushed but the Pipeline does not run | The branch does not match the Filter | Check the Branch Filter |
| GitLab reports a Webhook error | The URL or Token is incorrect | Check the Webhook Configuration |
| Trigger stops working after a Token regeneration | GitLab is still using the old Token | Update the new Token in GitLab |
| Webhook information is not shown | The Trigger is not enabled | Enable Auto Trigger first |
5. Notes & Tips
💡 Use a Branch Filter to avoid unintended Triggers.
💡 Grant Trigger management access only to the person responsible for CI/CD.
💡 Use GitLab's Test Webhook feature after configuring it.
⚠️ The old Token is invalidated immediately after a Regenerate.
⚠️ Auto Trigger currently supports GitLab only.