Create Pipeline
1. Before You Start
Make sure that:
- You have permission to create Pipelines within the Project.
- A Git Connection or Registry Connection has been configured (if you intend to use one).
- You have defined the CI/CD workflow you want to build.
2. Walkthrough: Create and Configure a Pipeline
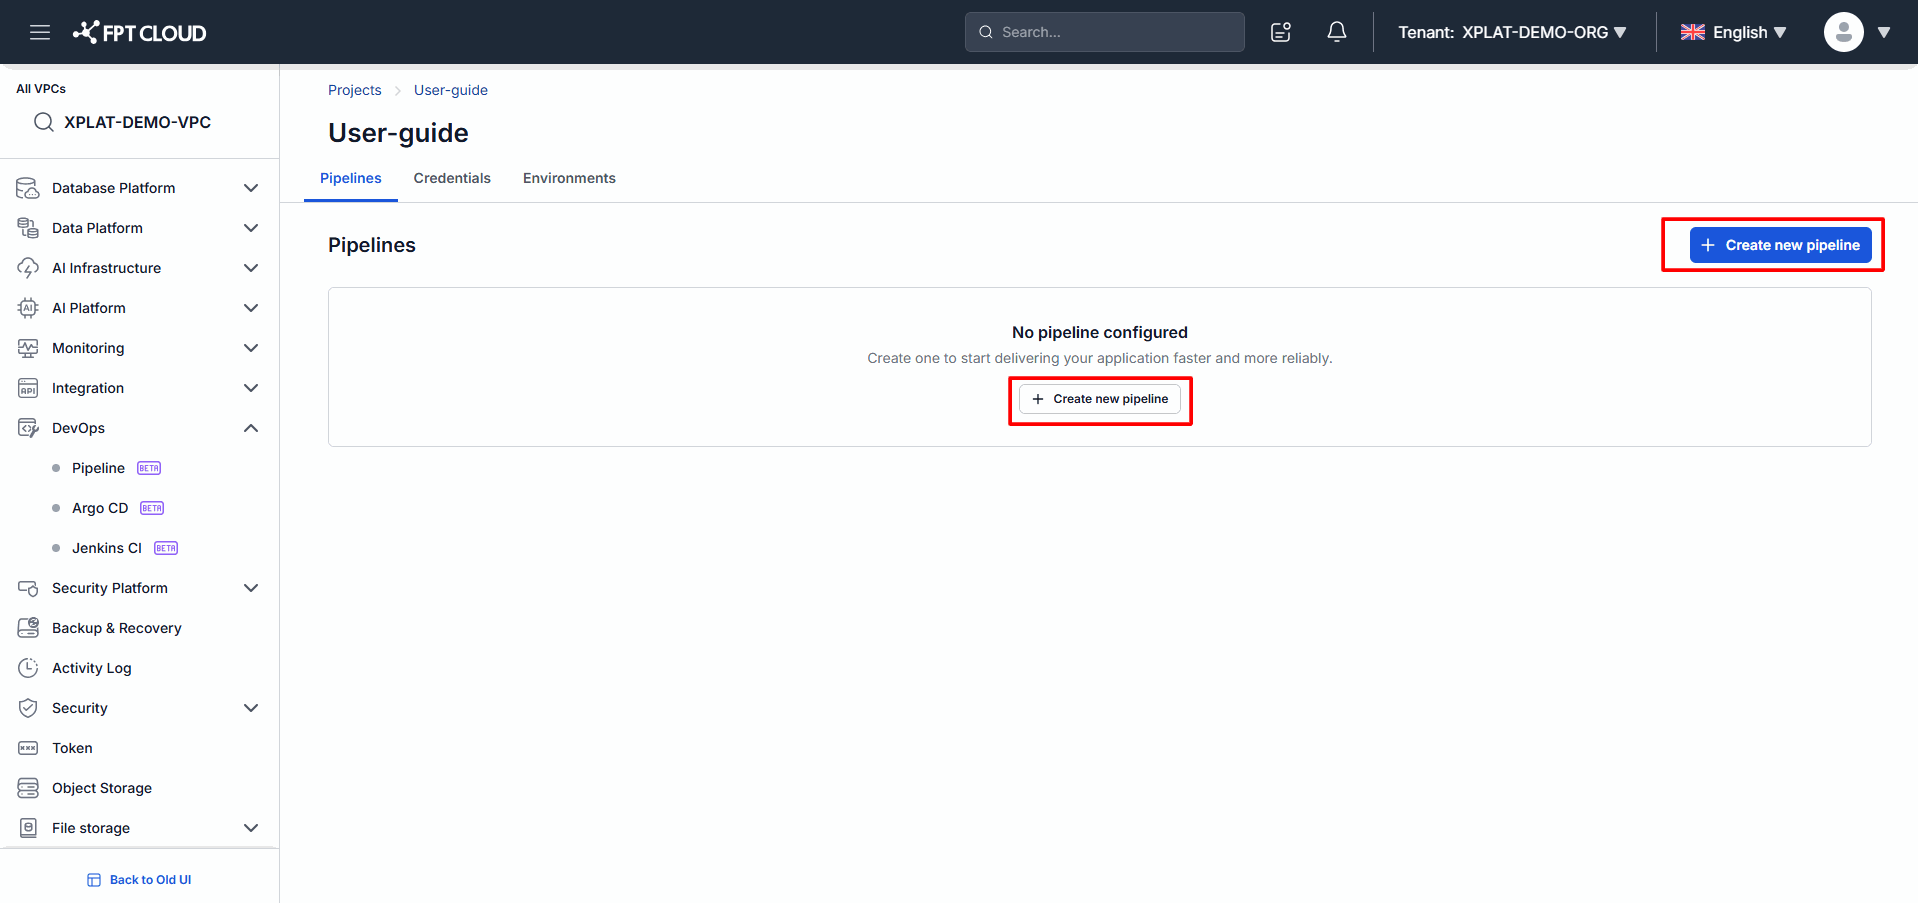
Step 1. Open Create Pipeline Screen
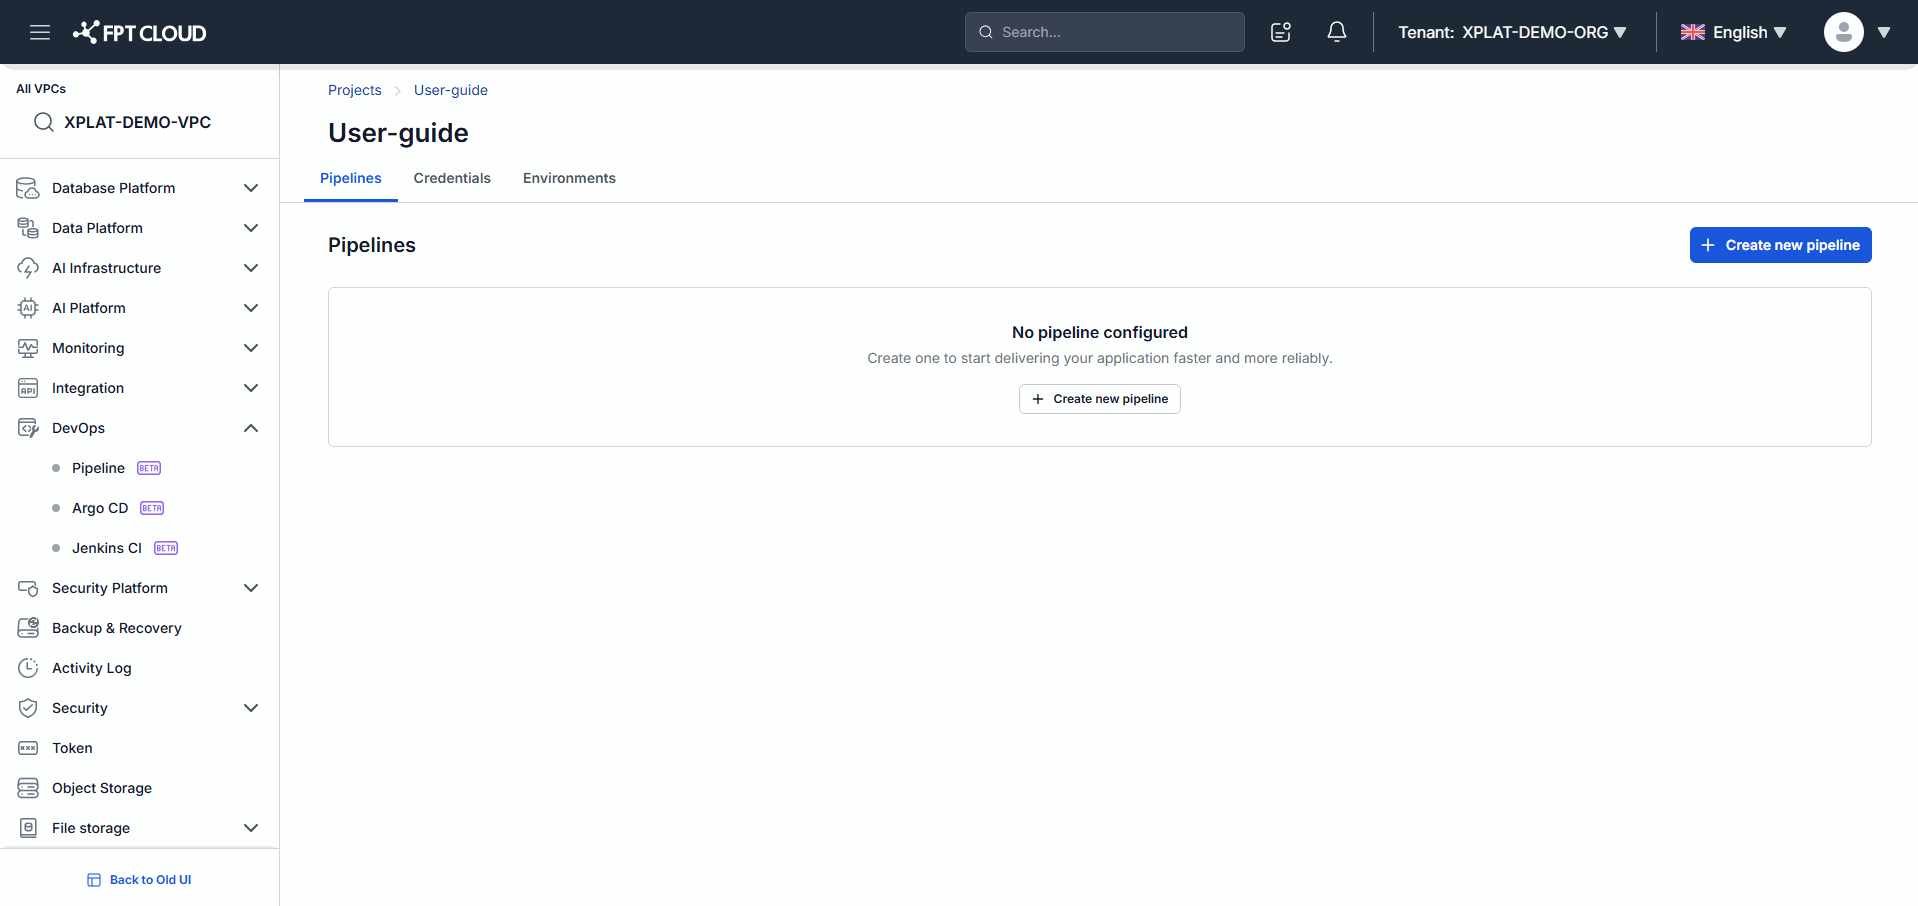
Steps
- Open the Project you want to configure.
- Click Create New Pipeline.
Expected Result
- The Pipeline creation screen is displayed.
Step 2. Enter Basic Information

Steps
- Enter the Pipeline Name.
- Enter a Description (optional).
Expected Result
- The Pipeline's basic information is fully filled in.
Step 3. Create the Pipeline
Steps
- Click Create.
Expected Result
- The Pipeline is created successfully.
- The system redirects you to the Pipeline configuration screen.
Step 4. Configure Pipeline Source
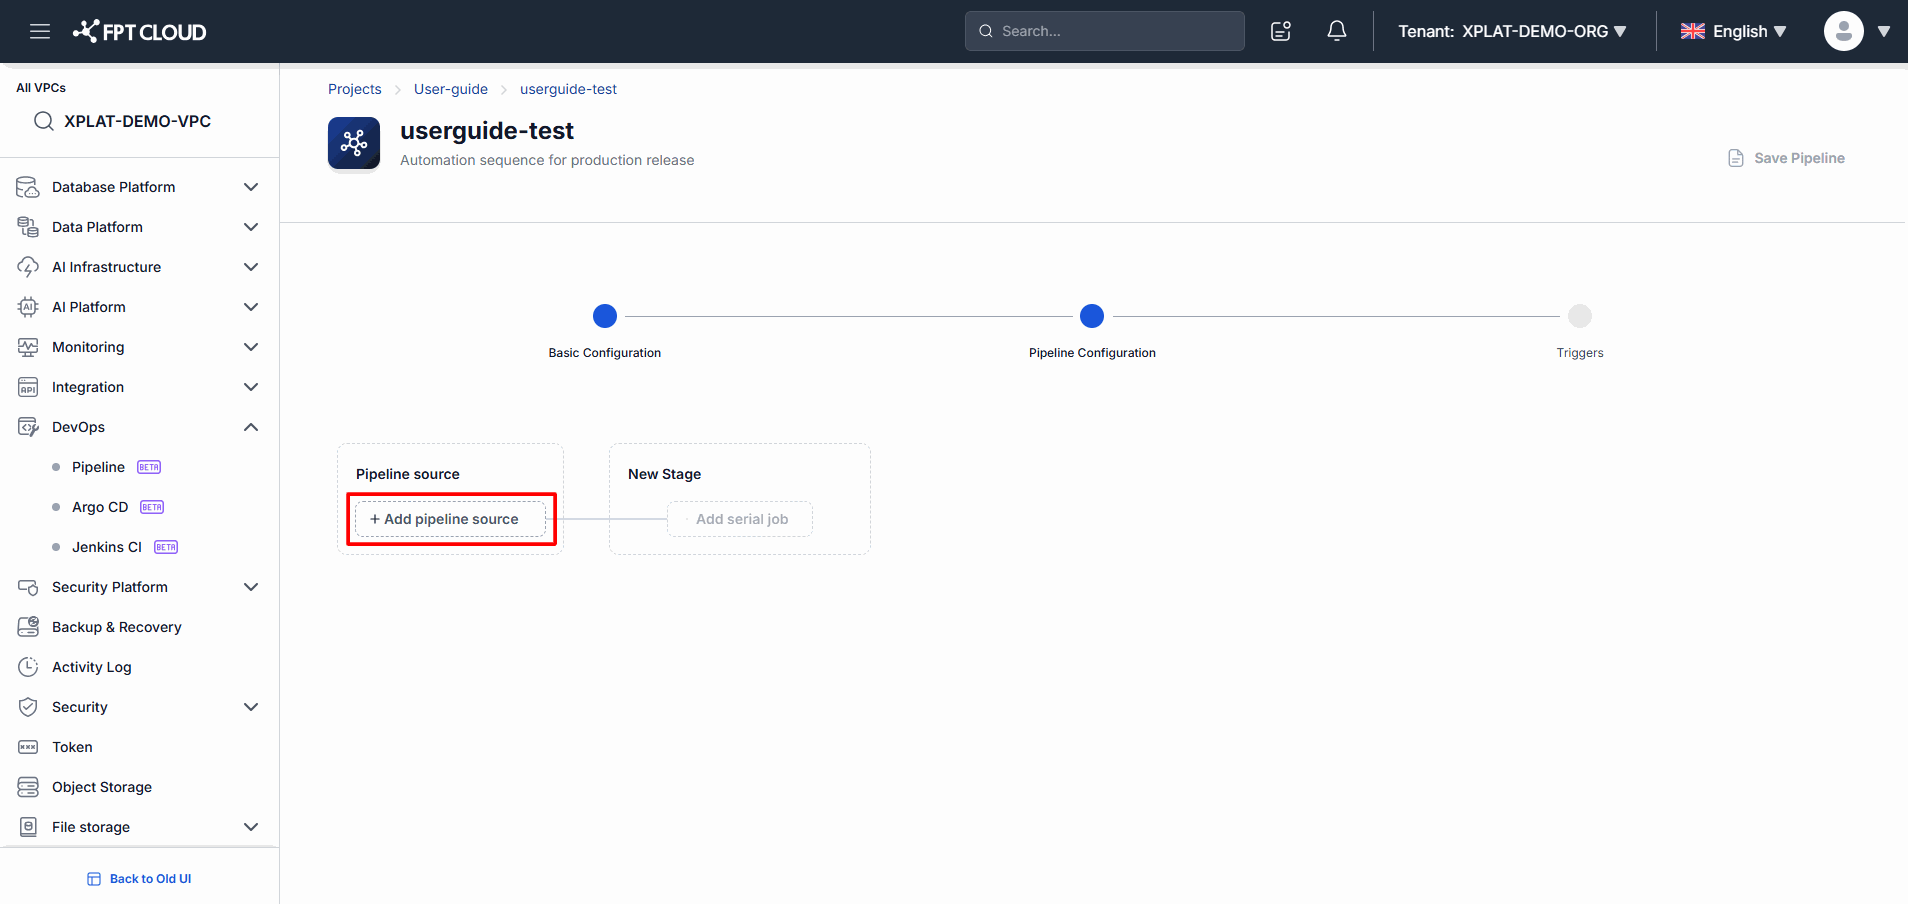
Steps
- In the Pipeline Source area, click Add Pipeline Source.
Choose a Source Type
You can choose from:
- Git Repository
- Container Registry
Configure a Git Source
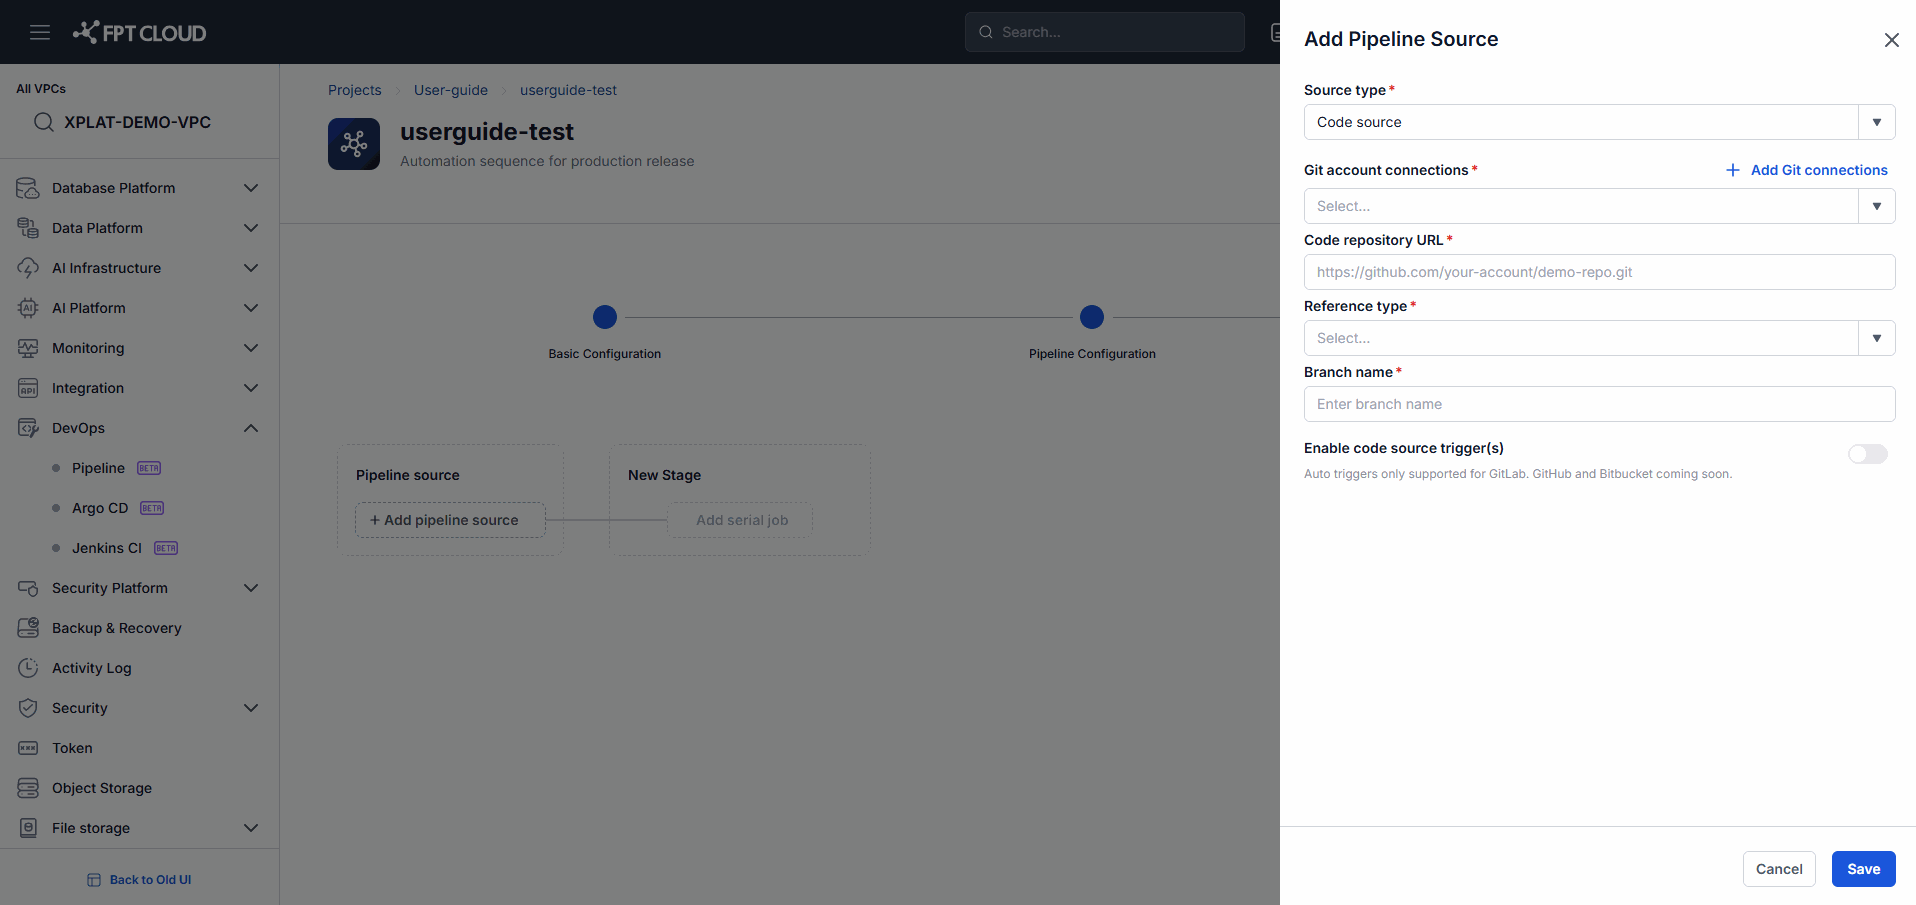
- Select a Connection.
- Select a Repository.
- Select a Branch.
- Configure a Trigger if needed.
Configure a Registry Source
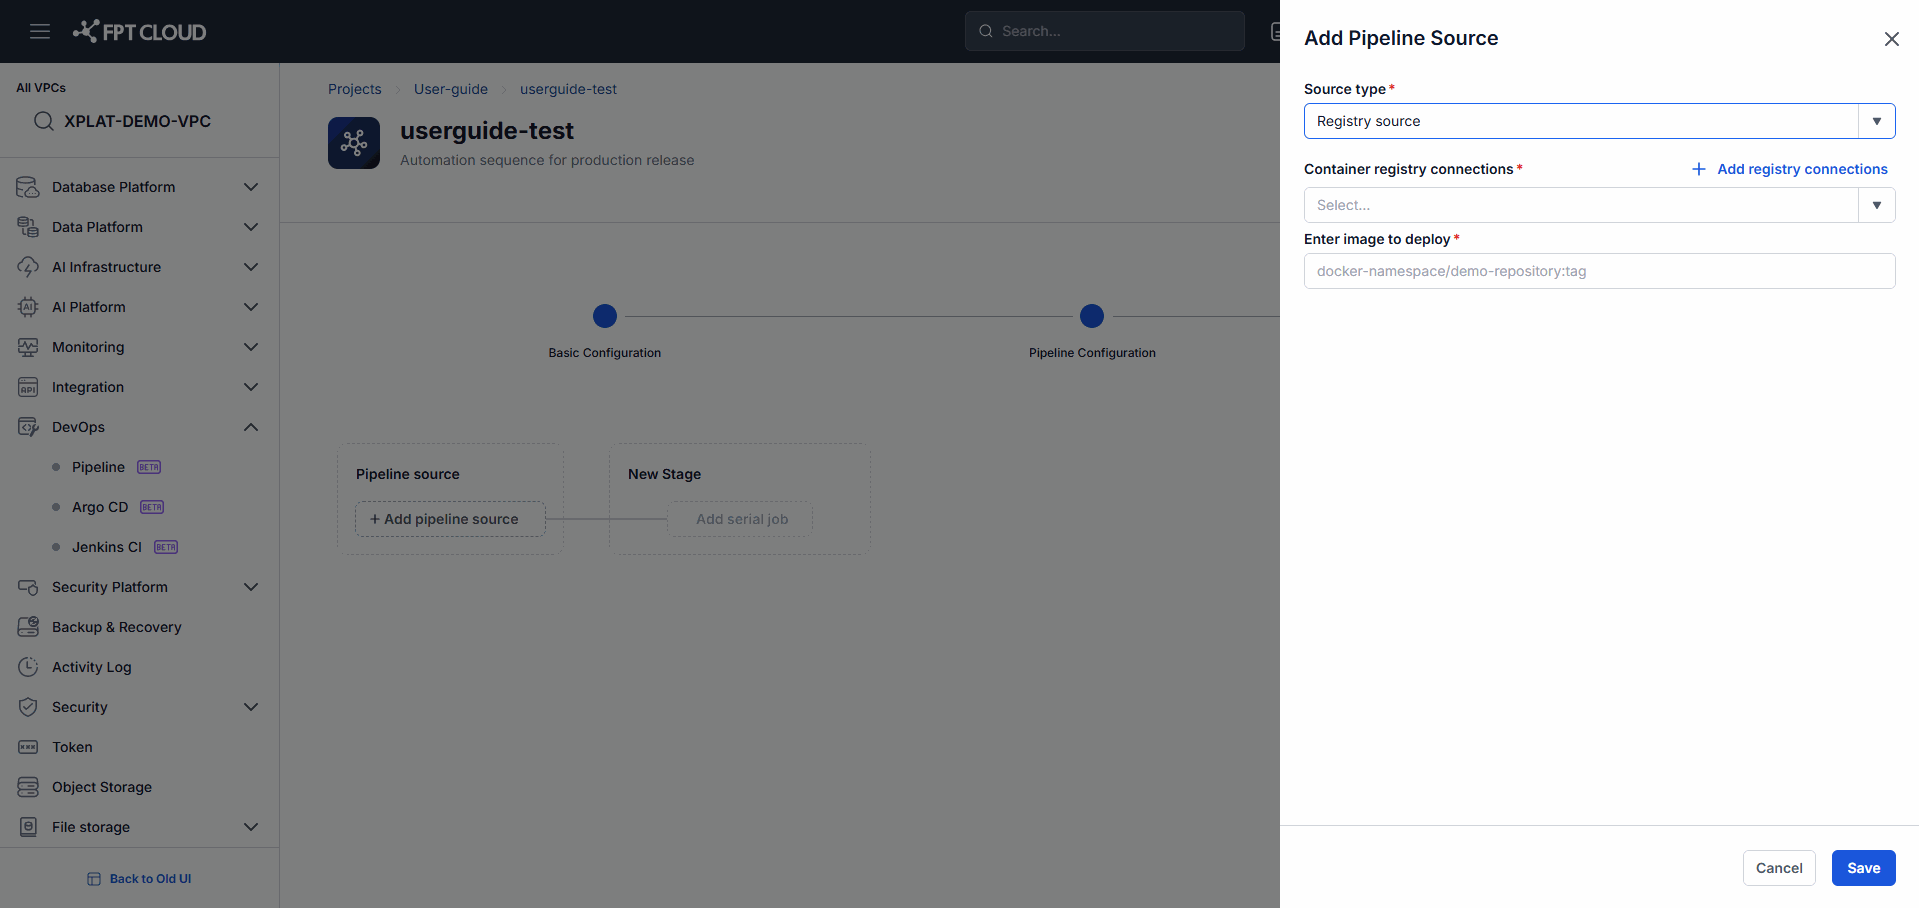
- Select a Registry Connection.
- Select the appropriate Image.
Expected Result
- The Pipeline Source is configured successfully.
Step 5. Add a Stage
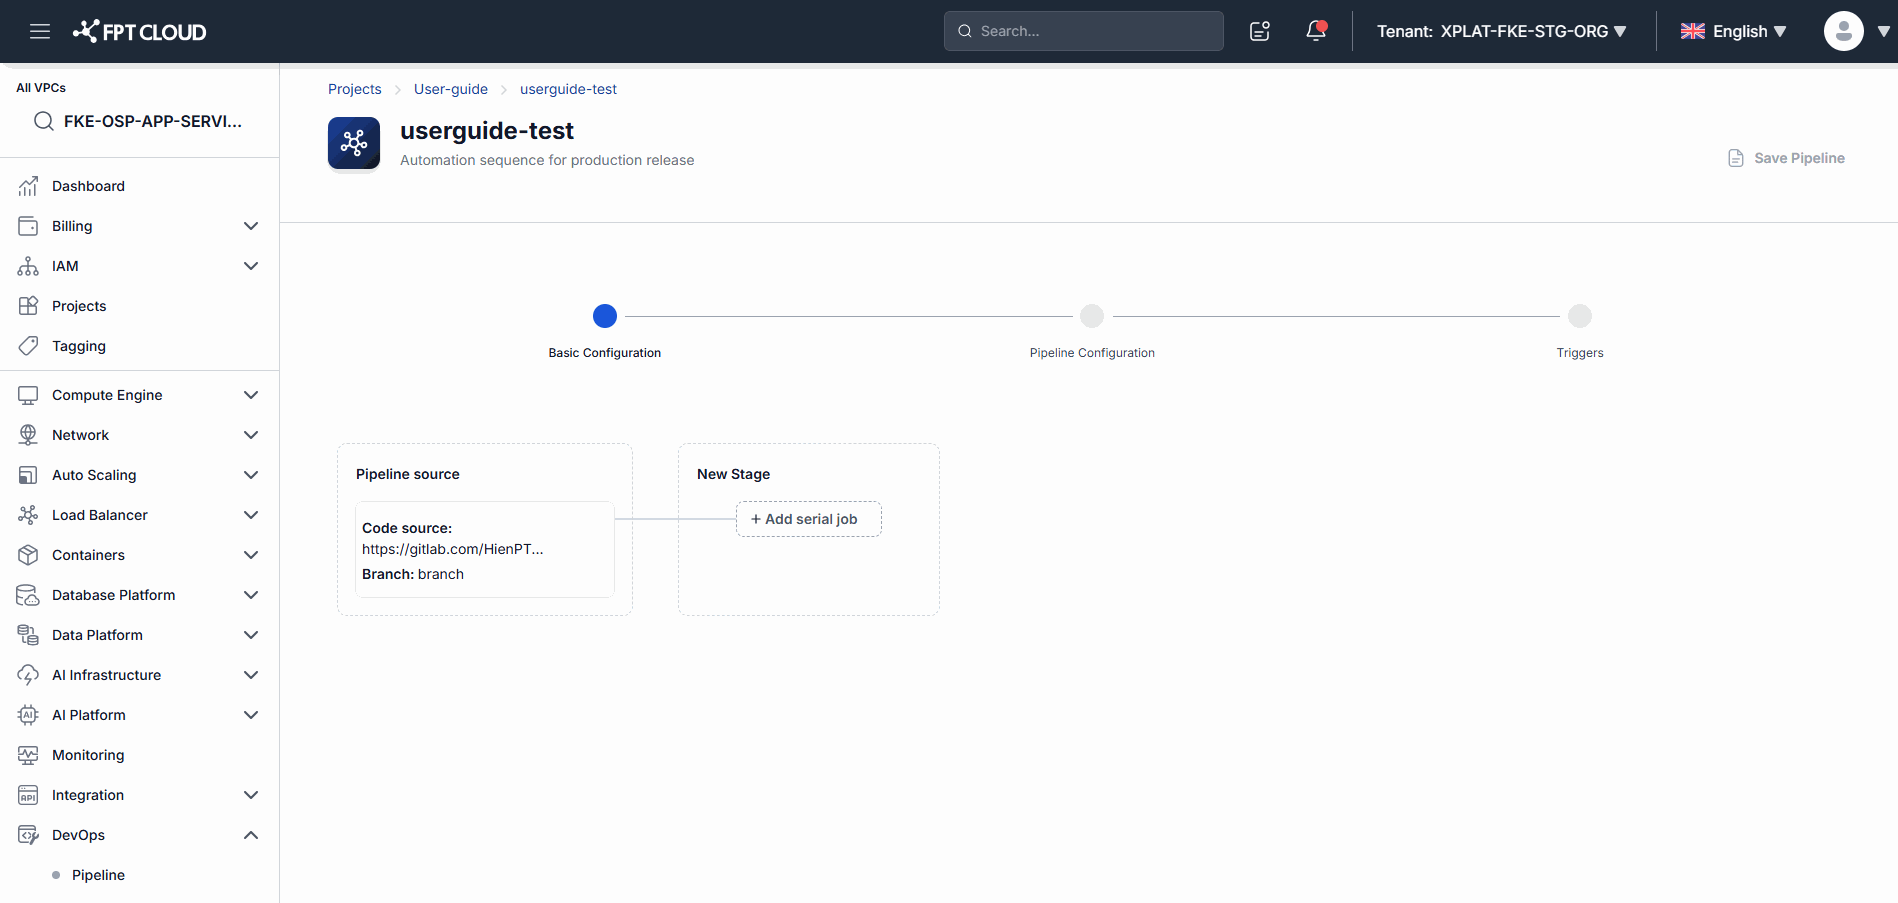
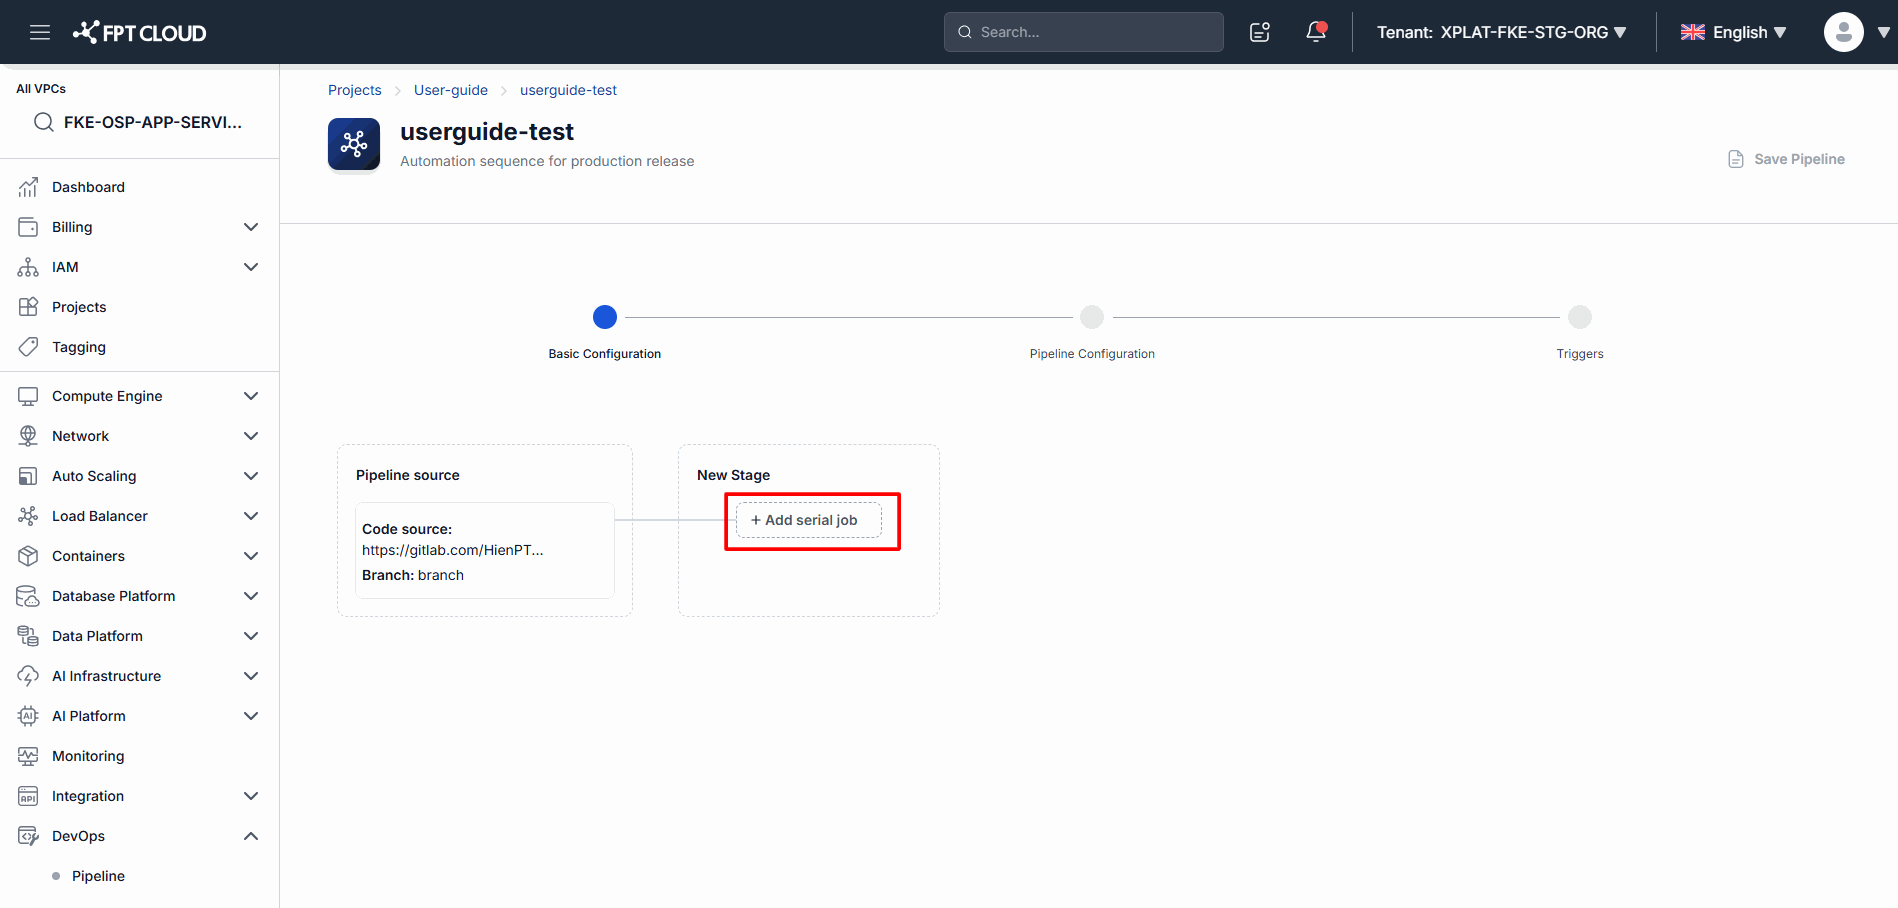
Steps
- Select the position where you want to add a Stage.
- Click New Stage.
Expected Result
- A new Stage is created in the Pipeline.
Step 6. Add Jobs to the Stage
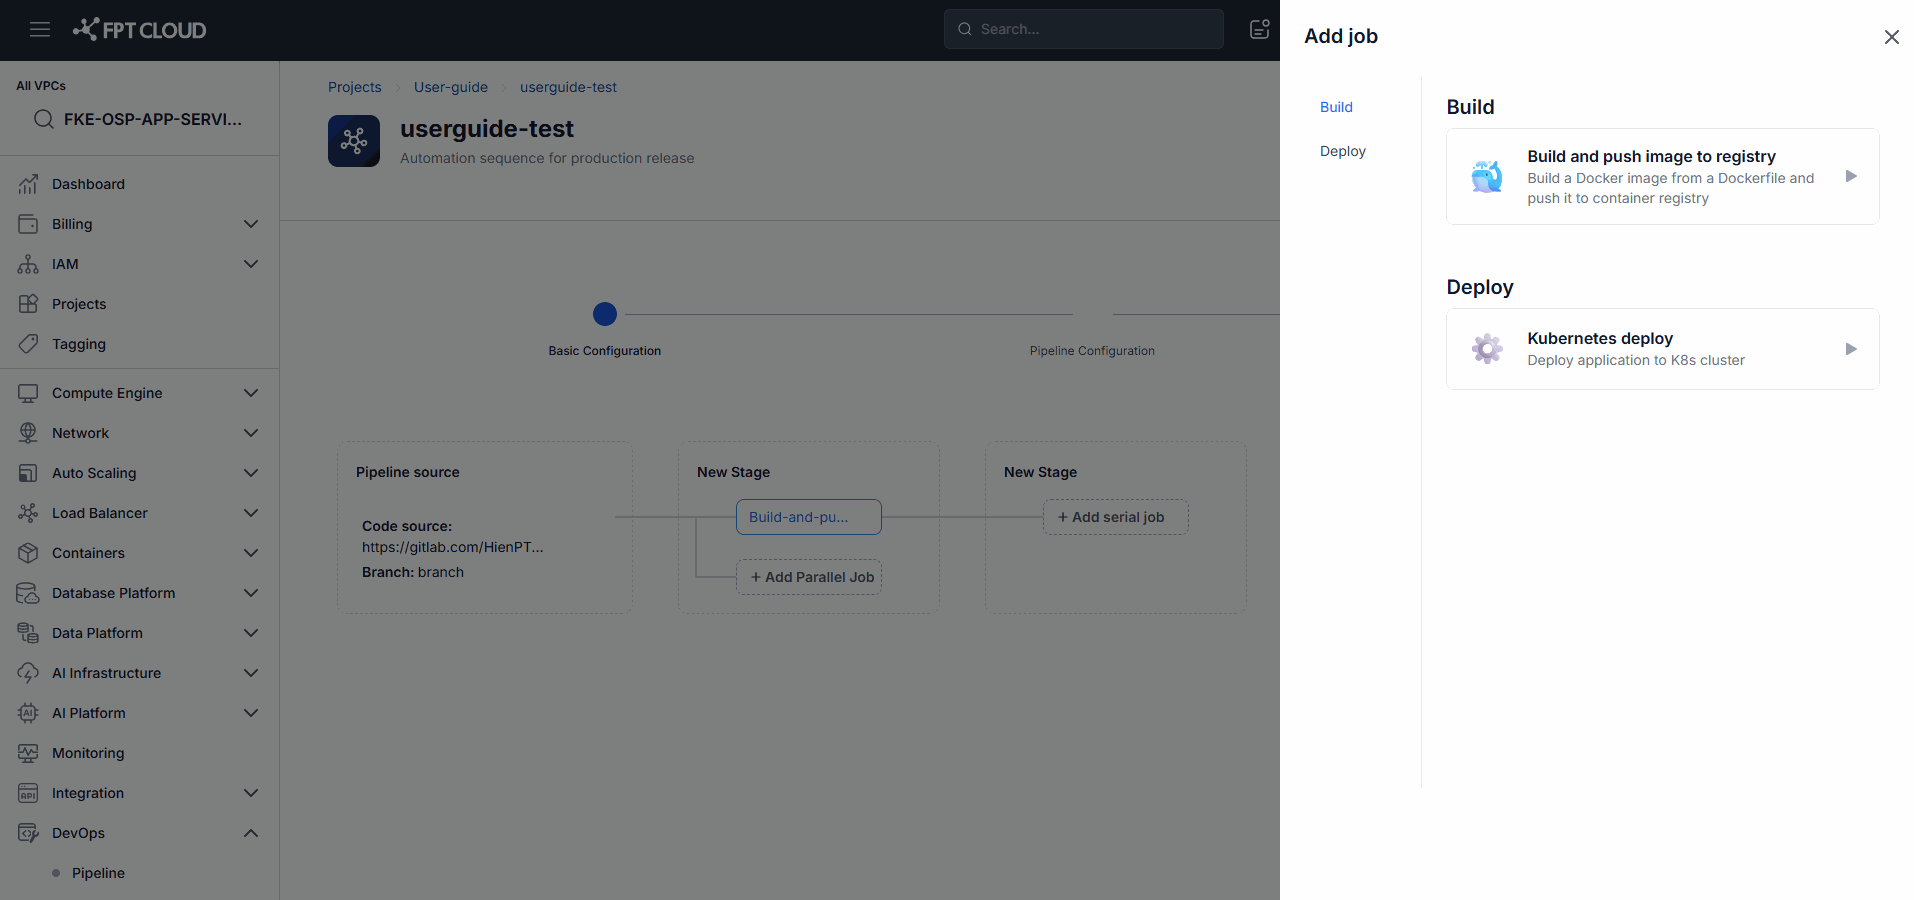
Steps
- Select the Stage you just created.
- Add Jobs as needed.
Job Types
- Serial Job: runs sequentially.
- Parallel Job: runs in parallel.
Expected Result
- The Job is added to the Stage.
- The Job is ready to be configured.
Optional: Insert a Stage Between Existing Stages
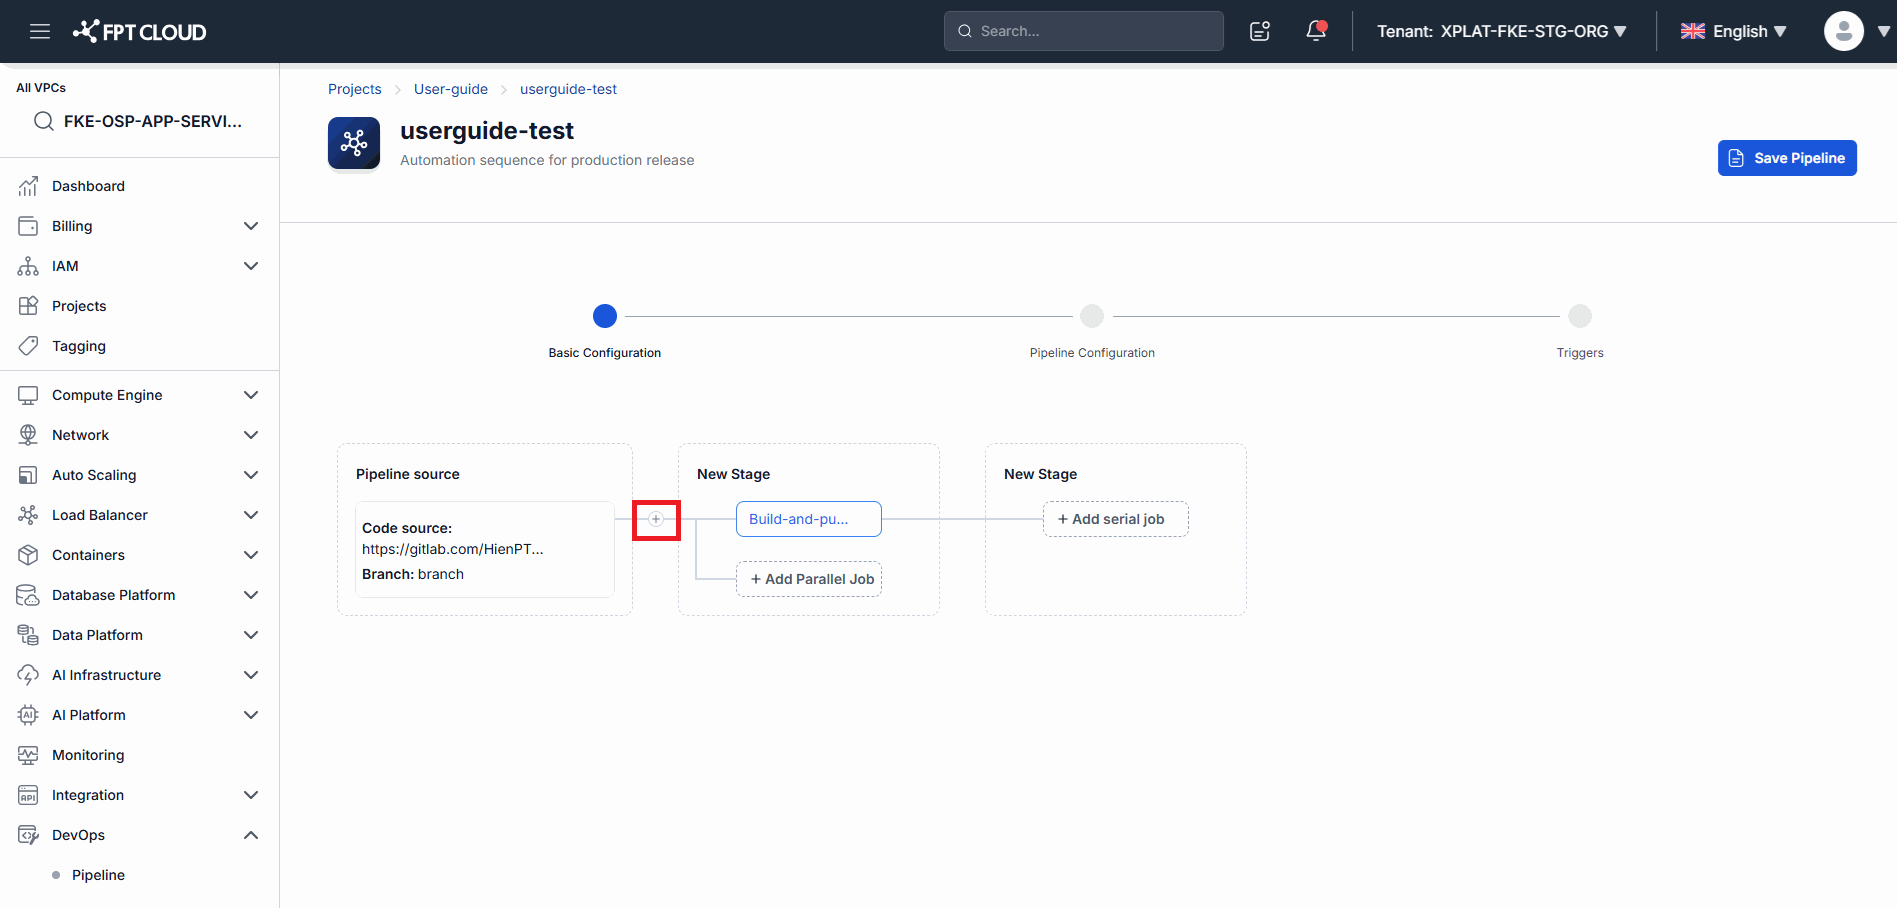
Steps
- Hover over the connector between two Stages.
- Click the add-Stage icon.
Expected Result
- A new Stage is inserted into the Pipeline.
- The execution order is updated automatically.
Step 7. Save the Pipeline
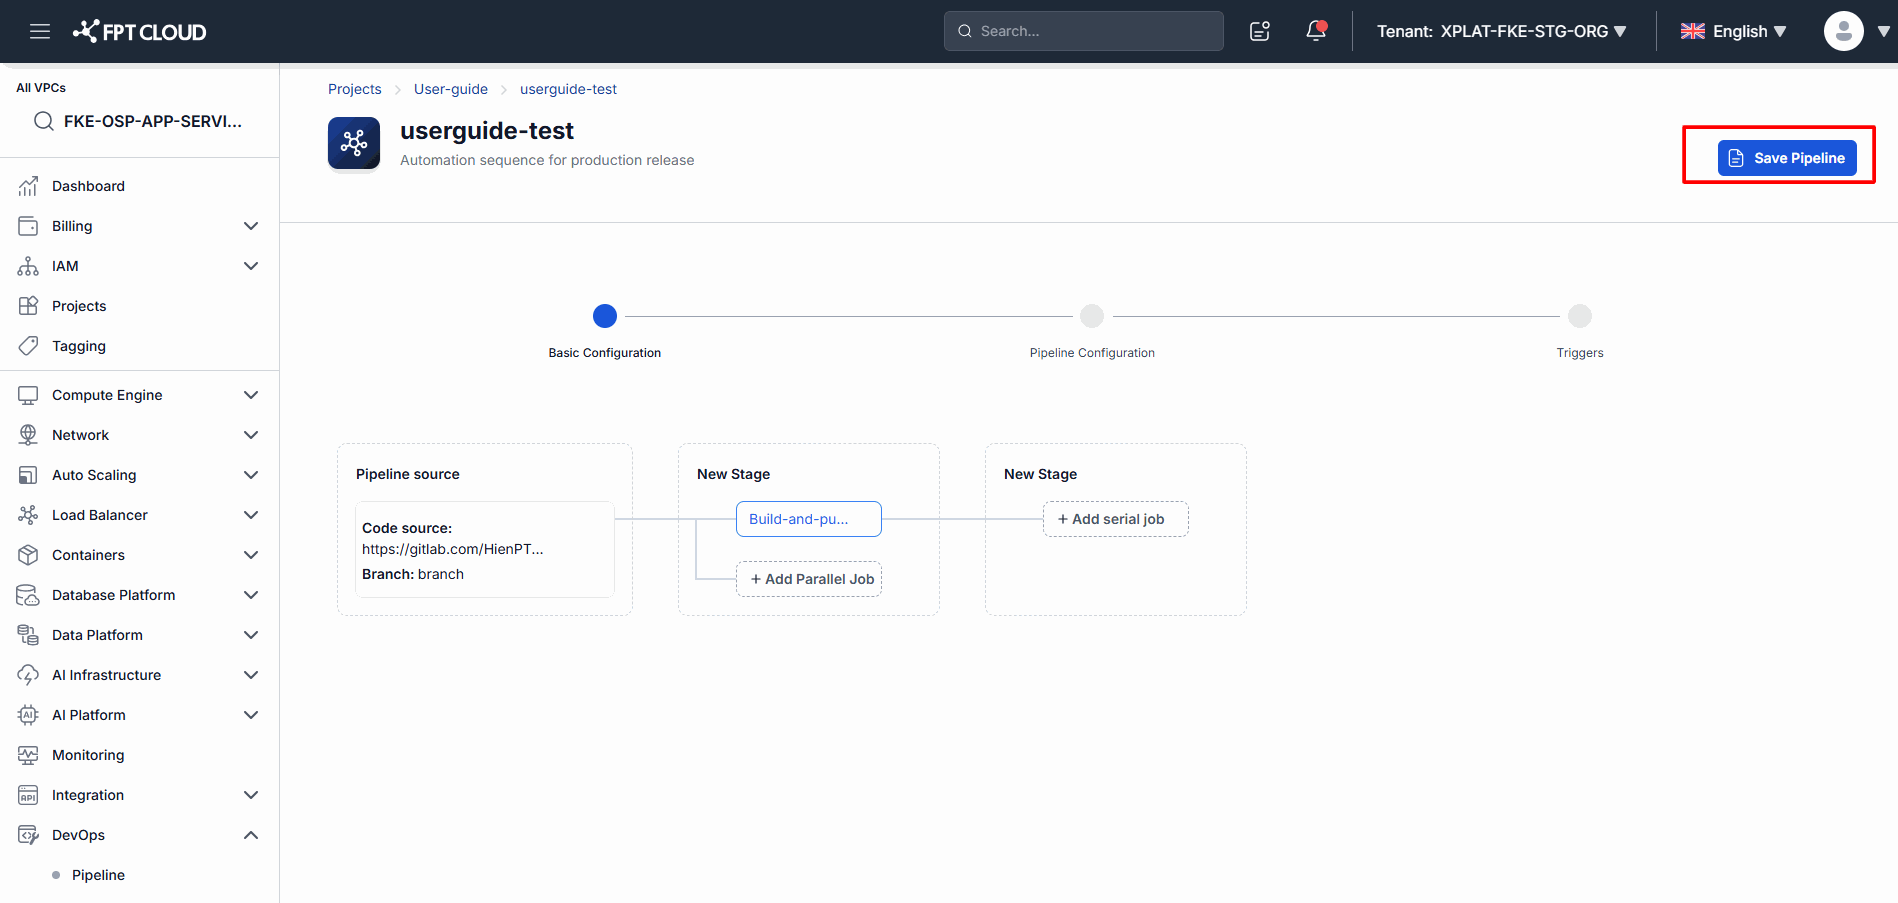
Check Before Saving
Make sure the Pipeline has:
- A Pipeline Source
- At least one Stage
- At least one Job
Steps
- Click Save.
Expected Result
- The Pipeline is saved successfully.
- The Pipeline is ready to run.
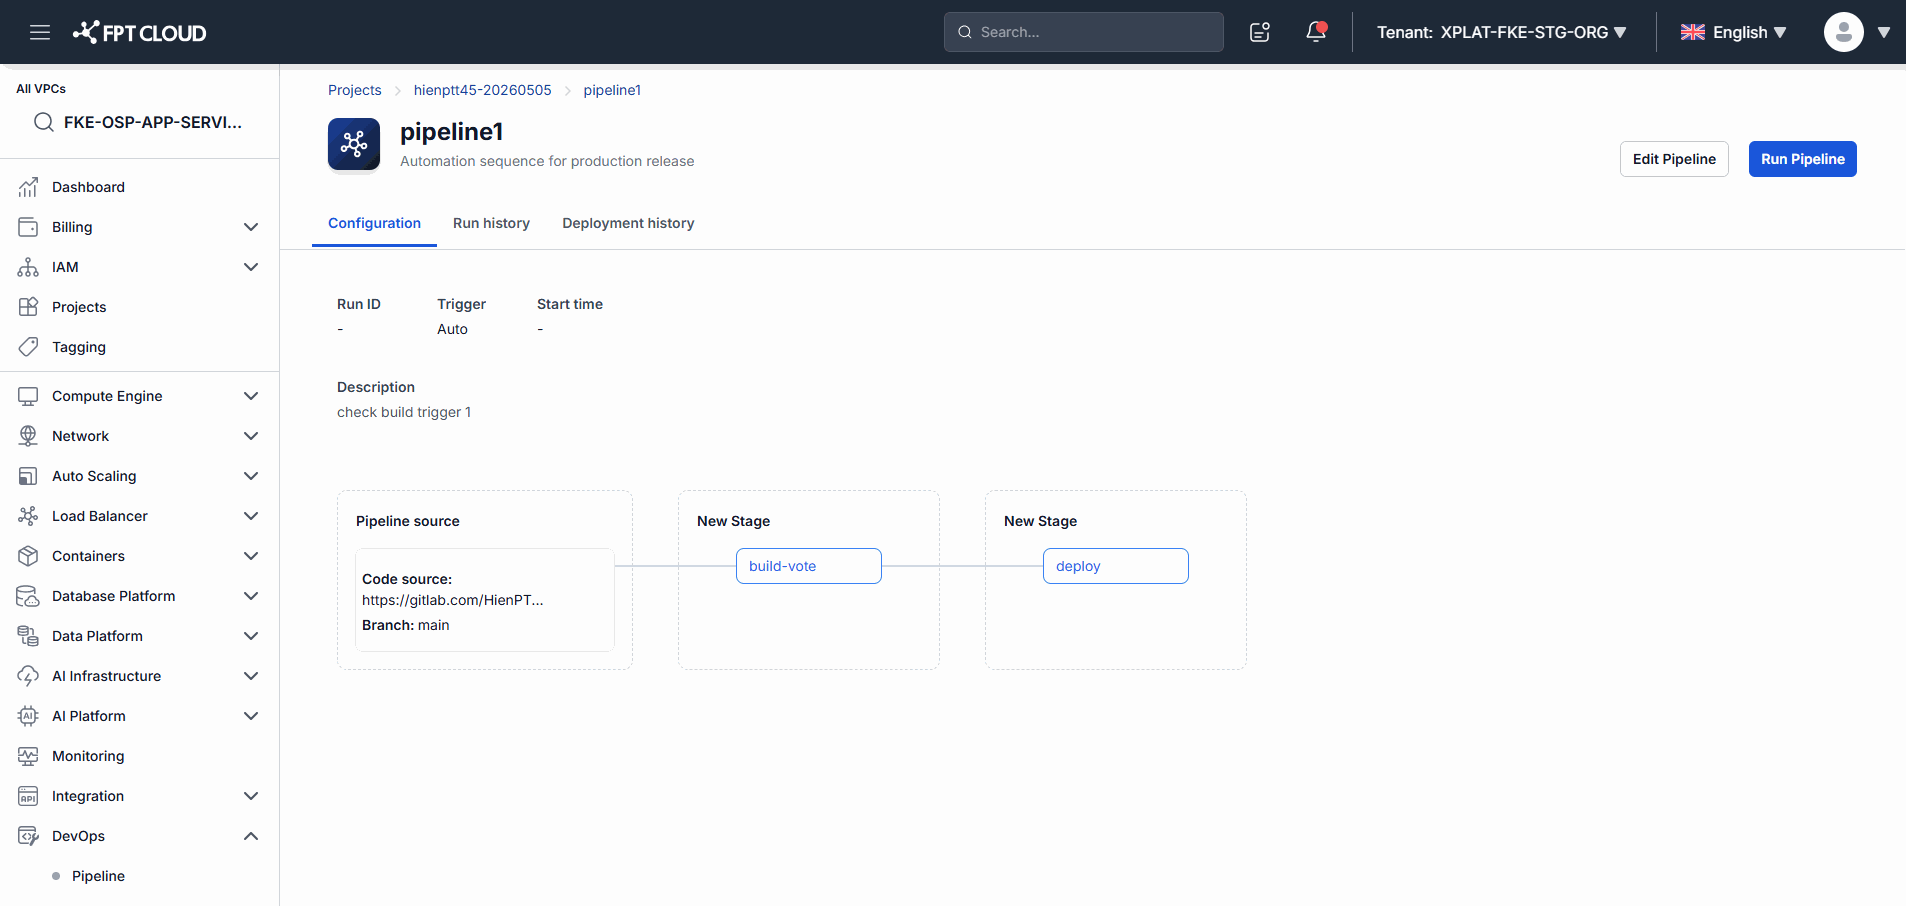
3. Understanding Pipeline Components
| Component | Description |
|---|---|
| Pipeline Name | The name of the Pipeline |
| Description | The Pipeline description |
| Pipeline Source | The source that triggers the Pipeline |
| Stage | A processing stage |
| Job | An executable task |
| Serial Job | A Job that runs sequentially |
| Parallel Job | A Job that runs in parallel |
| Save | Saves the Pipeline |
4. Common Issues
Why can't I create a Pipeline?
Possible causes:
- You don't have sufficient permissions.
- The Project isn't configured correctly.
Recommendation:
- Contact your Project Admin.
Why don't I see my Repository?
Possible causes:
- The Git Connection hasn't been configured.
- You don't have access to the Repository.
Recommendation:
- Review your Connection settings.
Why can't I save my Pipeline?
The Pipeline doesn't meet the minimum requirements:
- No Pipeline Source has been added.
- No Stage has been added.
- No Job has been added.
Can I create multiple Jobs in a single Stage?
Yes.
A single Stage can contain multiple Jobs, depending on your CI/CD workflow.
Can I add Stages after the Pipeline is created?
Yes.
A Pipeline can be edited and extended with new Stages at any time.
5. Notes
💡 Every Pipeline must have at least one Pipeline Source.
💡 Every Pipeline must have at least one Stage.
💡 Every Stage must have at least one Job.
💡 You can use multiple Jobs within the same Stage.
💡 Name your Pipeline so it clearly reflects its purpose.
⚠️ A Pipeline Source is required before the Pipeline can be saved.
⚠️ A Pipeline that hasn't been saved cannot be run.