AWS Transit Gateway 経由で FCI と AWS を接続する
このガイドでは、Unify Portal 上で AWS と OPS の各プラットフォーム間の VPNaaS を接続する方法を説明します。
- I. AWS で VPN Site-to-Site を設定する
- II. AWS の新しい VPN IP を使って FCI Cloud 側の VPN Site-to-Site 設定を更新する
この例では、以下のトポロジーに示すパラメータで VPN Site-to-Site 接続を作成します。

AWS で VPN Site-to-Site を設定する
Step 1. Customer Gateway を作成します。 Customer Gateway は、on-premises ネットワークの gateway 機器を表す AWS 上のリソースです。 Customer Gateway を作成するには:
- https://console.aws.amazon.com/vpc/ にアクセスします。
- Customer gateways > Create customer gateway を選択します。
必要な項目を入力します。IP address には FCI の VPN Gateway の Local IP public を使用します。

- Create Customer gateway を選択します。
作成された Customer gateway の詳細:

Step 2. Transit Gateway を作成します。 Transit Gateway を作成するには:
-
ナビゲーションペインで Transit gateway > Create transit gateway を選択します。
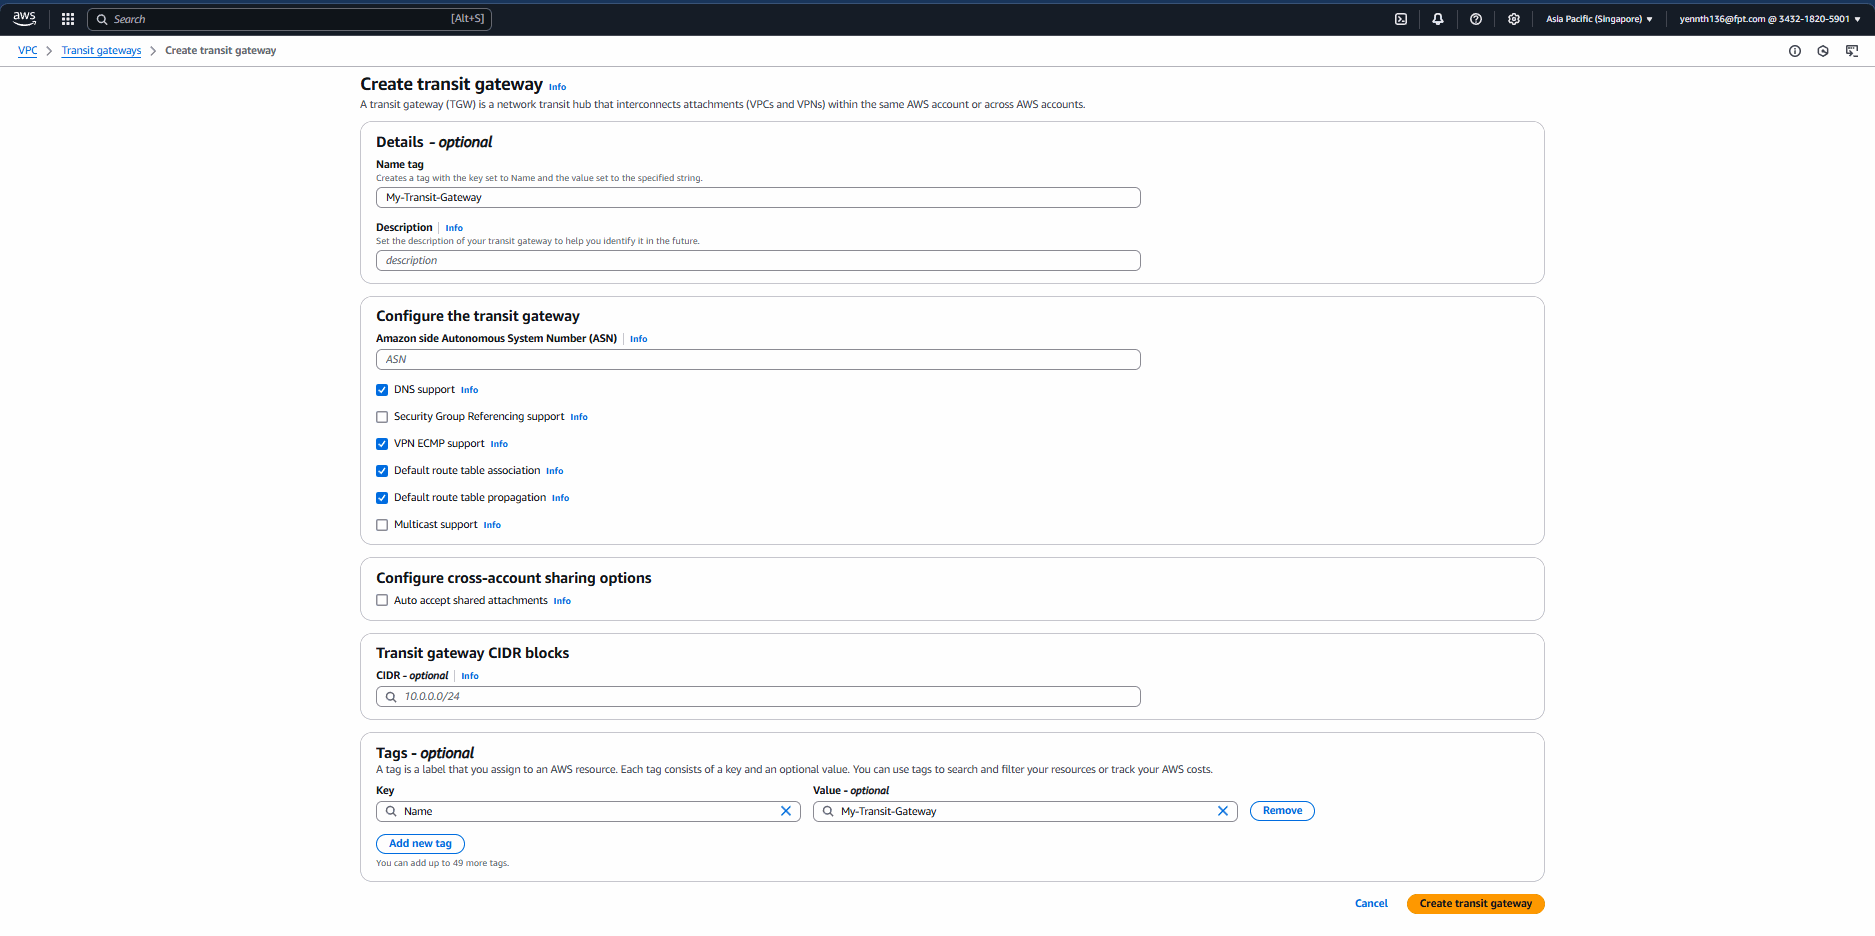
-
作成後の結果。
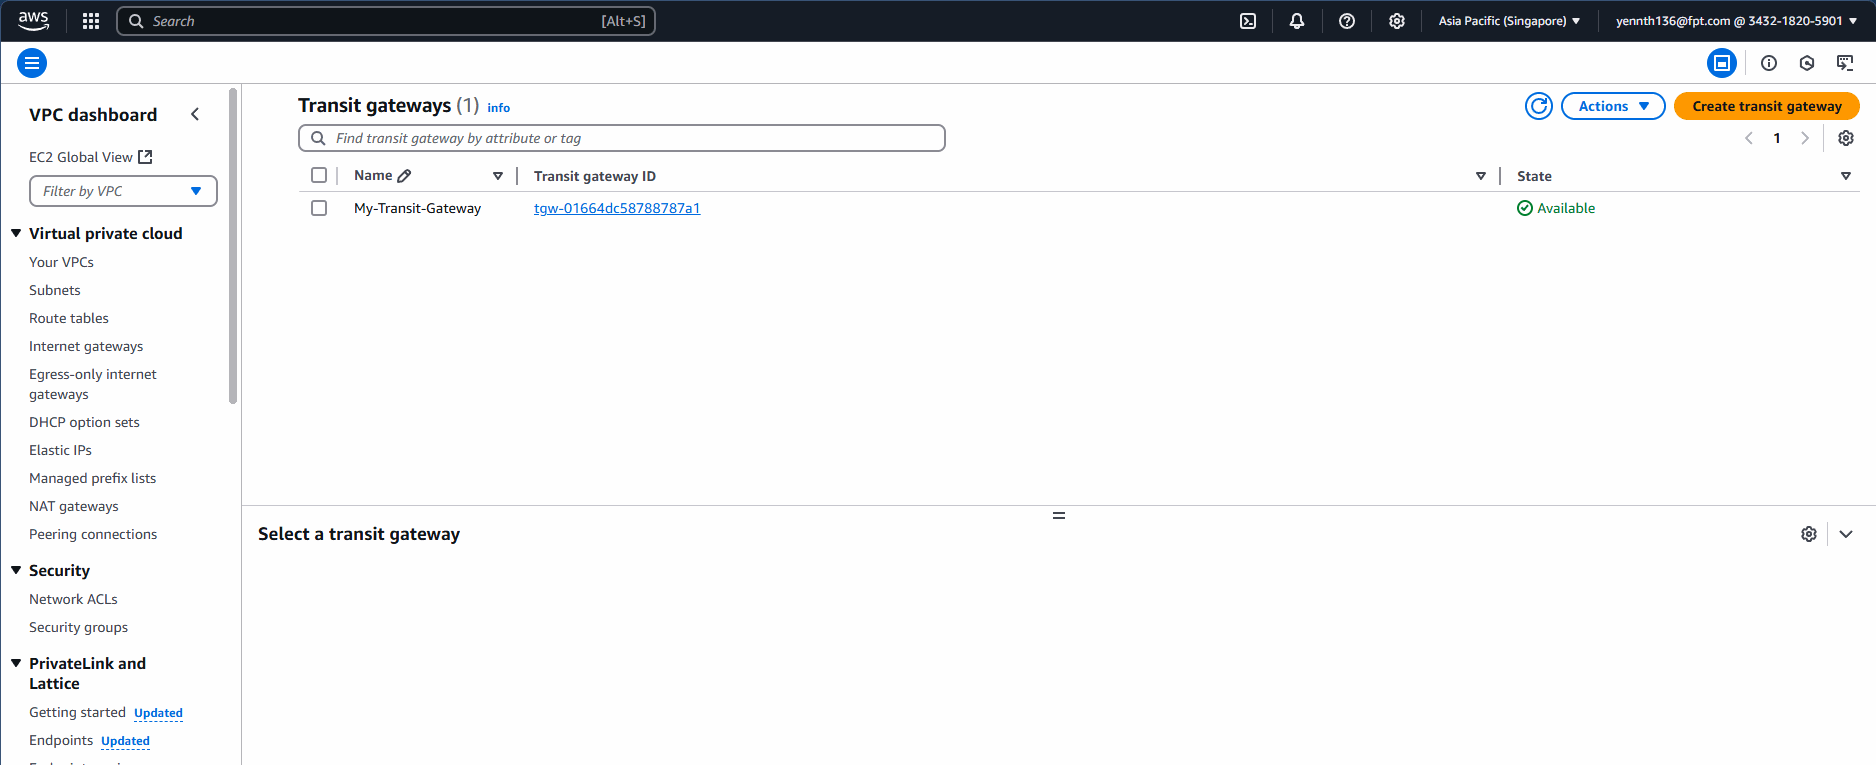
-
作成した Transit Gateway を VPC に attach します。
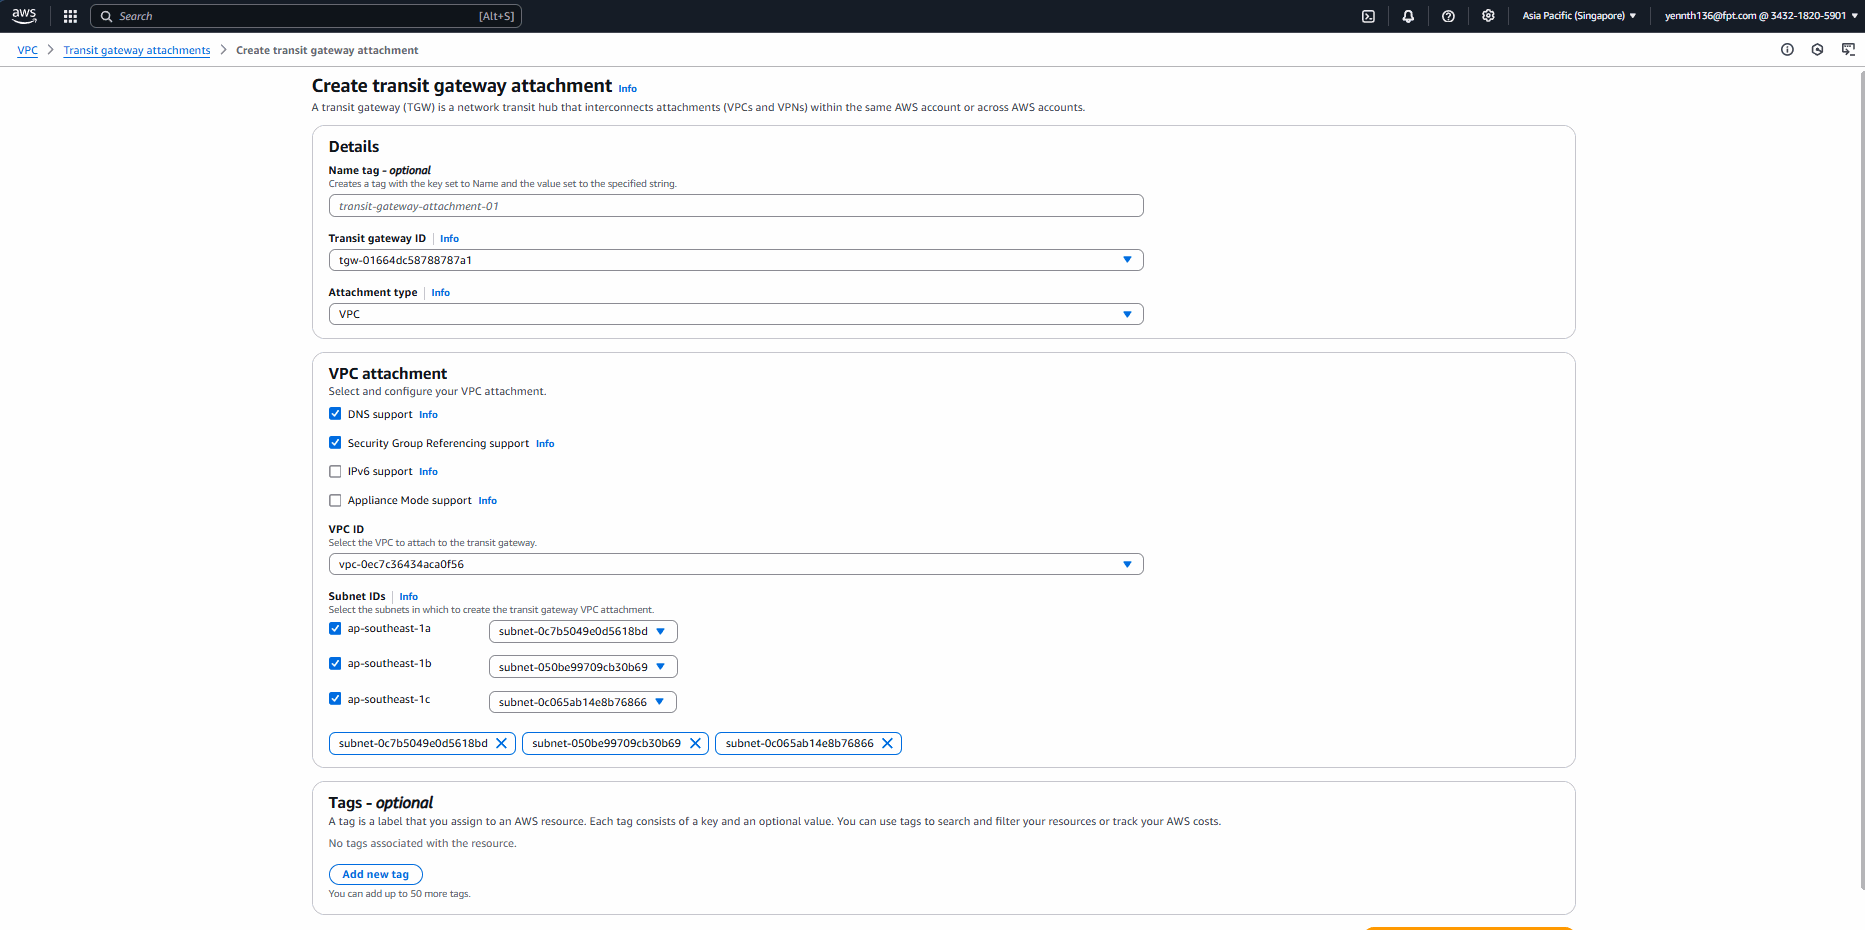


Step 3. VPN connection を作成します。
3.1 上で作成した Customer Gateway(セクション I.4.3) と Transit Gateway を使って VPN connection を作成します。 VPN connection を作成するには:
- ナビゲーションペインで Site-to-Site VPN connections を選択します。
- Create VPN connection を選択します。
- Target gateway type を Transit Gateway に設定します。
- 先に作成した Transit Gateway と Customer Gateway を選択します。
- Routing option で Static を選択します。static IP prefixes には FCI の subnet 範囲(172.16.8.0/24)を入力します。
- Local IPv4 network に FCI の subnet 範囲を入力します。
- Remote IPv4 network に AWS の subnet 範囲を入力します。
- tunnel1 と tunnel2 のパラメータを編集します。
- Create VPN connection を選択します。


3.2 Transit Gateway を VPN connection に attach します。

結果:

Step 4. routing を設定します。 Transit Gateway を経由して VPC(AWS)から Customer Gateway(FCI)へトラフィックを流すよう routing を設定します。 VPN connection からの route を route table(FCI subnet: 172.16.8.0/16)に追加します。

Step 5. Security groups を更新します。 SSH、RDP、ICMP のアクセスを許可するよう Security groups を更新します。 Security group にルールを追加するには:
-
ナビゲーションペインで Security groups を選択します。
-
アクセスを許可したい VPC 内の instance 向けの security group を選択します。
-
Inbound rules タブで Edit inbound rules を選択します。FCI の subnet 範囲に All Traffic を許可します。
-
SSH、RDP、ICMP の inbound を許可するルールを追加し、Save rules を選択します。
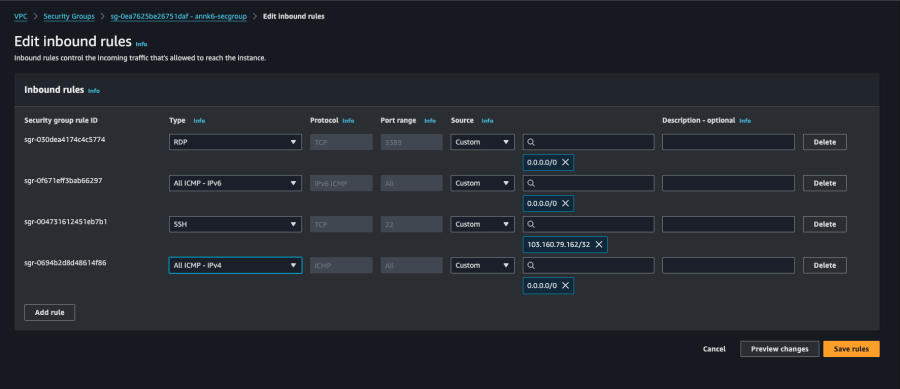
VPN Connection がステータス 'Available' で正常に作成されます。次に、Route table が正しく設定されているか確認します。

Step 6. 設定ファイルをダウンロードします。 VPN connection の作成後、FCI の VPC で使用する 設定ファイルをダウンロードできます。 設定ファイルをダウンロードするには:
-
VPN connection のページに移動します。
-
作成した接続を選択 > Download configuration を選択します。
-
Vendor に pfSense、IKE version に IKEv1(または IKEv2) を選択 > Download を選択します。
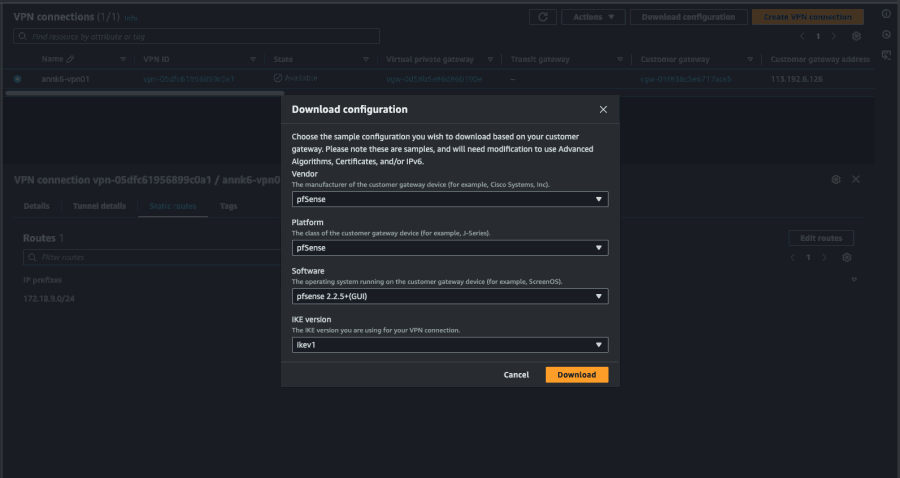
この設定ファイルを使って FCI 側の VPN Site-to-Site を作成します。

AWS の新しい VPN IP を使って FCI Cloud 側の VPN Site-to-Site 設定を更新する
-
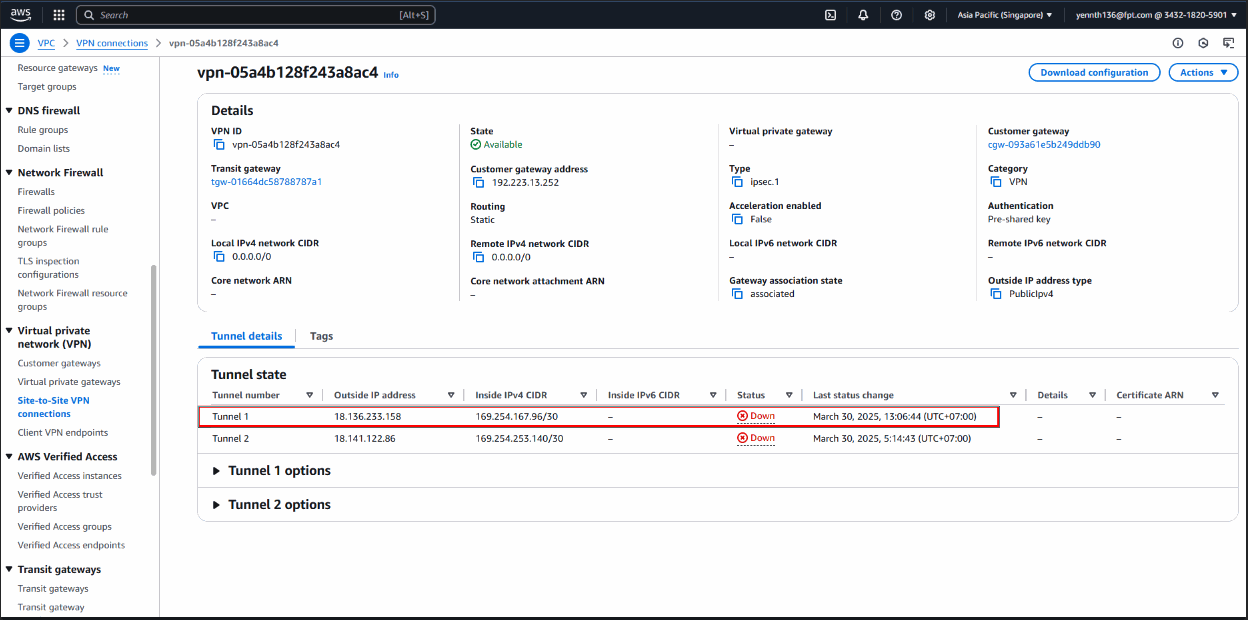
Tunnel 1 の IP を使って FCI 側の設定を更新します。
-
Customer Gateway を編集し、Remote IP public 欄に AWS の tunnel IP を入力します。

次に、上記の AWS のパラメータ — tunnel IP、pre-shared key、AWS からダウンロードした設定ファイルの IKE/IPSec 設定 — と一致するように FCI Cloud 側の VPN Connection を設定します。詳細は VPN Connection の作成 を参照してください。
両側の設定が一致すると、接続が完了します。
- FCI Cloud では、VPN connection の Operating status が Online と表示されます。
- AWS では、VPN connections > 対象の VPN connection を選択 > Tunnel details に移動します。Tunnel 1 が UP と表示されます。
結果を確認する
VPN Site-to-Site で設定したネットワーク範囲を使って各 VPC で VM を起動し、両側から ping します。