Tutorial: create a Checkpoint Firewall
By the end of this tutorial you will have provisioned a working Checkpoint Firewall in a VPC and will understand how the non-HA and HA flows differ. You will fill every wizard step, so keep your subnet and IP plan handy.
Prerequisites
- A tenant (org) in the FPT Cloud Console.
- A VPC with 3 free isolate subnets.
- 1 free public IP for the non-HA flow, or 3 free public IPs for the HA flow.
What you'll build
A Checkpoint NGFW cluster: a Master gateway, an SMS, and a Jump host — plus a Slave gateway if you enable HA.
Steps
Step 1: Open the wizard
- Sign in to the FPT Cloud Console.
- Open Security → Checkpoint Firewall from the left menu.
When no firewall exists yet, the page shows an empty state with a create button.
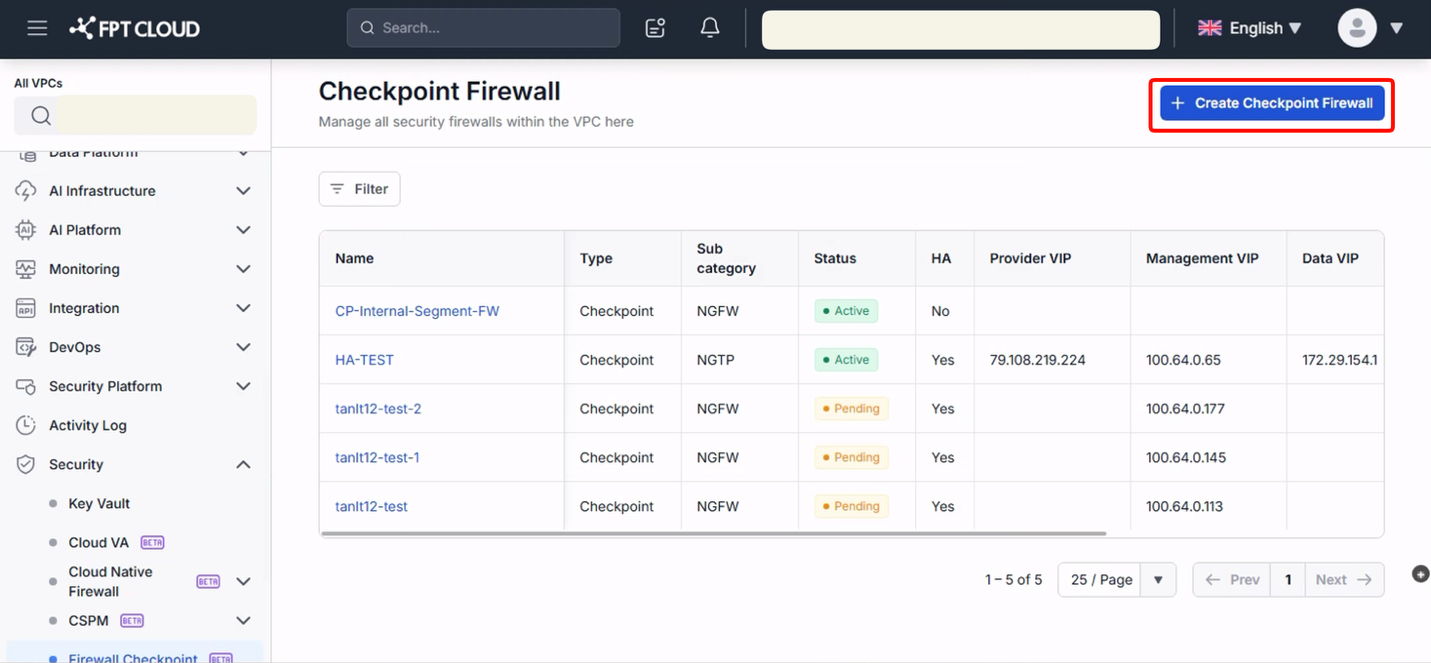
- Click Create Checkpoint Firewall to open the wizard.
Step 2: Fill Basic Configuration
Set the following fields:
- Region — the current region of your org.
- VPC — the VPC that will host the firewall.
- Firewall Type — Checkpoint (the only supported type today).
- Package Type — NGFW, NGTP, or NGTX.
- Template — Standard, Advance, or Premium. See the configuration reference for the vCPU, RAM, and Storage of each.
- High Availability (HA) — enable it to add a Slave gateway.
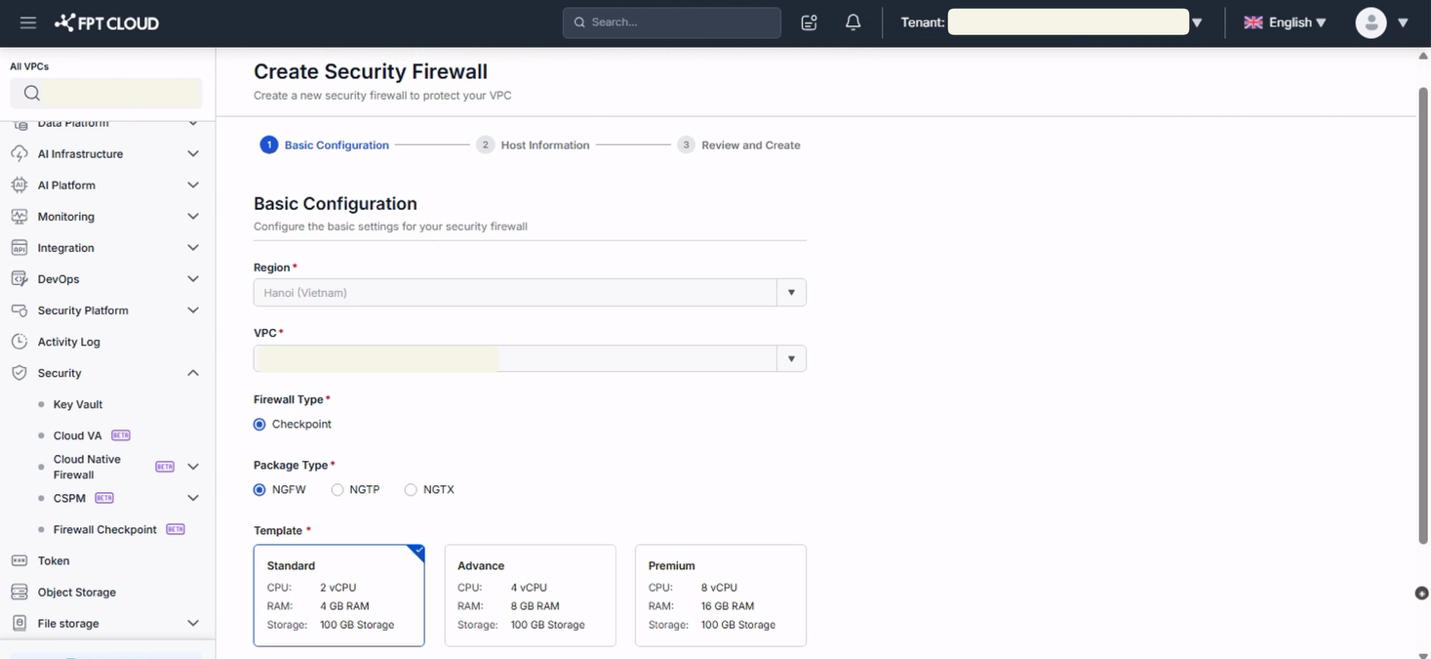
Click Next.
Step 3: Enter Host Information
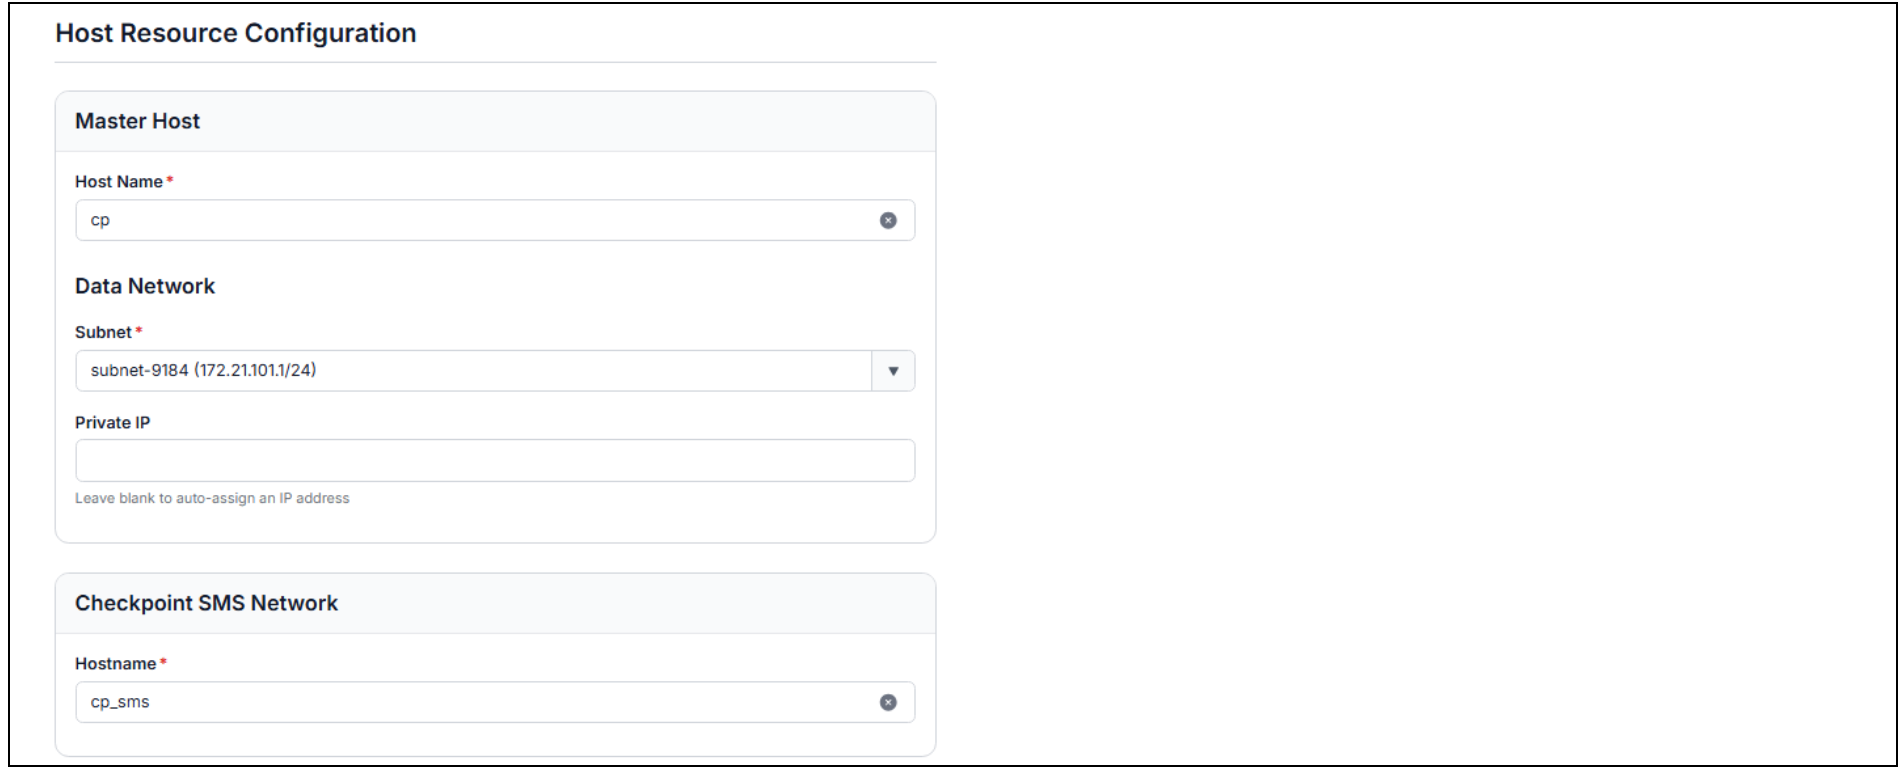
Name each host and set its network. CPU, RAM, and Disk default to the Template you chose in Step 2.
Master Host
- Name — a name for the Checkpoint Master.
- Subnet — select an isolate subnet.
- Private IP — leave blank to auto-assign. The system uses 1 IP without HA, or 3 IPs with HA.
- Password — set the host login password. This is for Console/SSH access to the VM, and is separate from the maintenance account the system emails you.
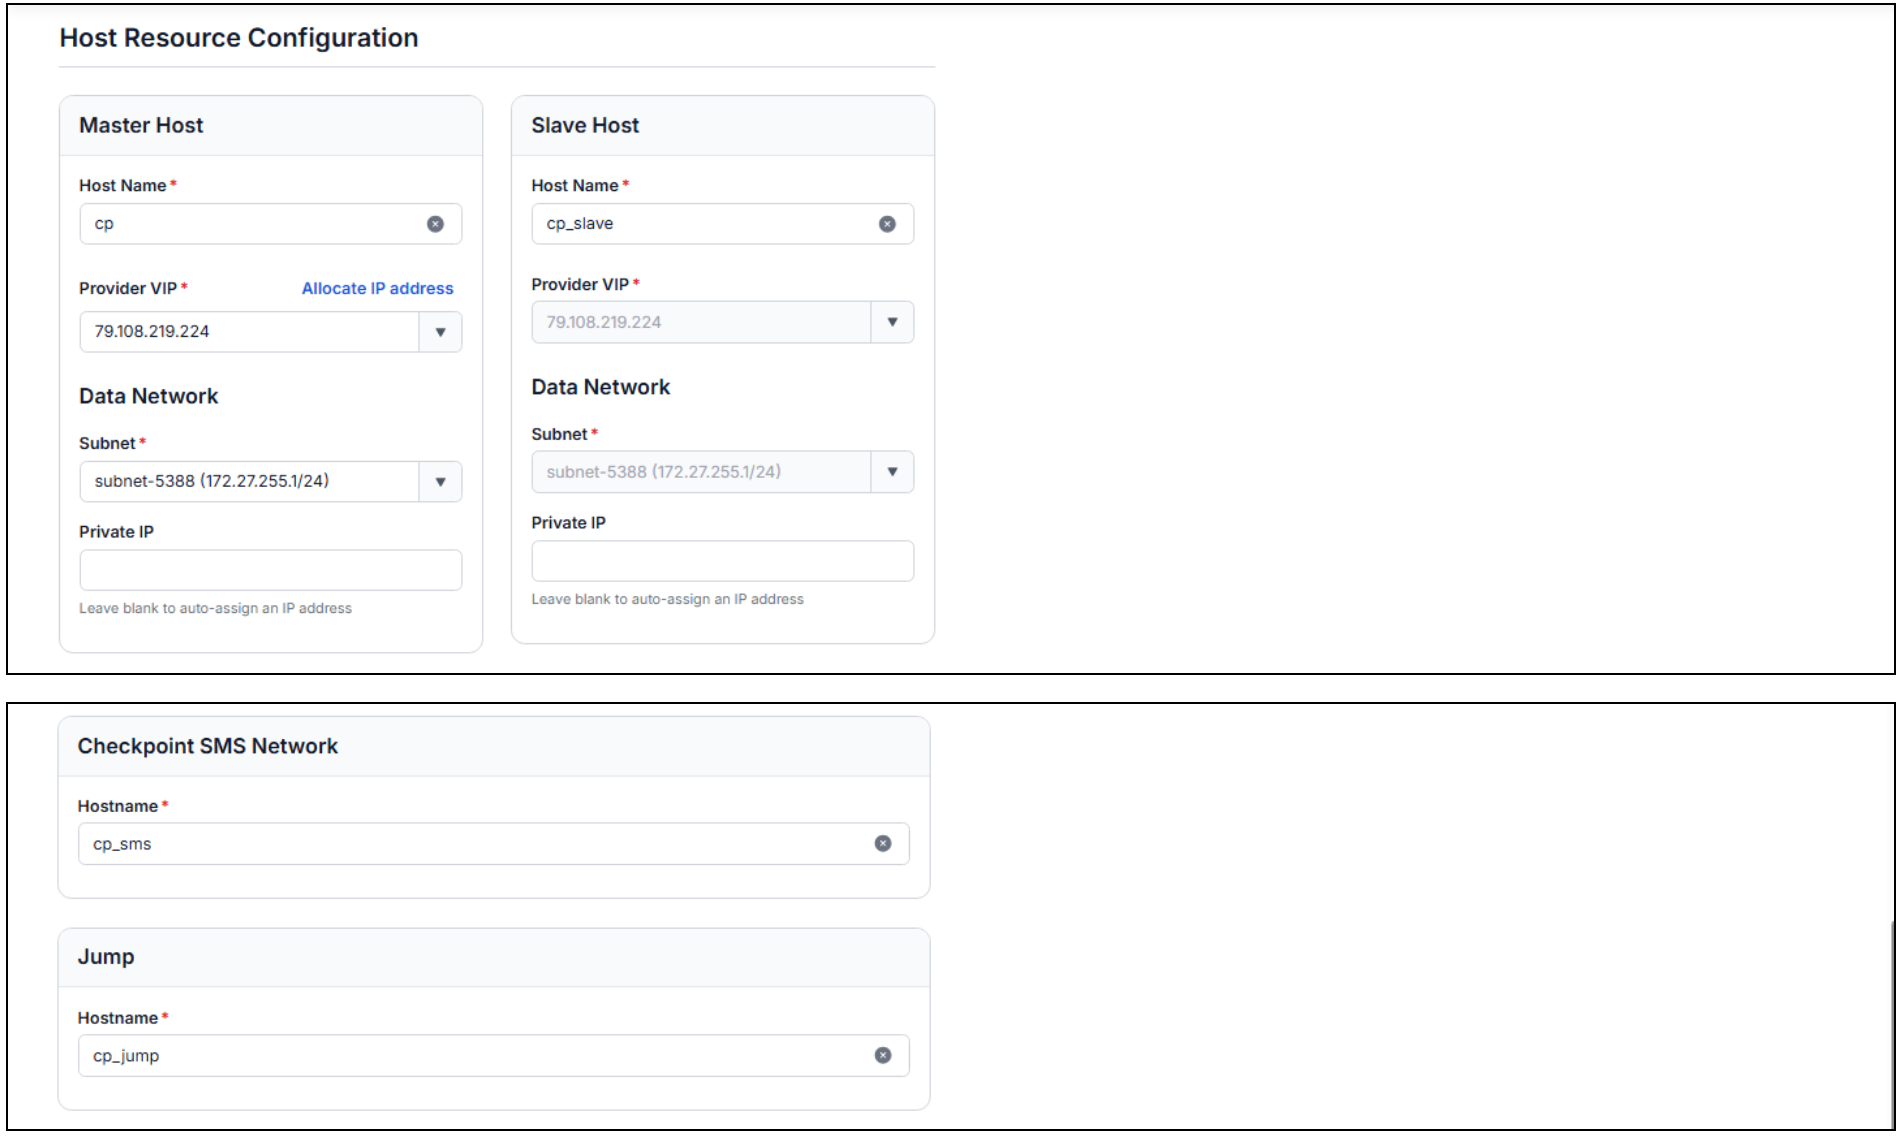
Slave Host (only shown when HA is enabled)
- Name — a name for the Checkpoint Slave.
- Subnet — inherited automatically from the Master Host.
- Private IP — leave blank to auto-assign.
Checkpoint SMS Network
- Name — a name for the SMS.
Jump
- Name — a name for the Jump host.
Non-HA example
With HA disabled, you fill the Master, SMS, and Jump.

HA example
With HA enabled, the Slave block appears alongside the Master, SMS, and Jump.
Click Next.
Step 4: Review and create
Check every value on the summary, then click Create Firewall.
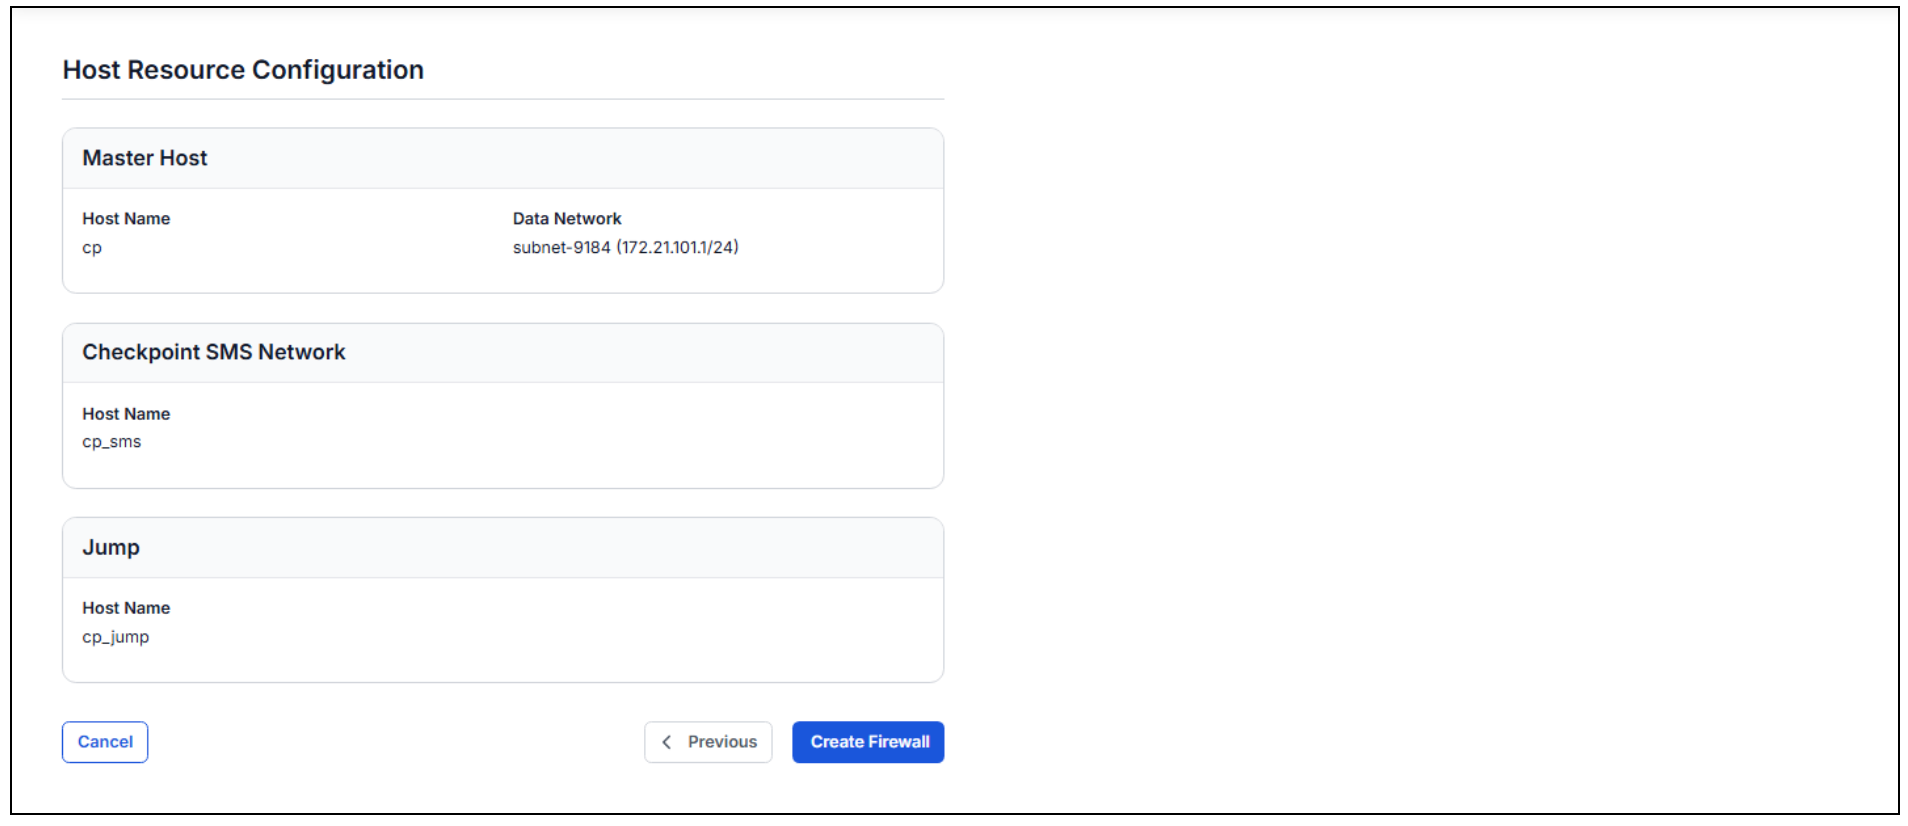
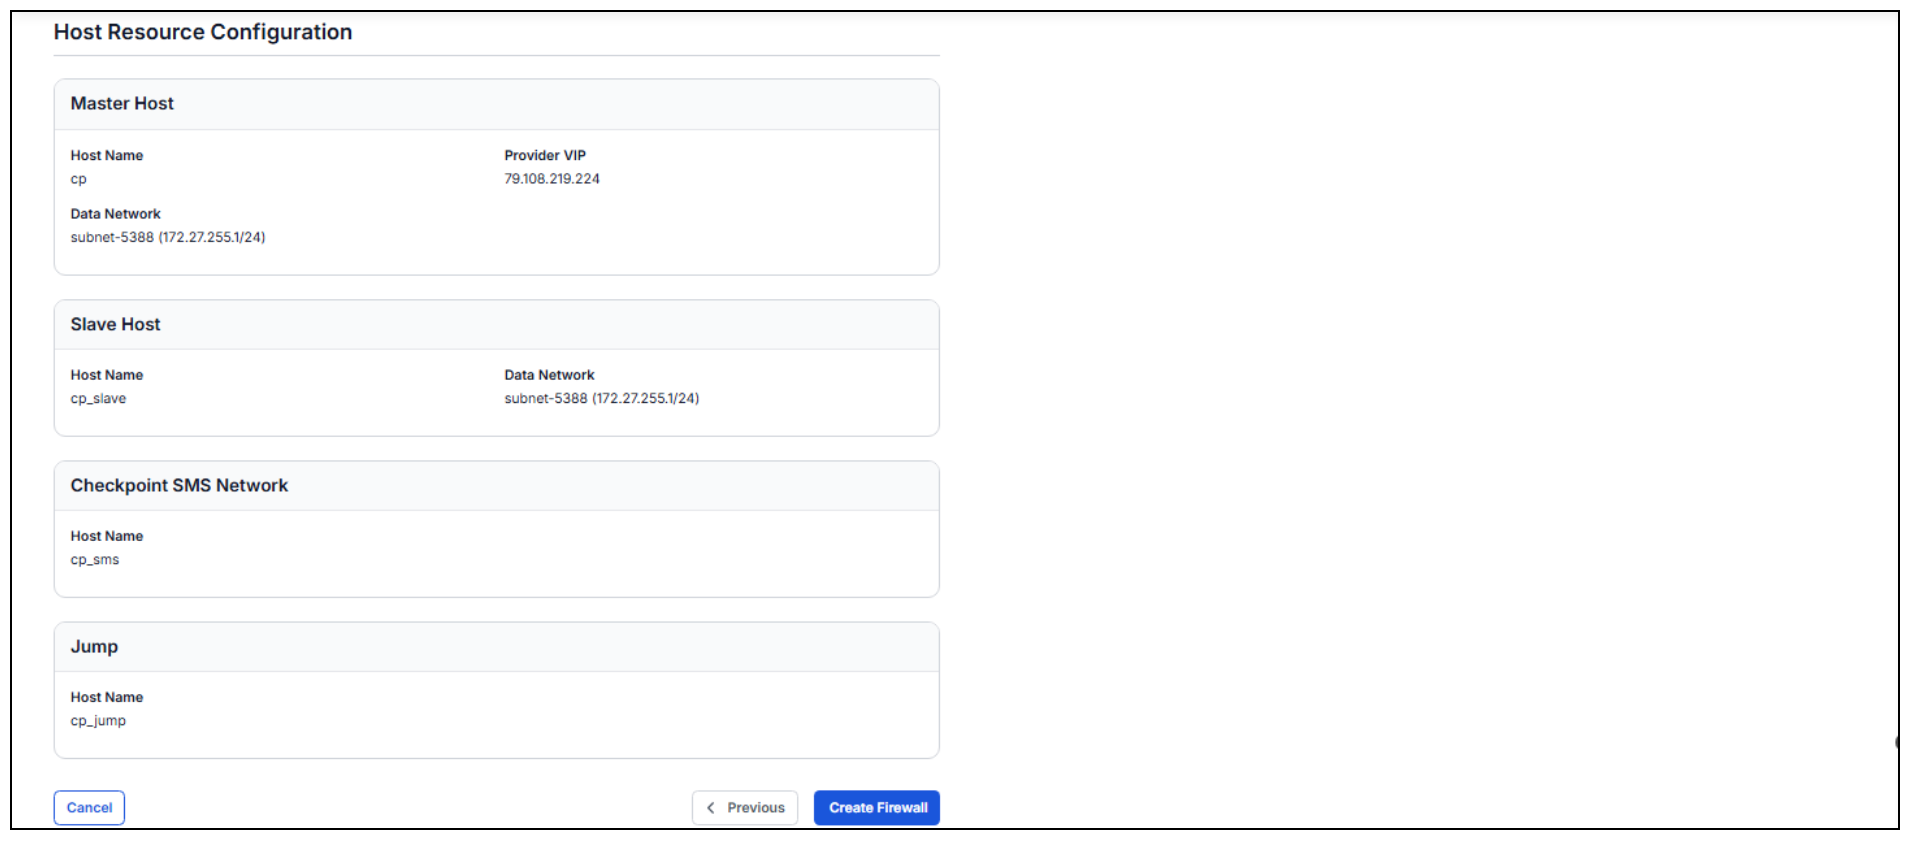
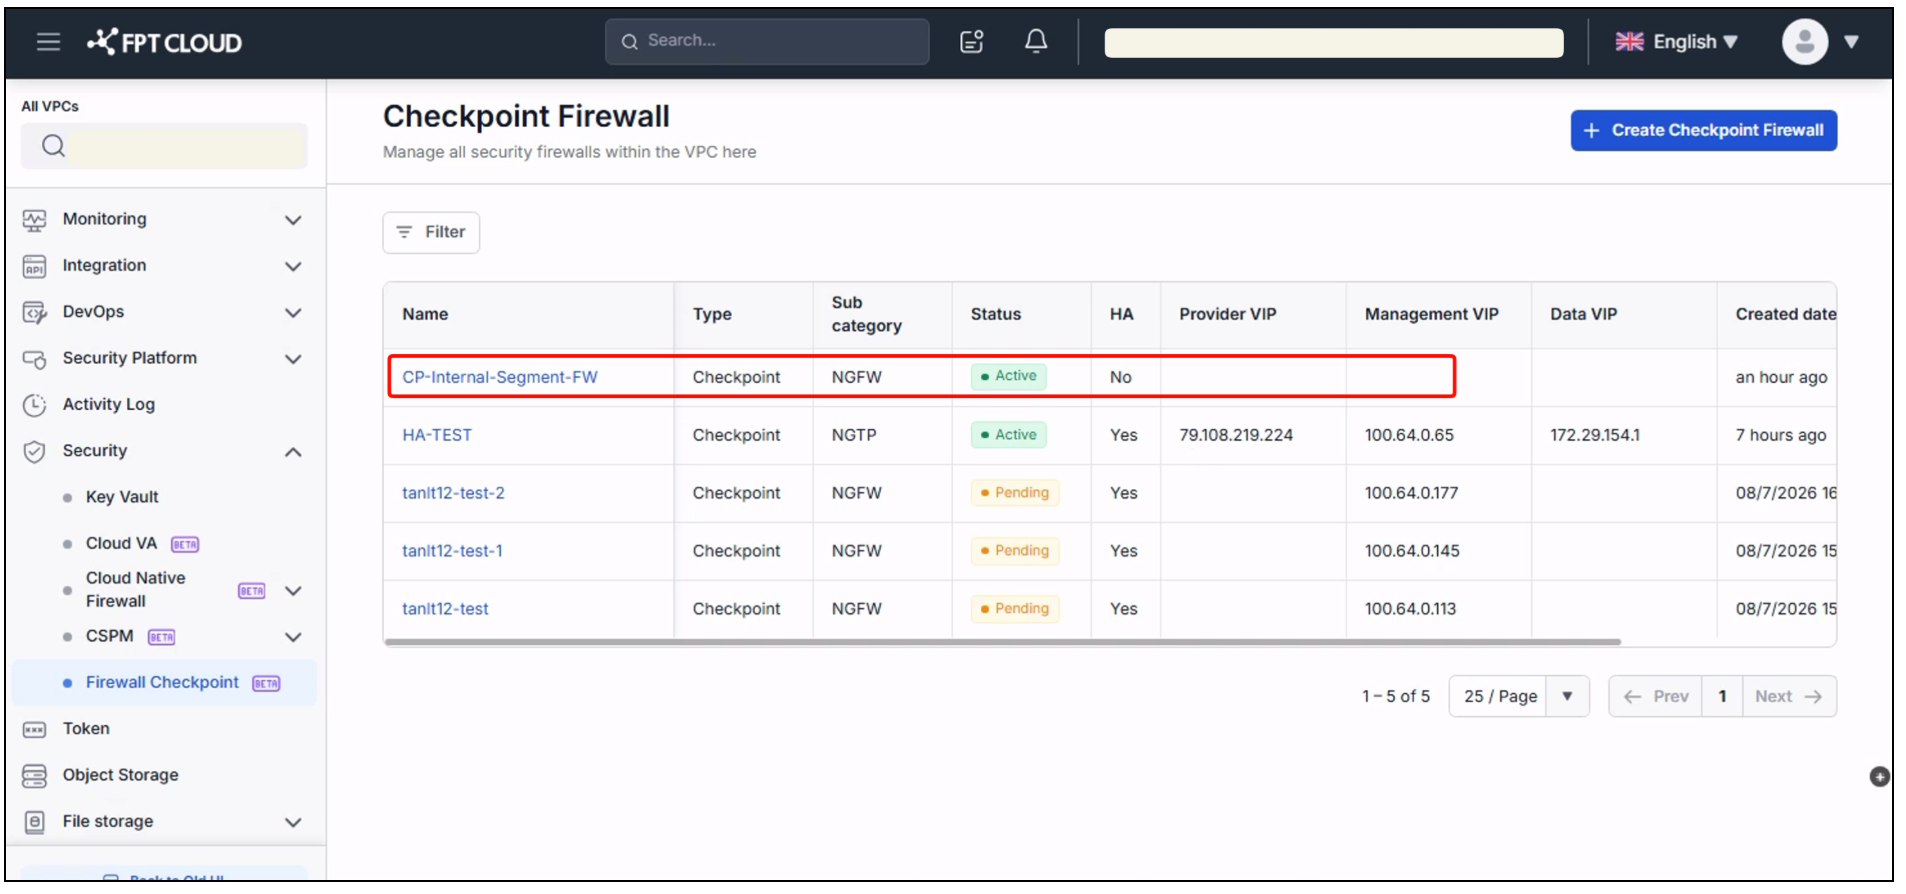
The system provisions the cluster. When it finishes, you receive an email confirming the firewall was created.
Summary
You provisioned a Checkpoint Firewall, saw how HA adds a Slave gateway and raises the IP requirement, and learned where the maintenance account comes from.