Policies
Policies control what actions are allowed or denied in a Workspace. Each Policy contains one or more statements — each statement specifies a Service, a region, an effect (Allow or Deny), and a list of actions. You attach Policies to Workspaces to set the maximum permissions Members can exercise.
By default, Workspace Members can use all enabled services freely. Create a Policy when you need to restrict specific actions — for example, allowing read-only access to a service, or blocking resource creation in a sensitive region.
Only the Organization Owner can create, edit, and delete Policies.
To open it: click Settings in the left sidebar, then select Policies.
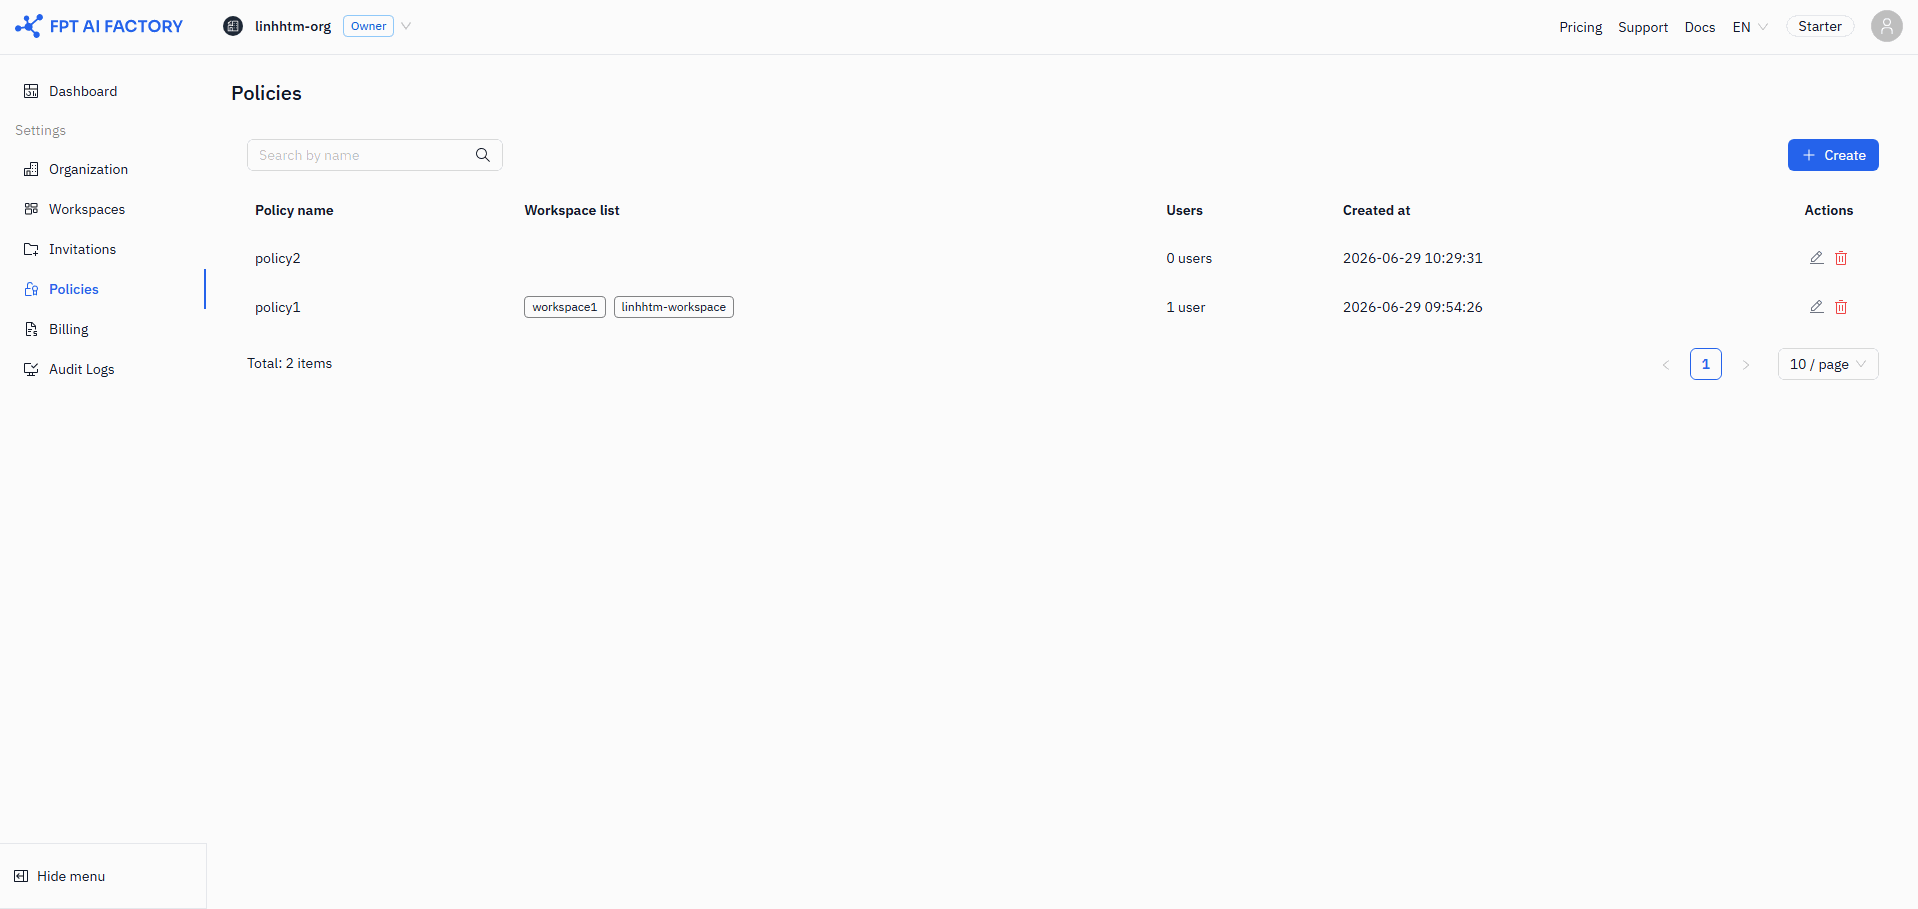
Policy list
The list shows all Policies in your Organization with the following columns:
| Column | Description |
|---|---|
| Policy name | Name of the policy |
| Workspace list | Workspaces this policy is attached to. If attached to more than 4 Workspaces, the first 3 are shown with a +N tag. |
| Users | Number of users this policy applies to |
| Created at | Date the policy was created |
| Actions | Edit (pencil) and Delete (trash) icons |
Use the search box to filter by policy name.
Create a policy
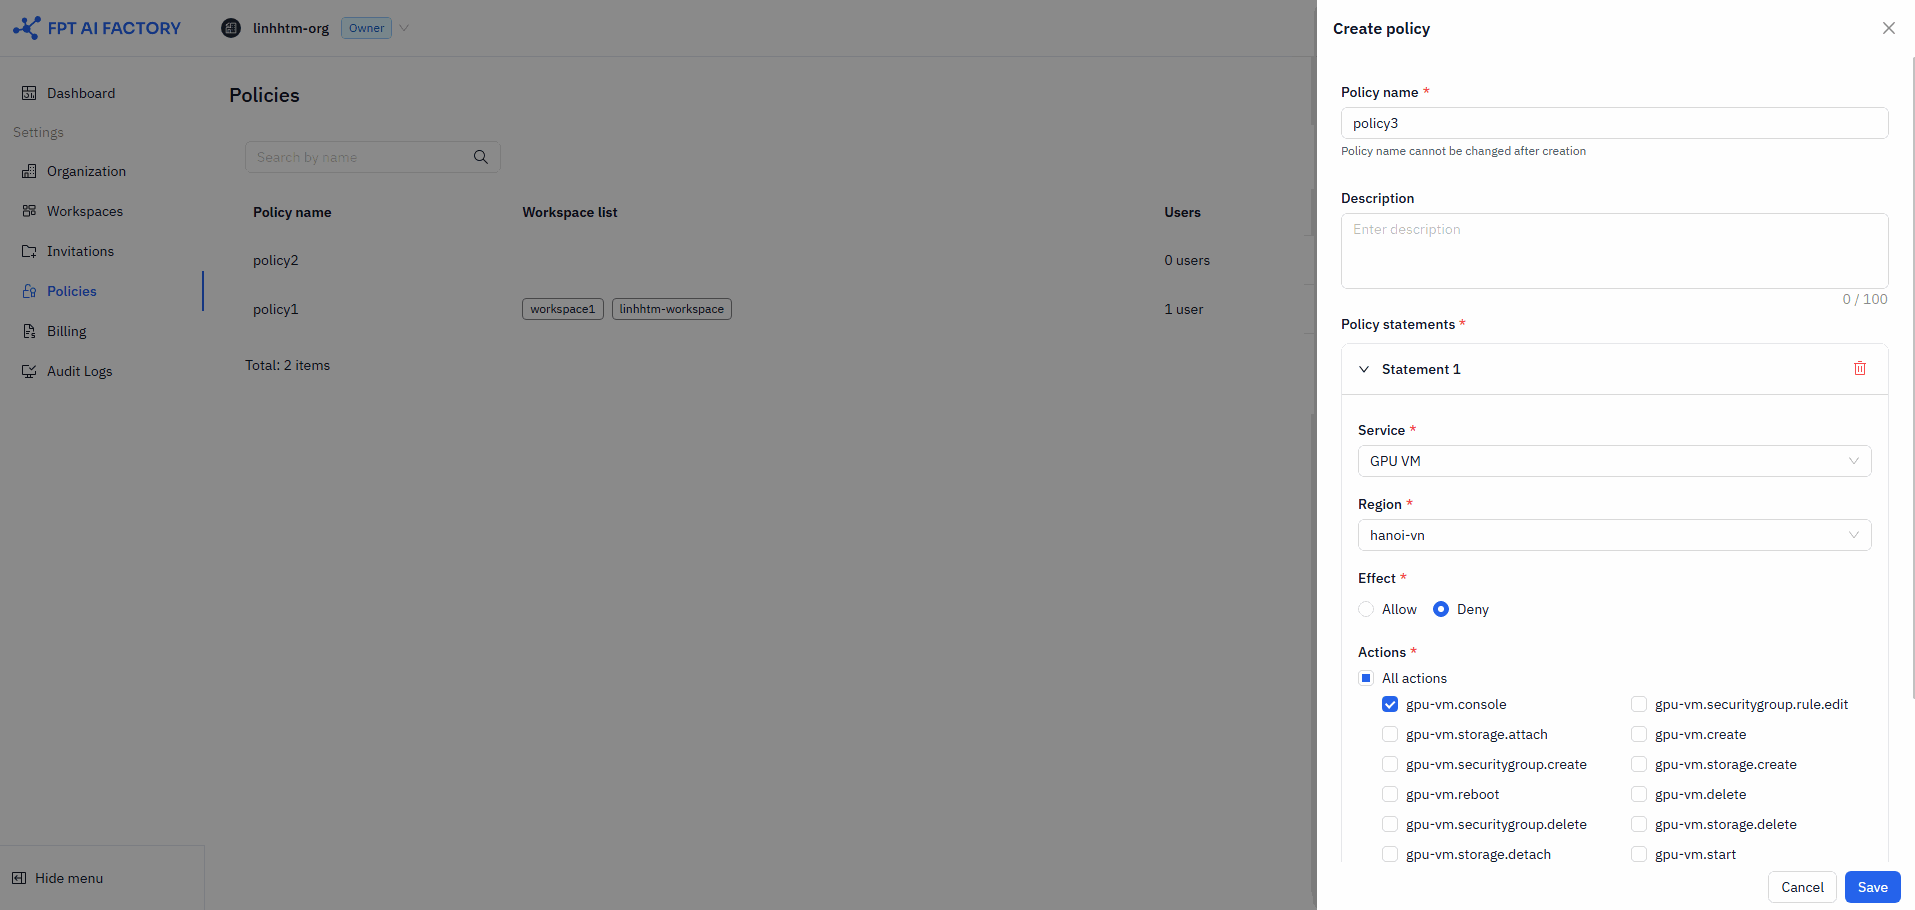
- Click + Create. The Create policy drawer opens.
- Enter a Policy name.
- Required. 3–50 characters. Allowed: A–Z, a–z, 0–9,
-,_. No spaces. Cannot start with a digit. - The name cannot be changed after creation.
- Required. 3–50 characters. Allowed: A–Z, a–z, 0–9,
- Optionally enter a Description (maximum 100 characters).
- Add at least one Policy statement (see below).
- Click Save.
Policy statements
Each statement defines one rule. A policy must have at least one statement.
| Field | Details |
|---|---|
| Service | The service this statement applies to (e.g. AI Notebook, GPU Container). Changing the service resets Region and Actions. |
| Region | The region this statement applies to. Select All regions to cover all available regions for the service. If only one region is available, it is selected automatically. |
| Effect | Allow permits the selected actions. Deny blocks them. Deny takes priority over Allow when statements overlap. |
| Actions | Select All actions to apply the statement to every action for the service. Or select individual actions (e.g. notebook:create, notebook:delete). At least one action is required. |
Click + Add statement to add more statements. Click the delete icon on a statement to remove it — at least one statement must remain.
How policies are evaluated
When a user performs an action, the portal evaluates all policies attached to that user and to their current Workspace. The decision follows this precedence:
| Priority | Rule |
|---|---|
| 1 | Explicit Deny — any Deny in any statement of any policy blocks the action |
| 2 | Explicit Allow — at least one Allow (with no Deny overriding it) permits the action |
| 3 | Implicit Deny — no Allow matched at all, action is blocked by default |
In short: Deny always wins. If no Deny exists, Allow wins. If neither, the action is denied.
Example
Broad Allow + narrow Deny in the same policy
A Workspace policy has two statements:
- S1: Allow
notebook:create,notebook:get,notebook:listin All regions - S2: Deny
notebook:createin region Tokyo
When a user tries to create a Notebook in Tokyo, both statements match. Because S2 is a Deny, the final result is Deny. The user can still create Notebooks in other regions where no Deny applies.
Use this pattern to grant broad access while blocking a specific action in a sensitive region.
Edit a policy
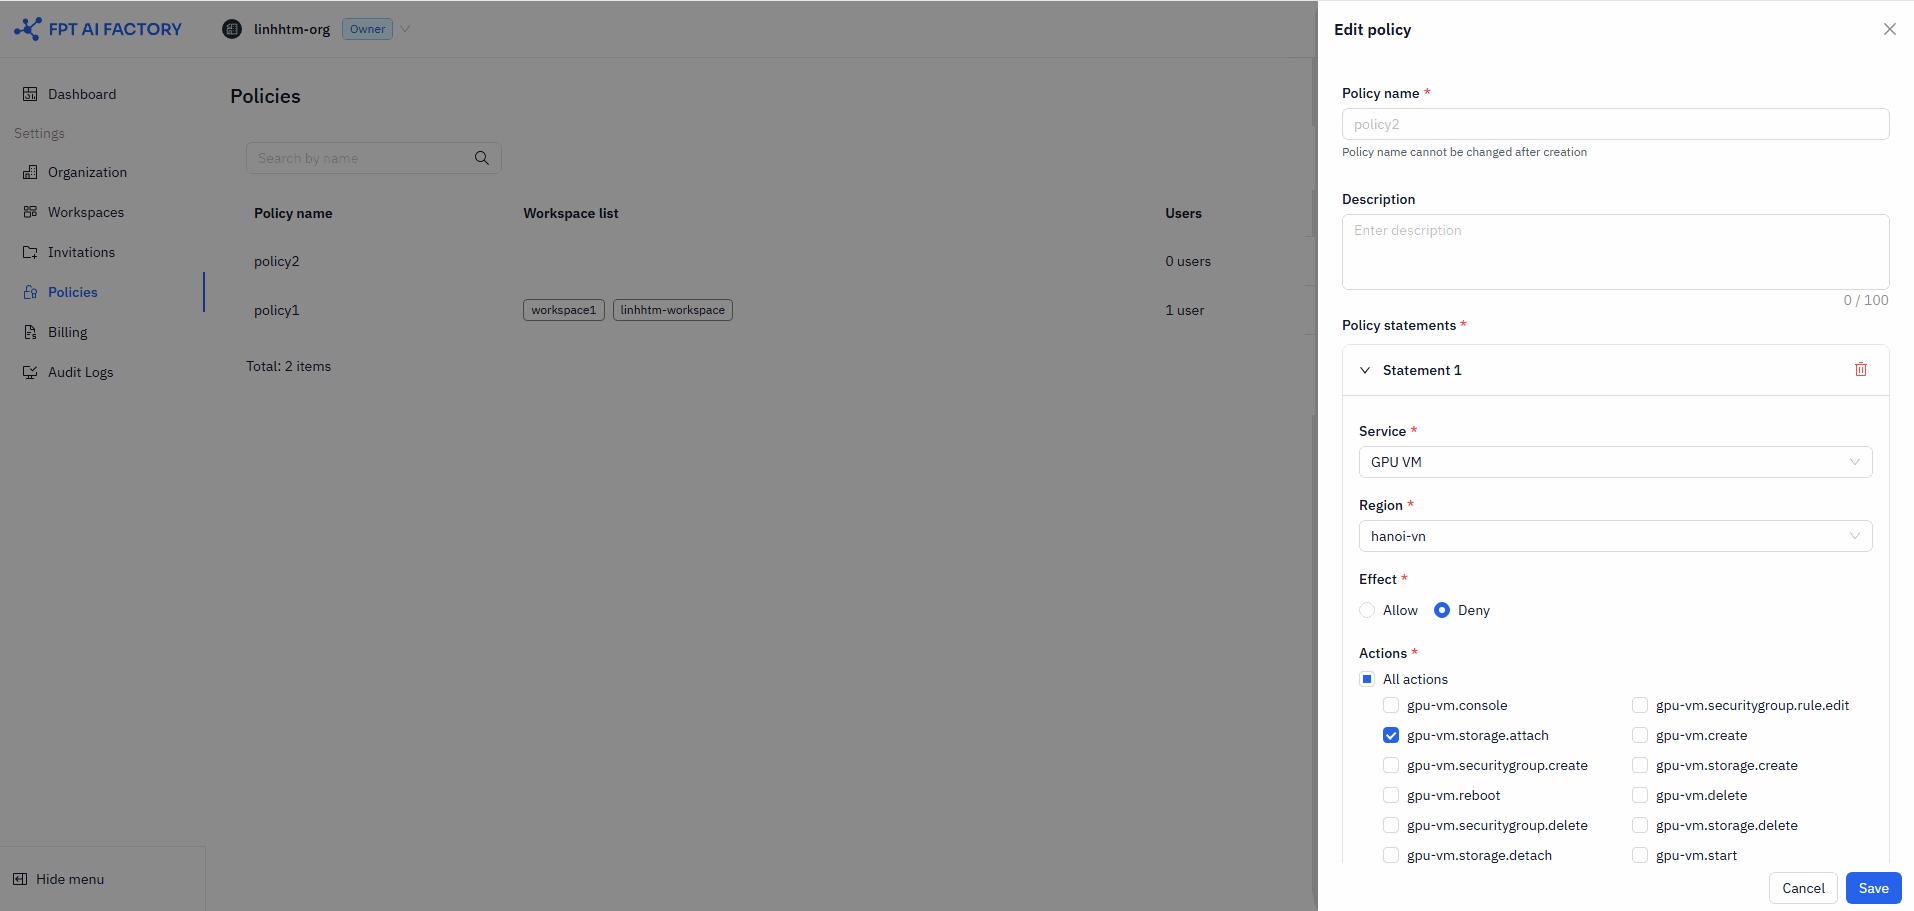
Click the Edit (pencil) icon on a policy row to open the Edit policy drawer. The Policy name is read-only and cannot be changed. Modify the description or statements as needed, then click Save.
Policy changes apply immediately to all Workspaces and users currently using the policy.
Delete a policy
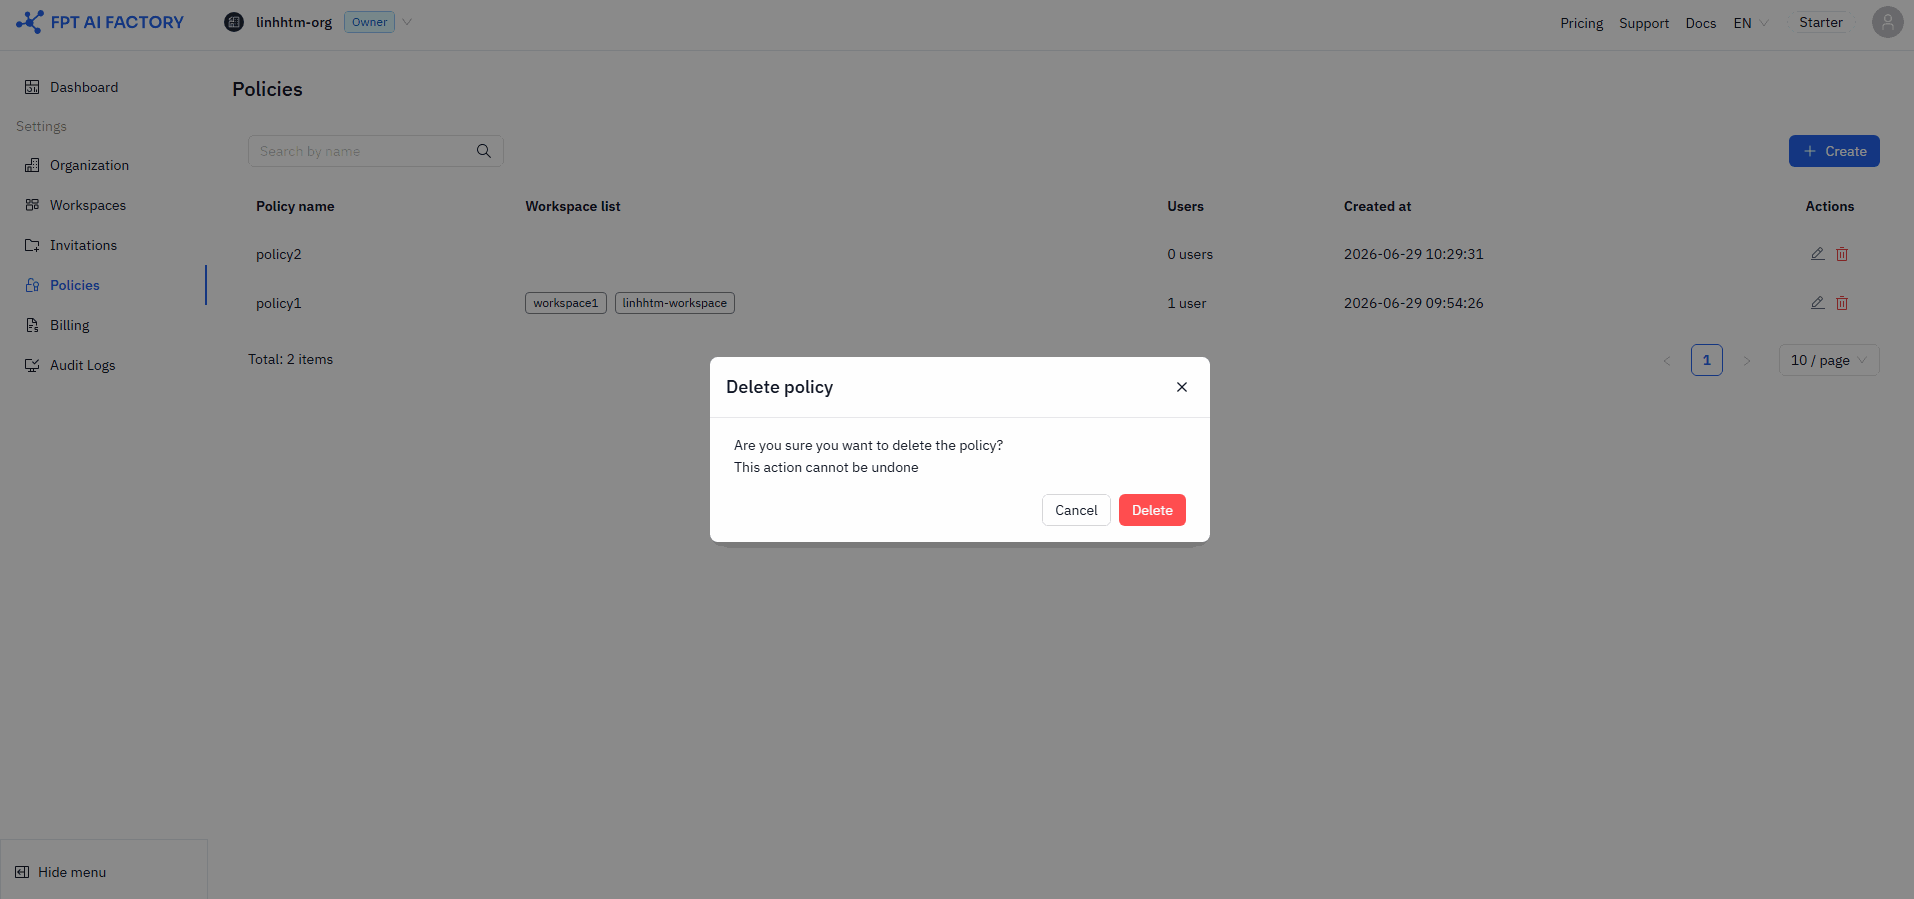
Click the Delete (trash) icon on a policy row to open the confirmation modal, then click Delete to confirm.
A policy that is currently attached to any Workspace or assigned to any user cannot be deleted. Detach it from all Workspaces first, then delete it.
Attach a policy to a workspace
Policies are assigned to Workspaces from the Workspace settings, not from this page.
- Go to Settings → Workspaces.
- Click Edit on a Workspace.
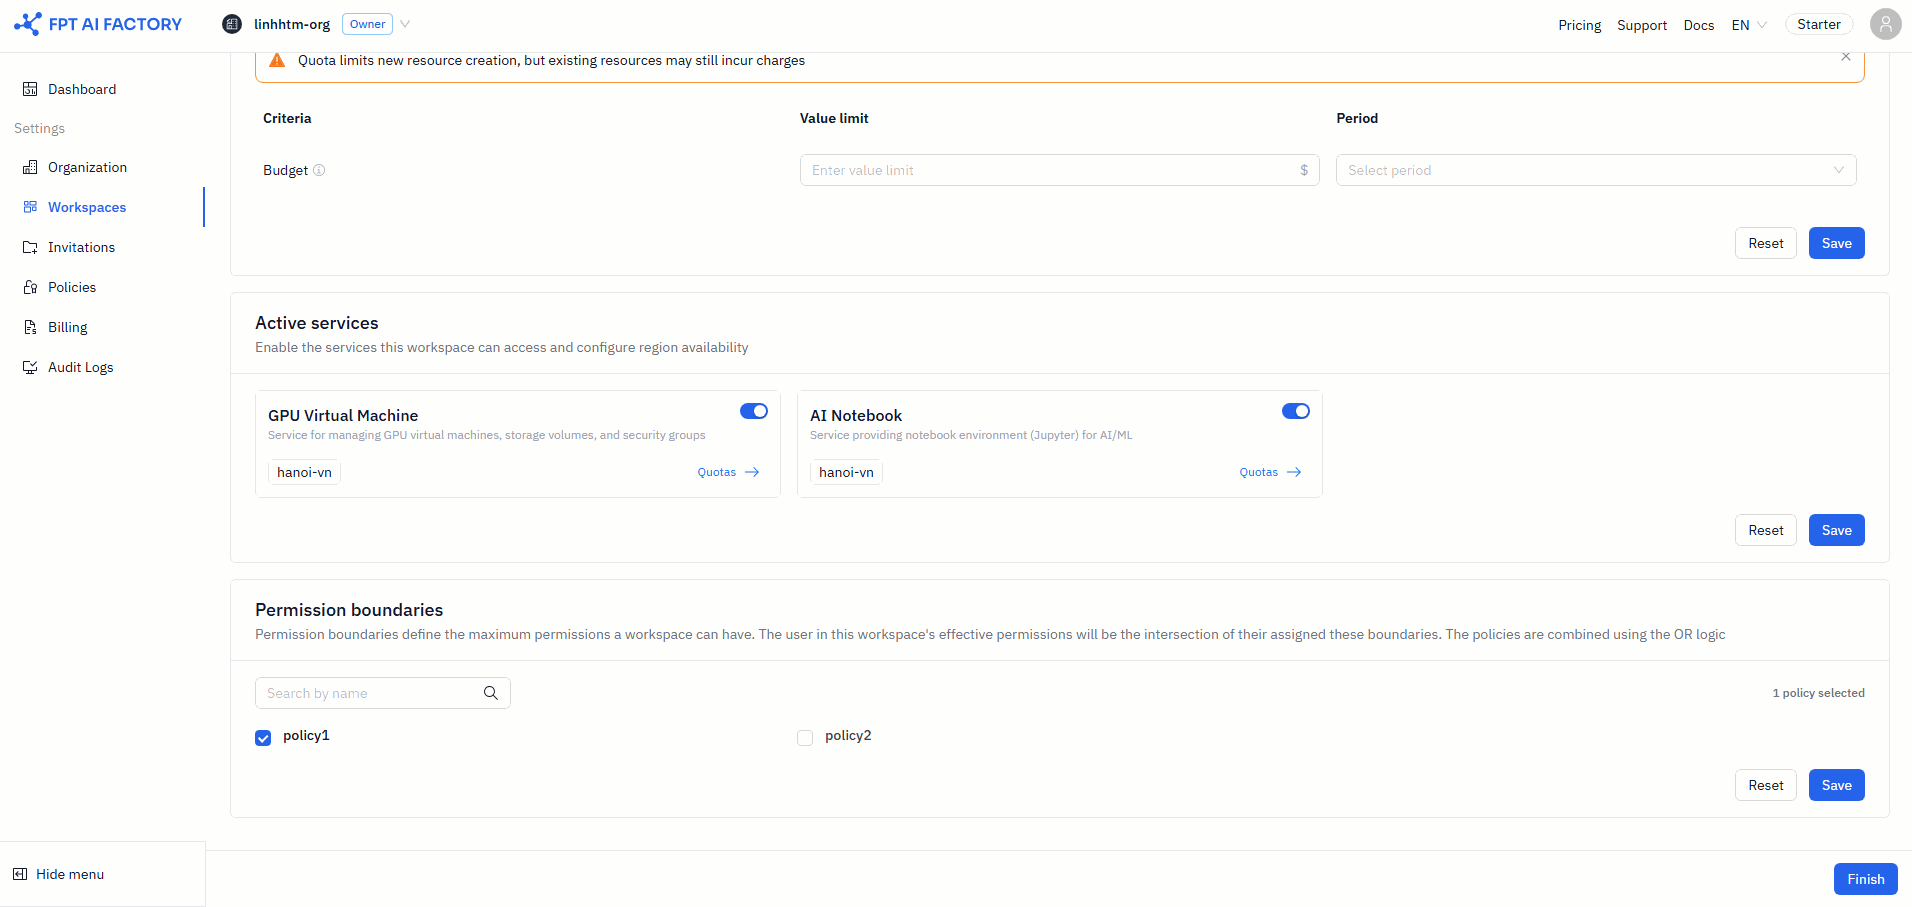
- Scroll to the Permission Boundaries section.
- Select the Policies to attach to this Workspace.
- Click Save, then Finish.
See Workspaces for full Workspace configuration steps.
What's next
- Workspaces — attach policies and set spending limits per Workspace.
- Audit Logs — track policy creation and attachment events.