Workspaces
Workspaces are isolated environments for teams or projects within your Organization. Each Workspace has its own Services, Quota, Policies, and Member list.
Only the Organization Owner can create, edit, or delete Workspaces from the Workspace list. Workspace Admins can edit their own Workspace from within the Workspace settings.
To open it: click Settings in the left sidebar, then select Workspaces.
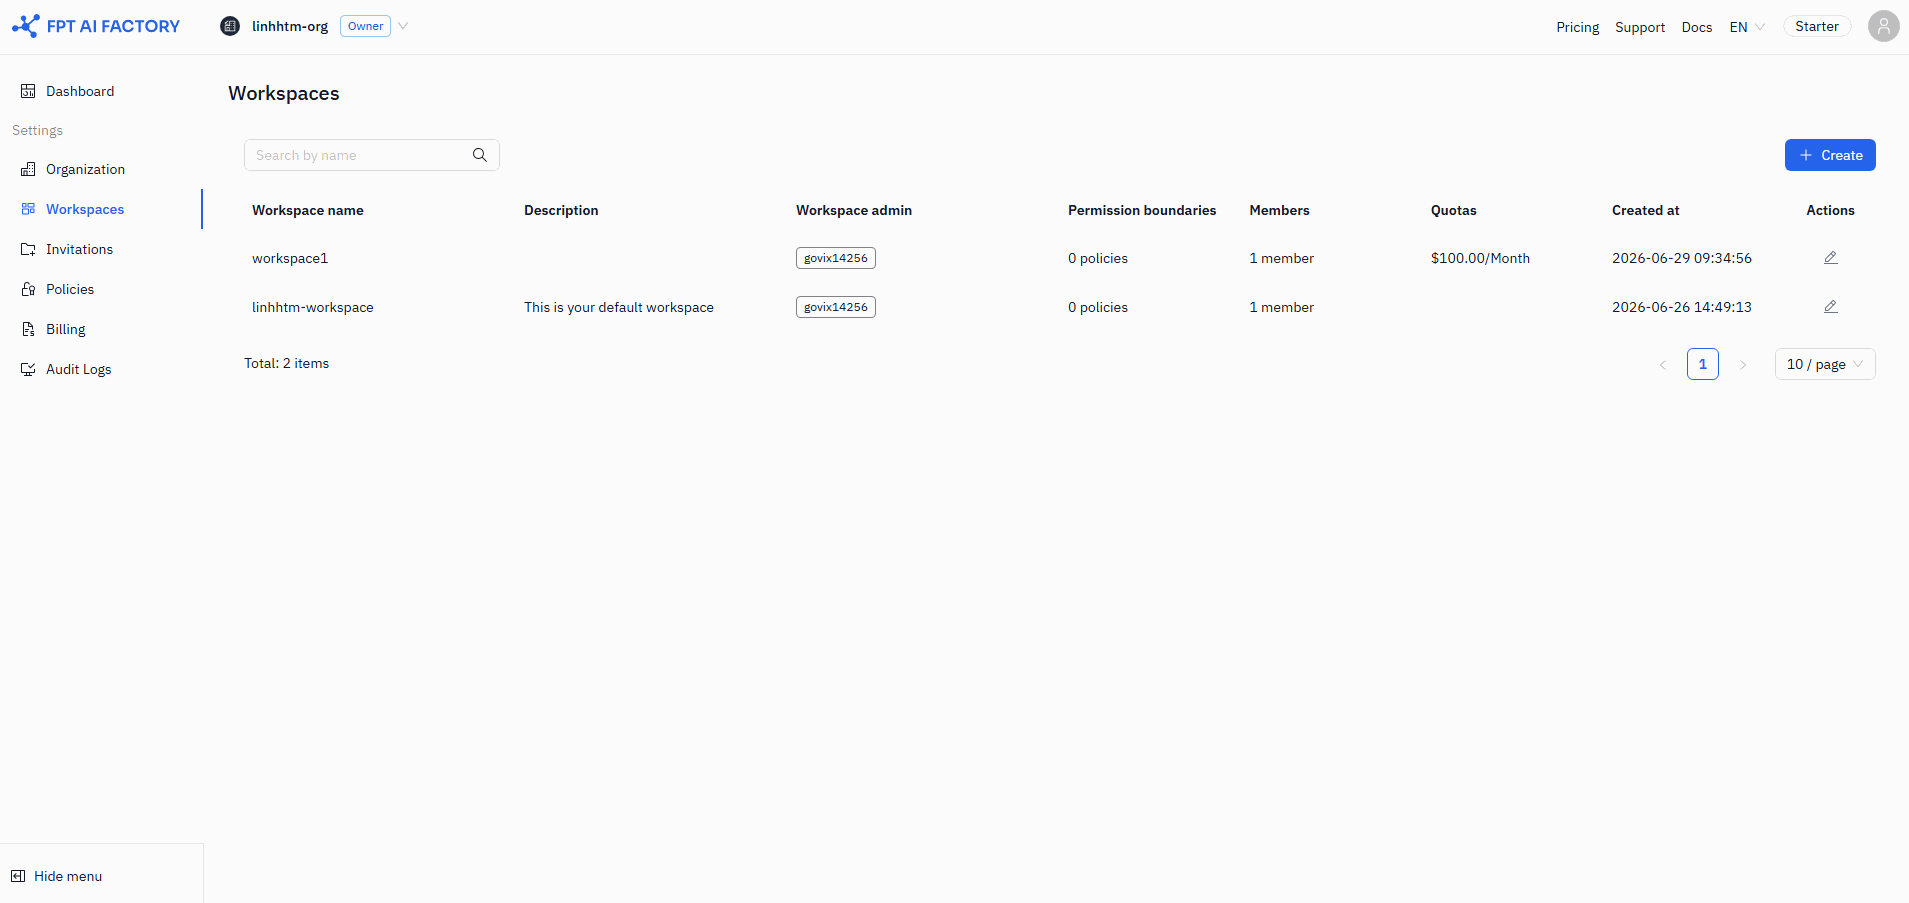
Workspace list
The list shows all Workspaces in your Organization with the following columns:
| Column | Description |
|---|---|
| Name | Workspace name |
| Description | Workspace description |
| Admin | Members with Workspace Admin role |
| Policies | Number of attached policies |
| Members | Total member count |
| Quota | Budget limit ($amount/day or $amount/month); — if no quota set |
| Created at | Creation date |
| Actions | Edit (pencil) and Delete (trash) icons |
Use the search box to filter by workspace name.
Create a workspace
Creating a workspace is a sequential flow — you save General info first, then the remaining sections unlock.
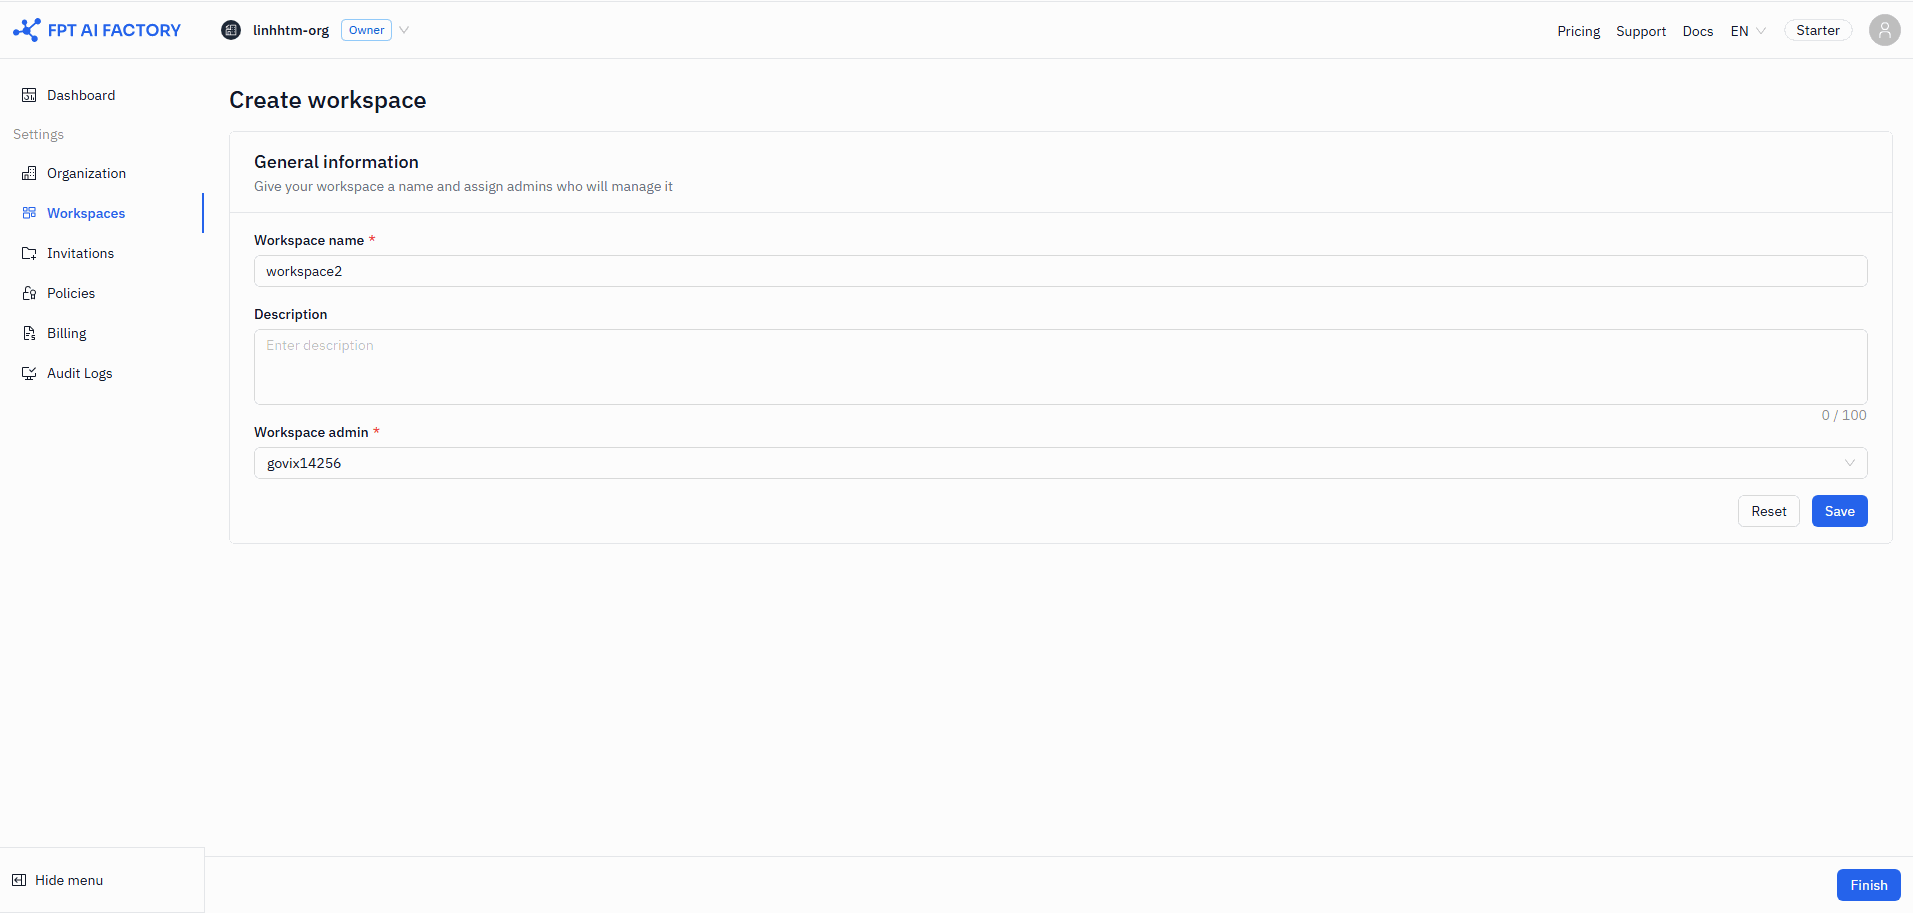
1. General info
Click + Create to open the create form.
| Field | Rules |
|---|---|
| Name | Required. 3–50 characters. Allowed: A–Z, a–z, 0–9, -, _. No spaces. Cannot start with a digit. |
| Description | Optional. Maximum 100 characters. |
| Admin | Required. At least one admin. The current logged-in user is pre-selected and cannot be removed. |
Click Save. Once saved, the Name, Description, and Admin fields lock and the remaining sections become available.
2. User list
After saving General info, you can invite members to the Workspace.
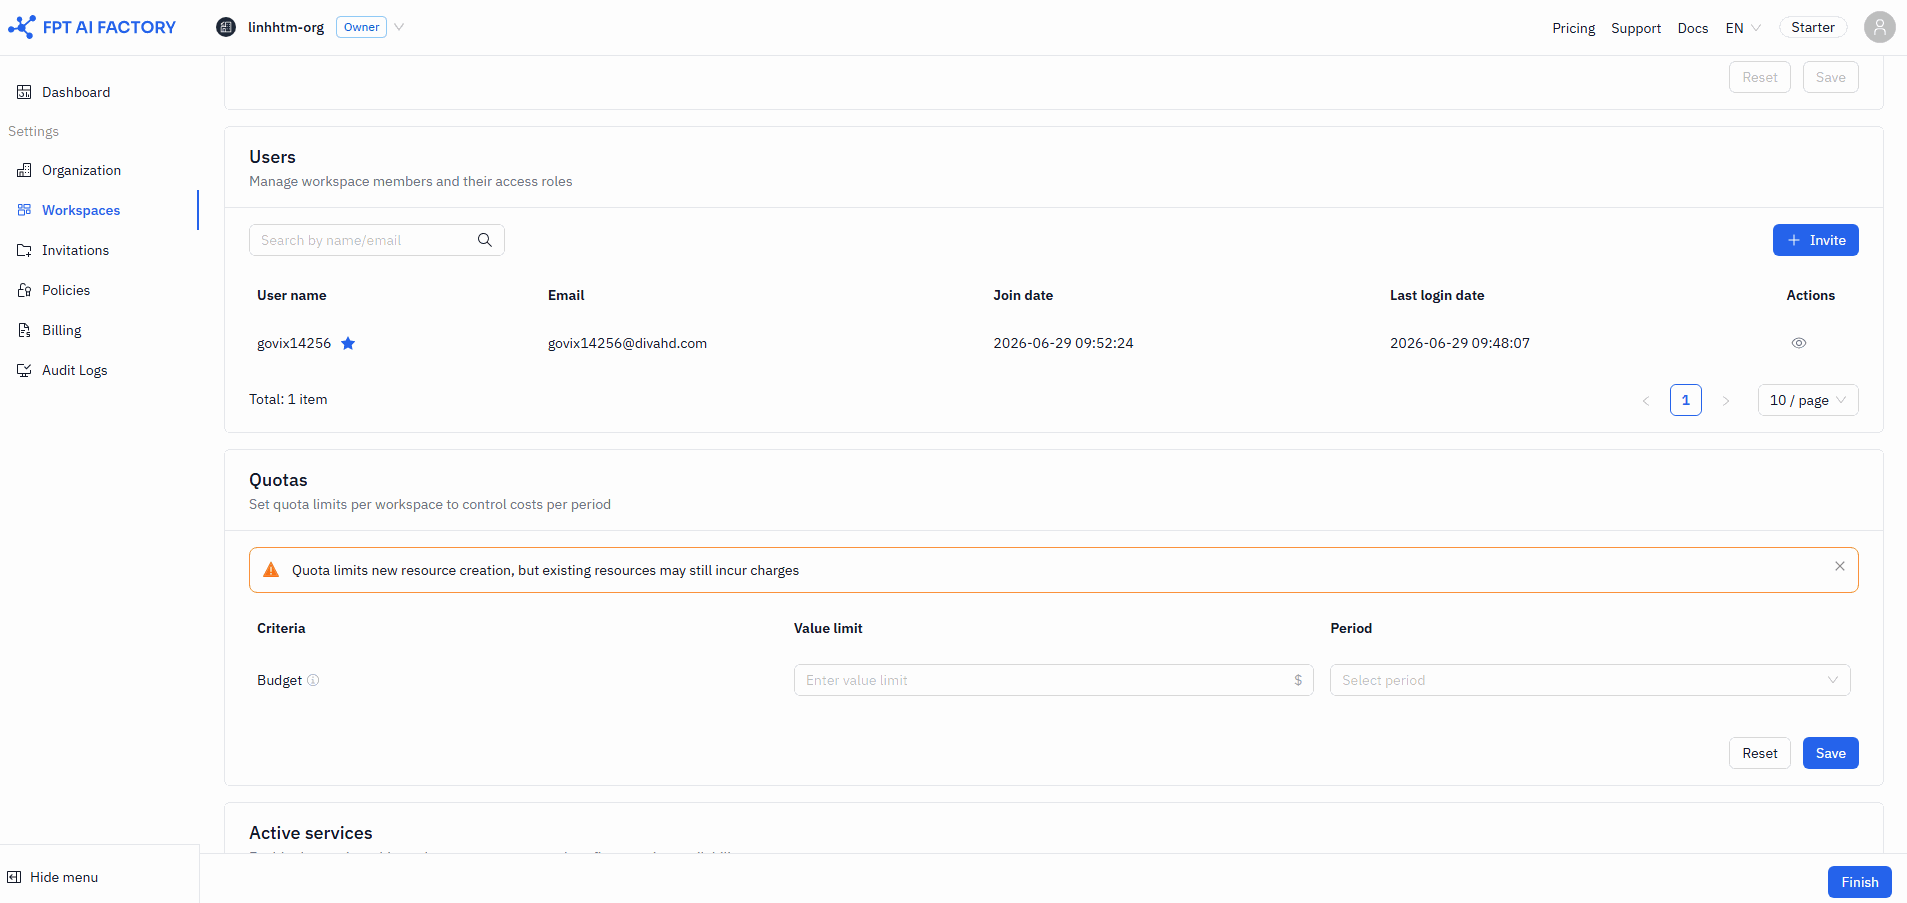
Click Invite to open the invite drawer and add users by email. Invited users show an INVITING status until they accept. You can cancel a pending invite at any time.
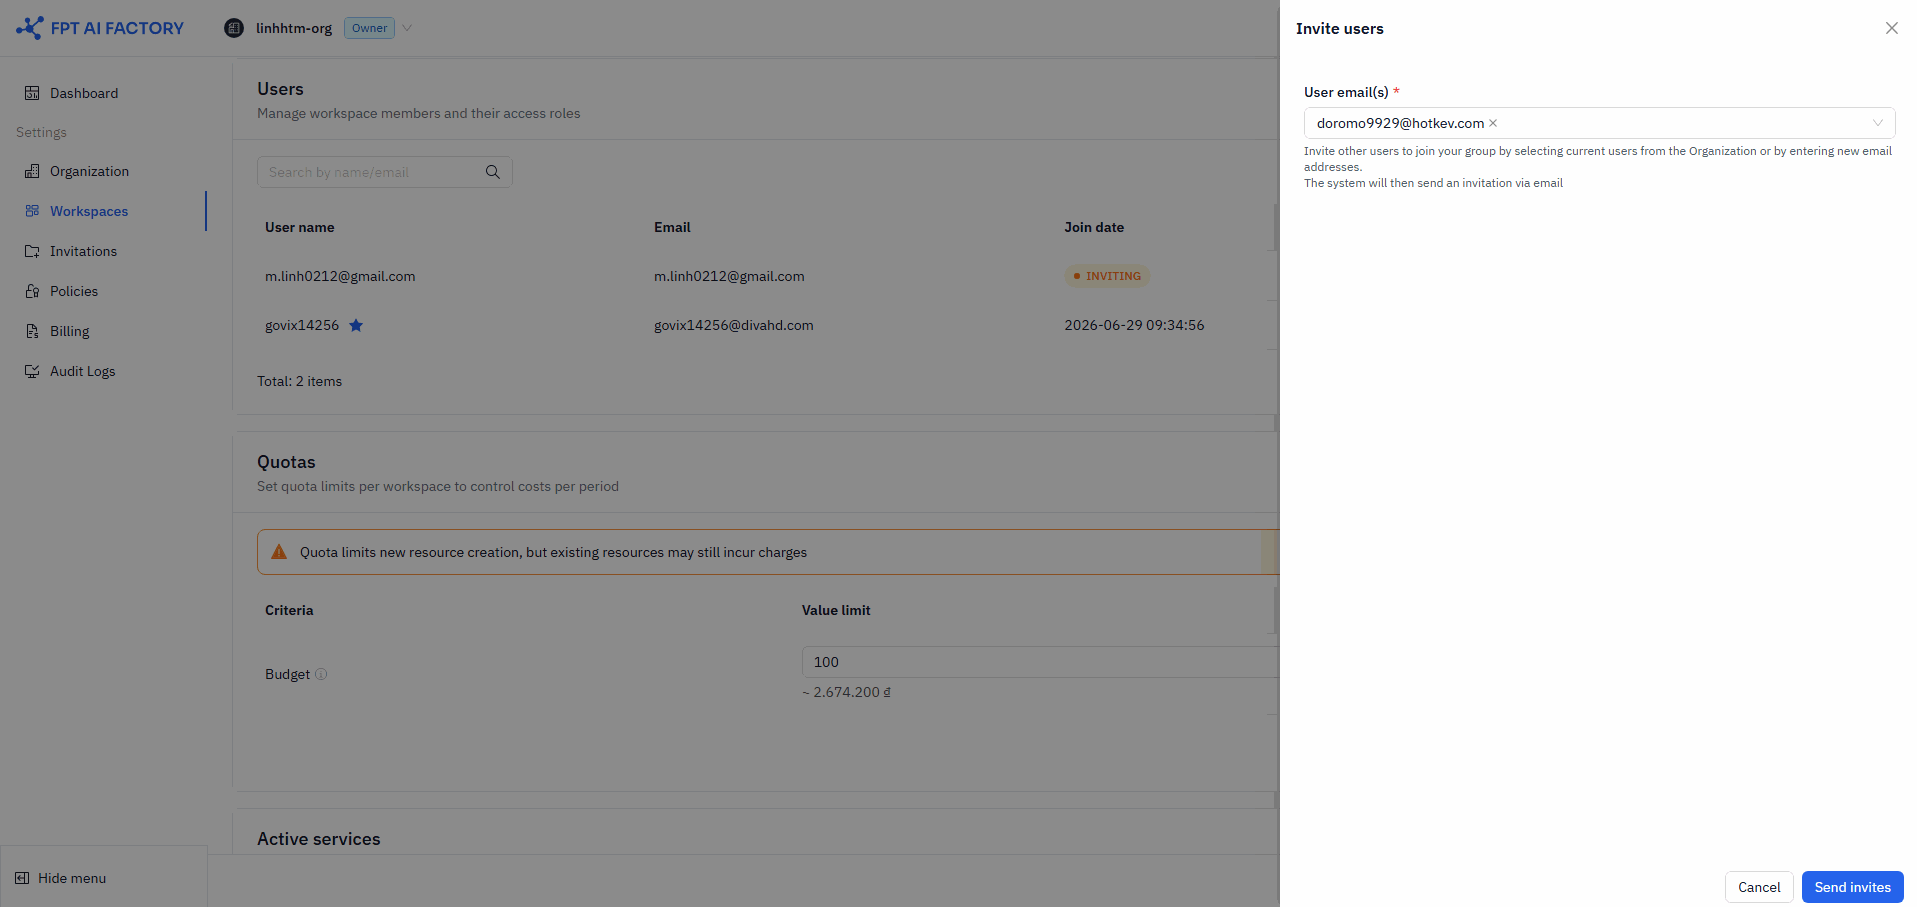
3. Quota
Set a credit spending limit for this Workspace. The value must not exceed the Organization quota.
Key fields:
- Value limit — Non-negative integer. Leave blank for unlimited.
- Period — Day or Month. Must be compatible with the Organization quota period.
For detailed information on quota hierarchy, period rules, and conflict resolution, see Quotas.
4. Active services
All services are enabled by default when a Workspace is created. Each service row shows the service name and available regions. Toggle a region on or off to enable or disable that service in that region. A service is considered active when at least one region is enabled.
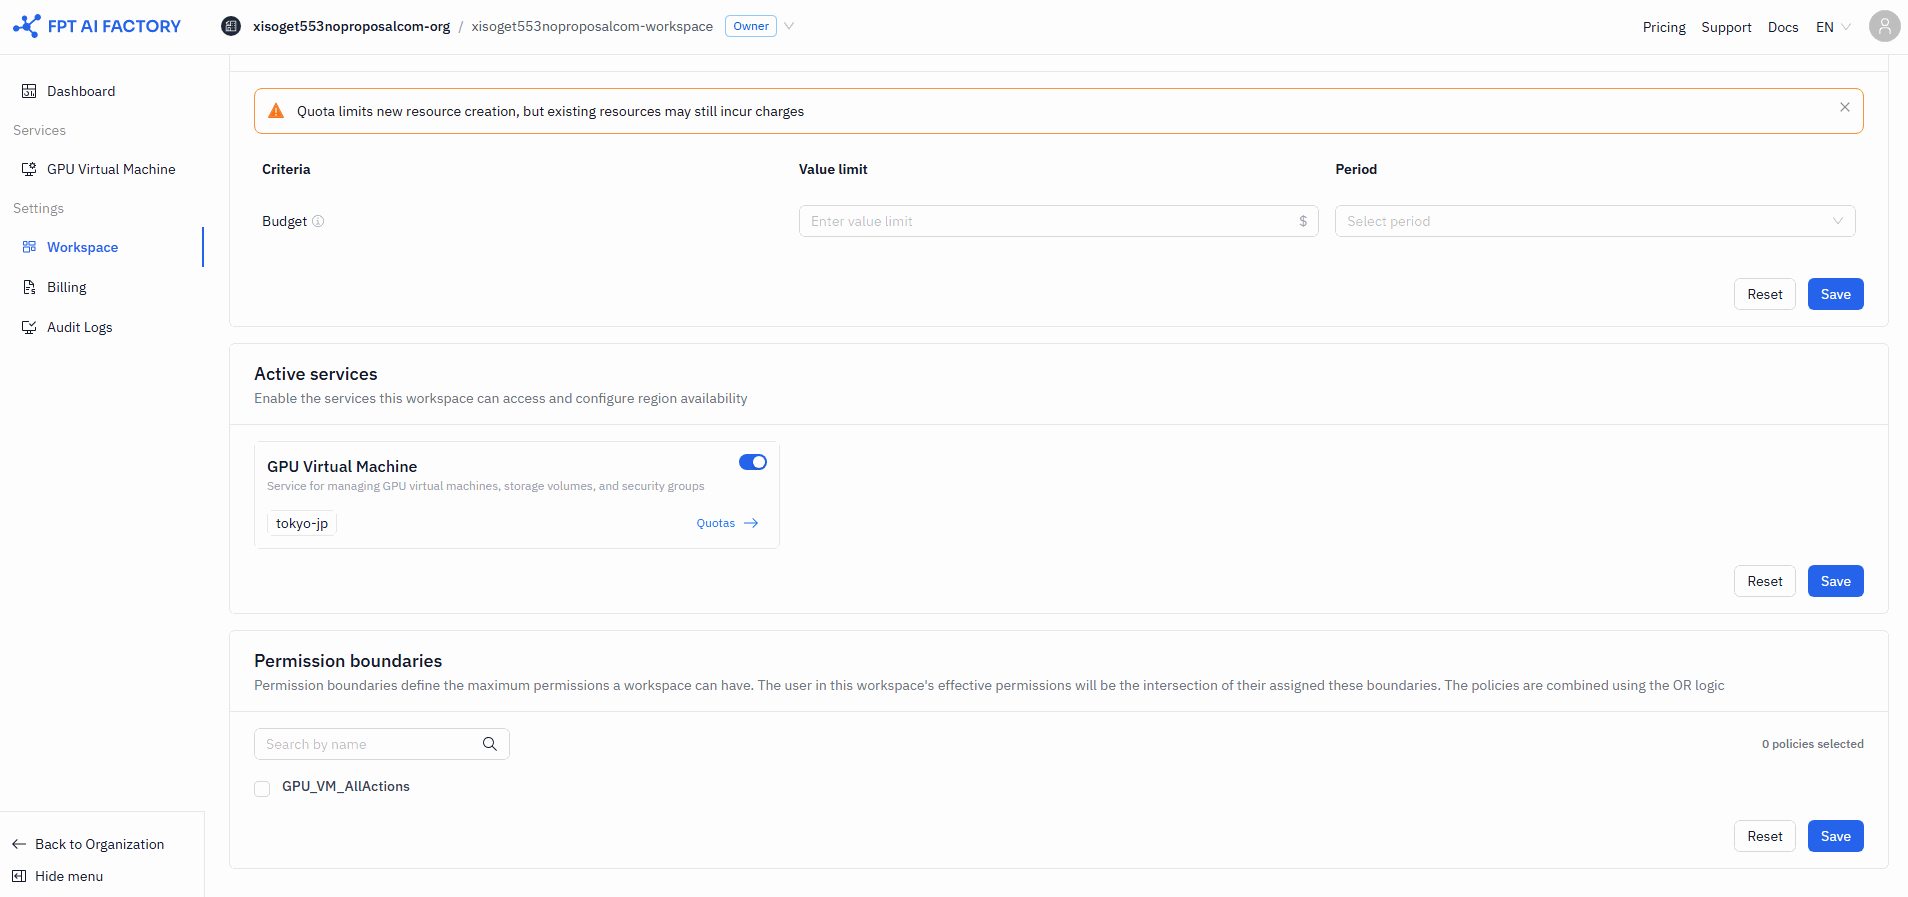
Click Save to apply, or Reset to revert.
Disabled services will not appear in the sidebar for any role.
Per-service quota
Each active service can have its own budget limit per region. Click Quotas → next to a service to open the service quota drawer (available only when at least one region is active).
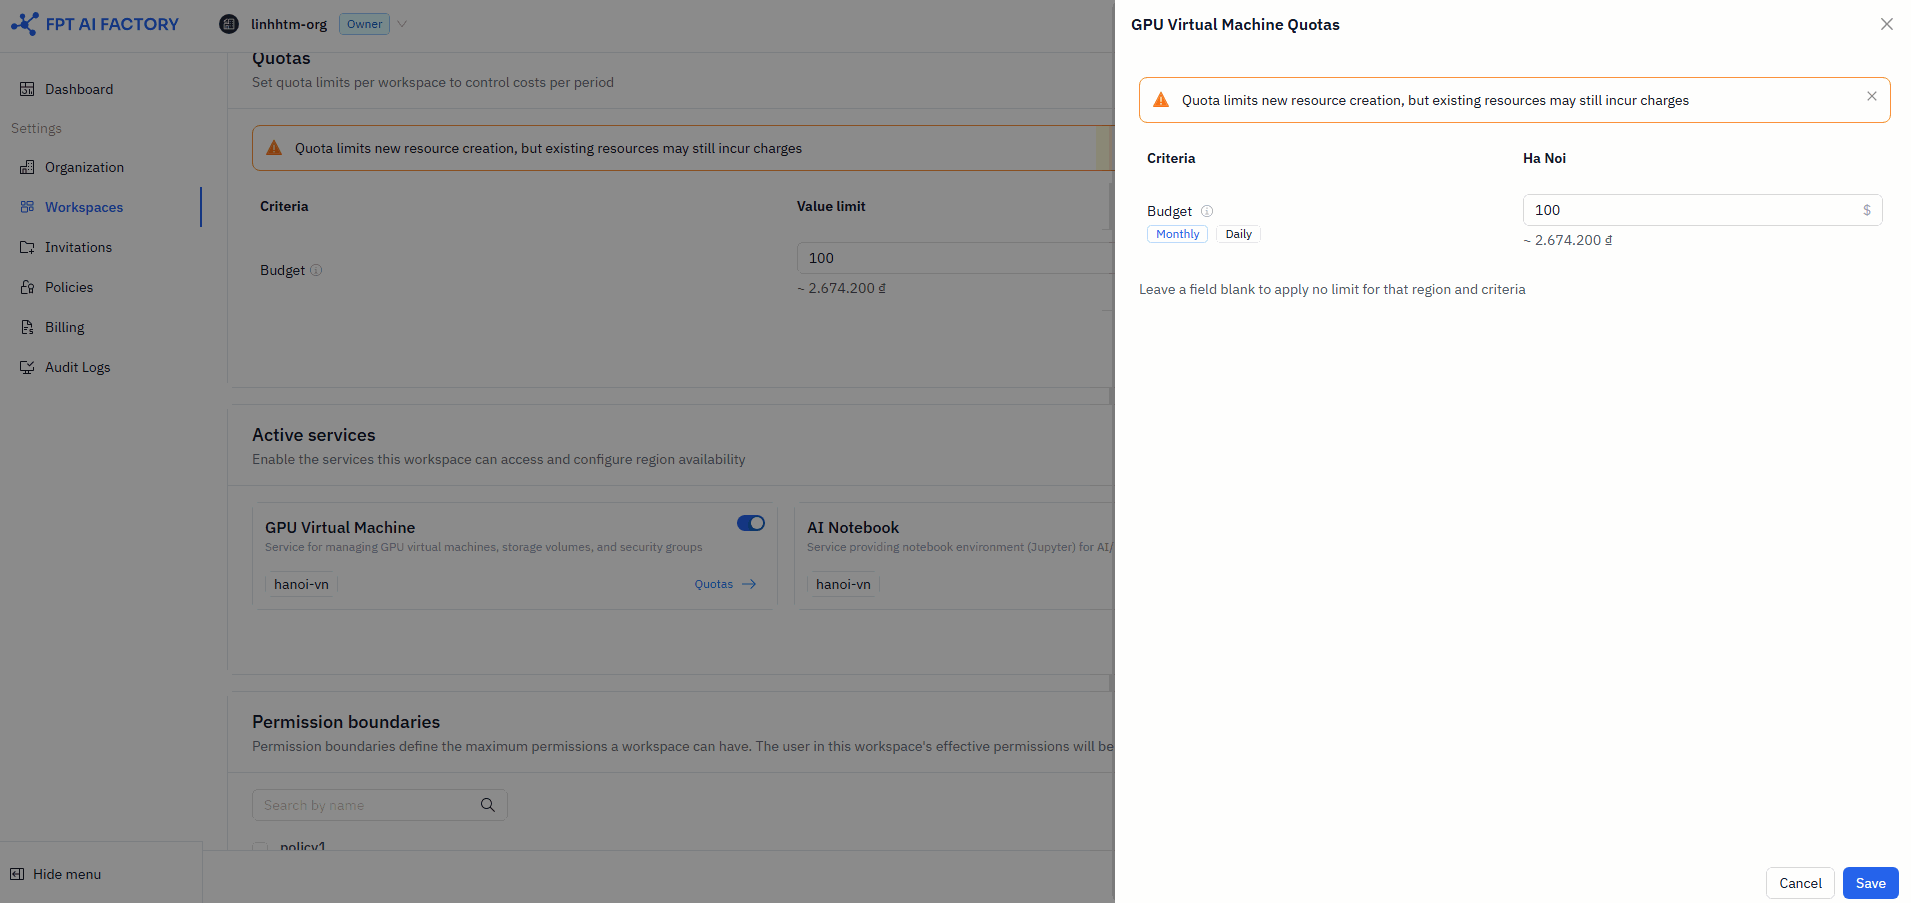
Service quotas must not exceed the Workspace quota.
5. Permission boundaries
Select which Policies apply to this Workspace. Policies define the maximum actions Members can take within the Workspace.
Click Save to apply, or Reset to revert. If no policies are selected, the Workspace has no explicit permission boundaries — Members can still use all enabled services, restricted only by their role.
See Policies for guidance on creating policies before assigning them here.
6. Finish
Click Finish to return to the Workspace list. The Finish button is disabled while any section is saving.
Edit a workspace
There are two ways to reach the edit form depending on your role:
- Organization Owner — click the Edit (pencil) icon on a workspace row in Settings → Workspaces.
- Workspace Admin — click Settings in the Workspace sidebar, then select Workspace.
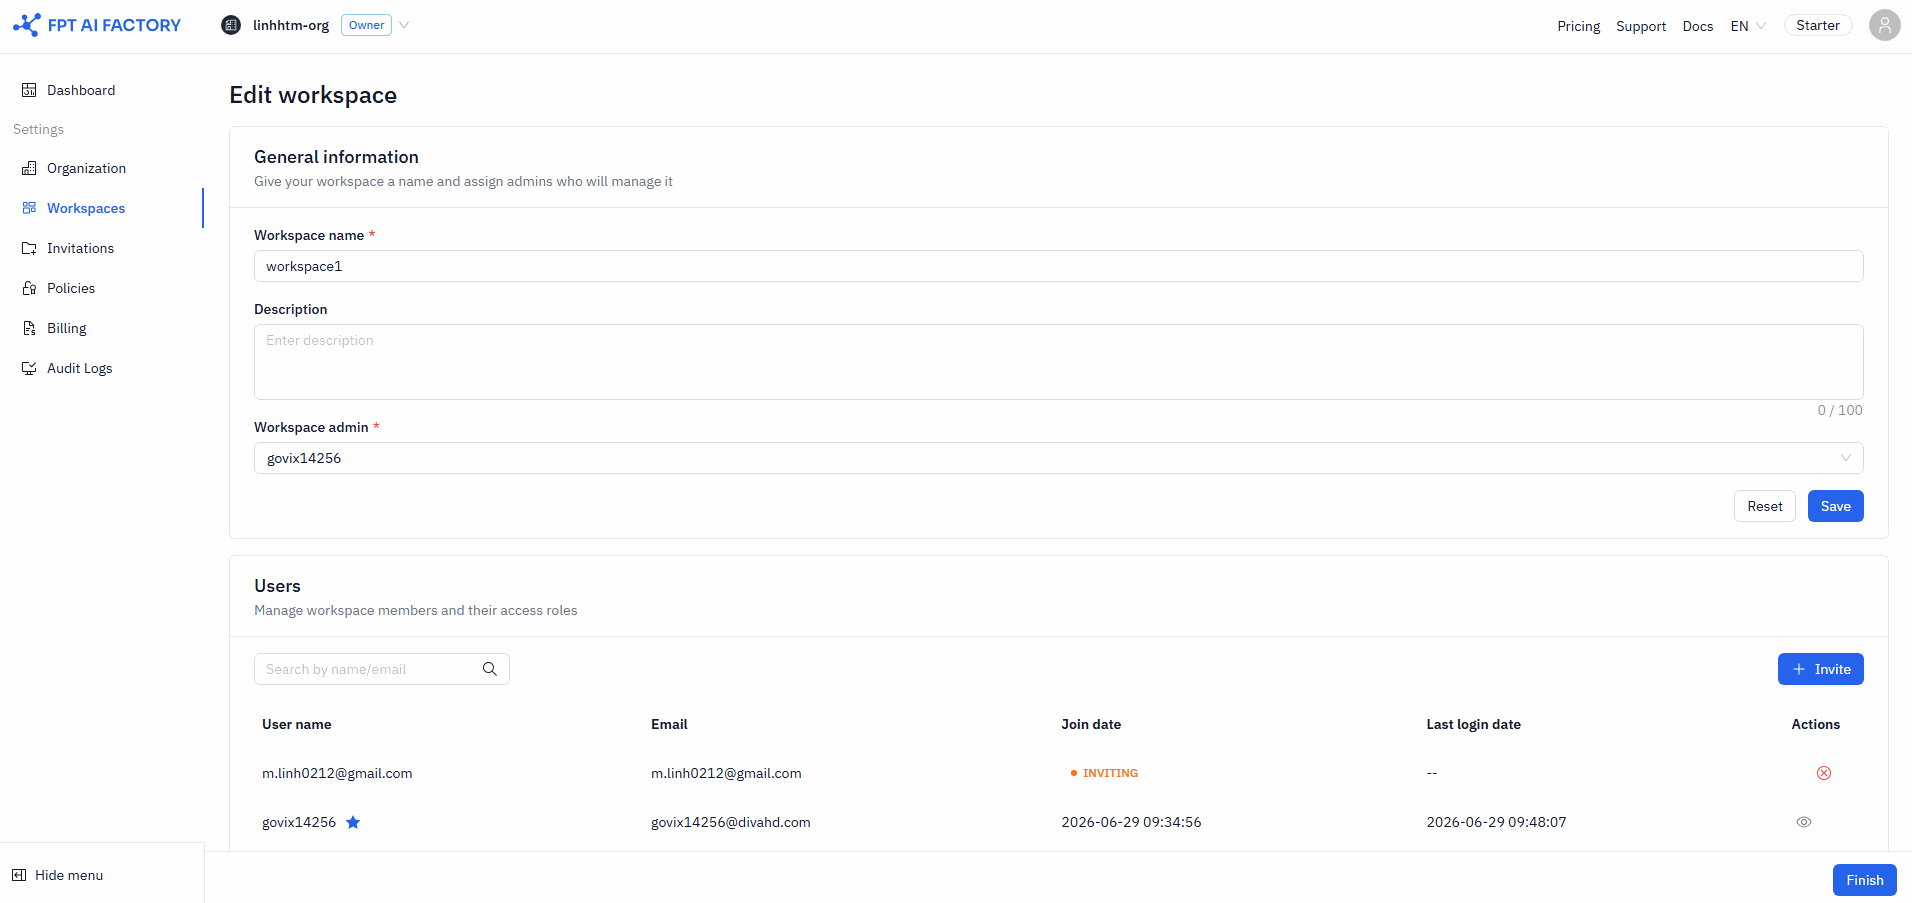
All sections are visible and pre-populated with current data. Each section saves independently — click Save within each section to apply changes, then click Finish when done.
When disabling a service (removing all regions):
- New resource creation is blocked for that service in this Workspace.
- Existing resources remain accessible and billing history is preserved.
- Re-enabling the service grants fresh access; previously deleted resources are not restored.
What's next
- Organization — set the Organization-level quota that constrains all Workspaces.
- Quotas — how quota hierarchy, period rules, and conflict warnings work.
- Policies — create policies before assigning them to Workspaces.
- Topping up your Wallet — add credits when a Workspace hits its Quota.